Fast2SMS for Shopify Integration
About
Fast2SMS for Shopify is an integration that enables businesses to send SMS notifications to customers directly from their Shopify store. It helps store owners send order updates, promotional messages, and important alerts through Fast2SMS, ensuring quick and reliable communication with customers.
Pre-requisites for app installation
-
Must be a Shopify user.
-
Should have a Fast2SMS account.
-
Should have Fast2SMS Mobile number.
-
Should have approved templates to initiate the conversation.
Features
-
Send a single message to Shopify customers.
-
Send bulk messages to Shopify customers.
-
Create and manage templates.
-
View the history of Fast2SMS messages.
-
Send automated messages through workflows.
Application Installation
Step 1: Go to the Shopify marketplace and install “Fast2SMS for Shopify” to initiate the installation process.
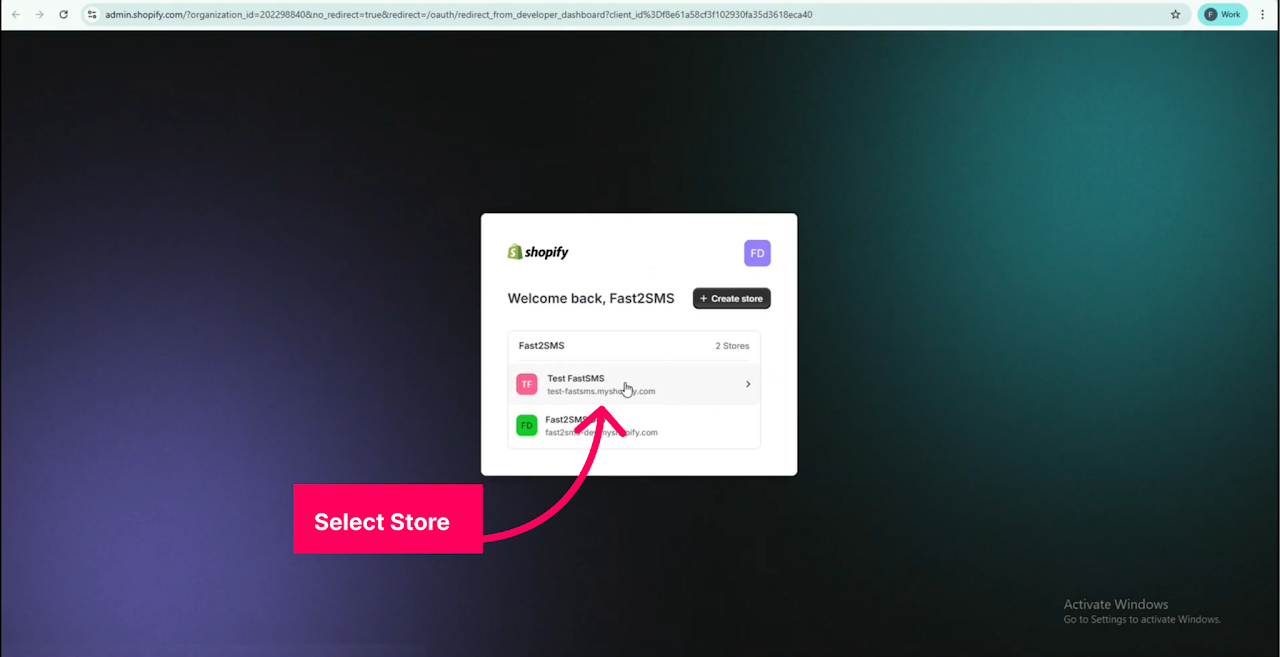
Step 2: Select your store from the list of available stores to continue.
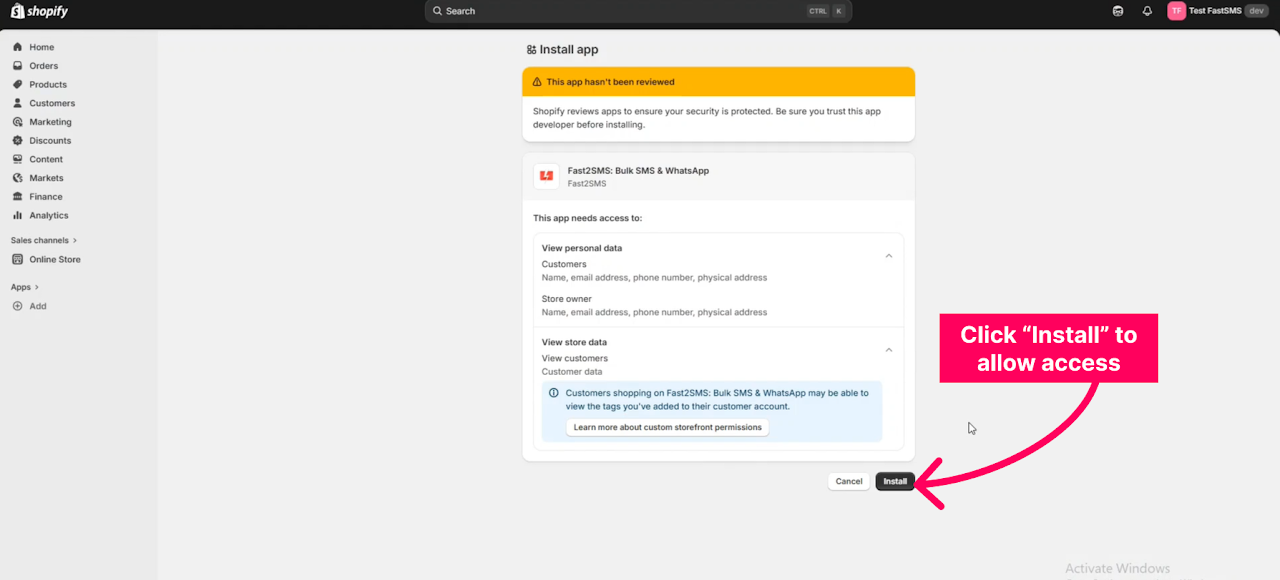
Step 3: Click the “Install” button to grant the required permissions and allow the Fast2SMS: Bulk SMS & WhatsApp app to access your store data.
Authorization
Step 1: Sign in to Fast2SMS using either the “Sign in with email” option or else you can use the “Sign in with Google” option.

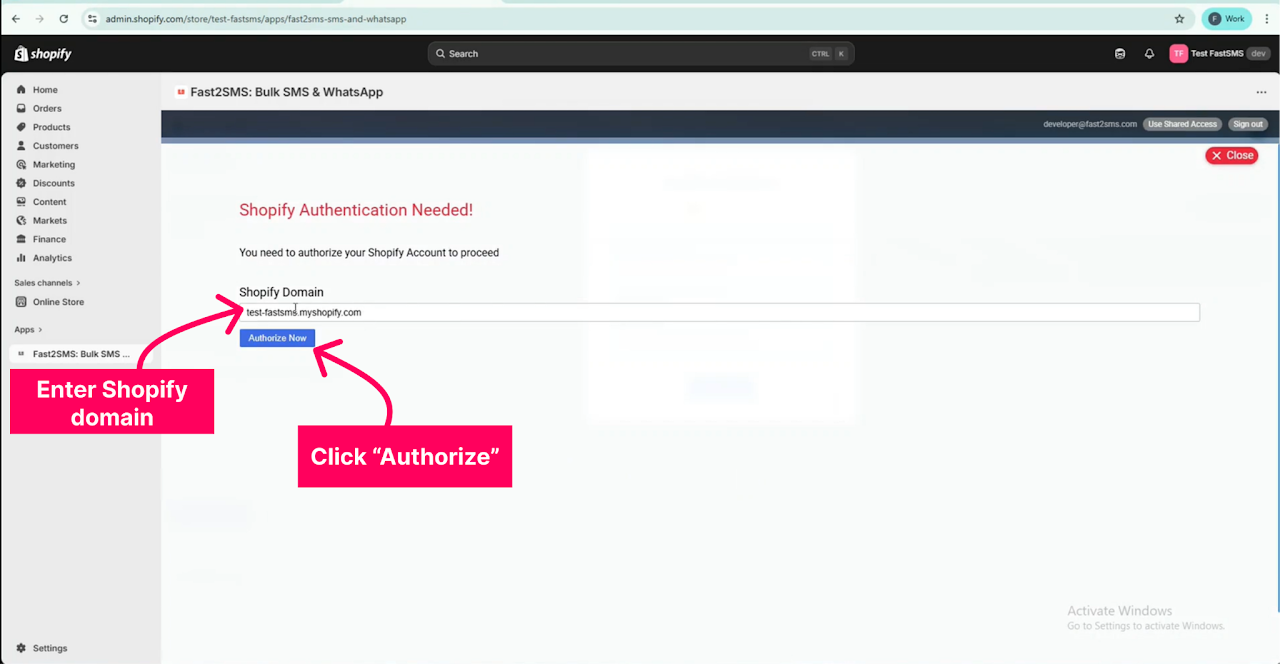
Step 2: Authorize Shopify by entering your Shopify domain and clicking the “Authorize Now” option.
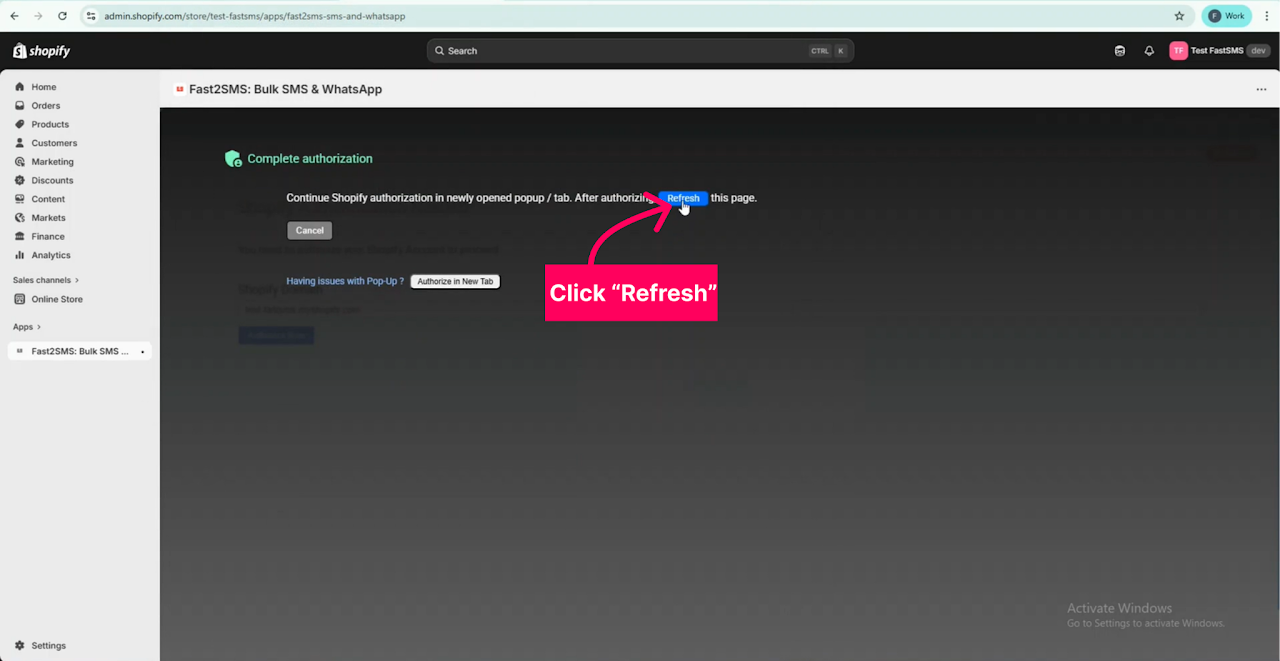
Step 3: Click the “Refresh” option to continue.
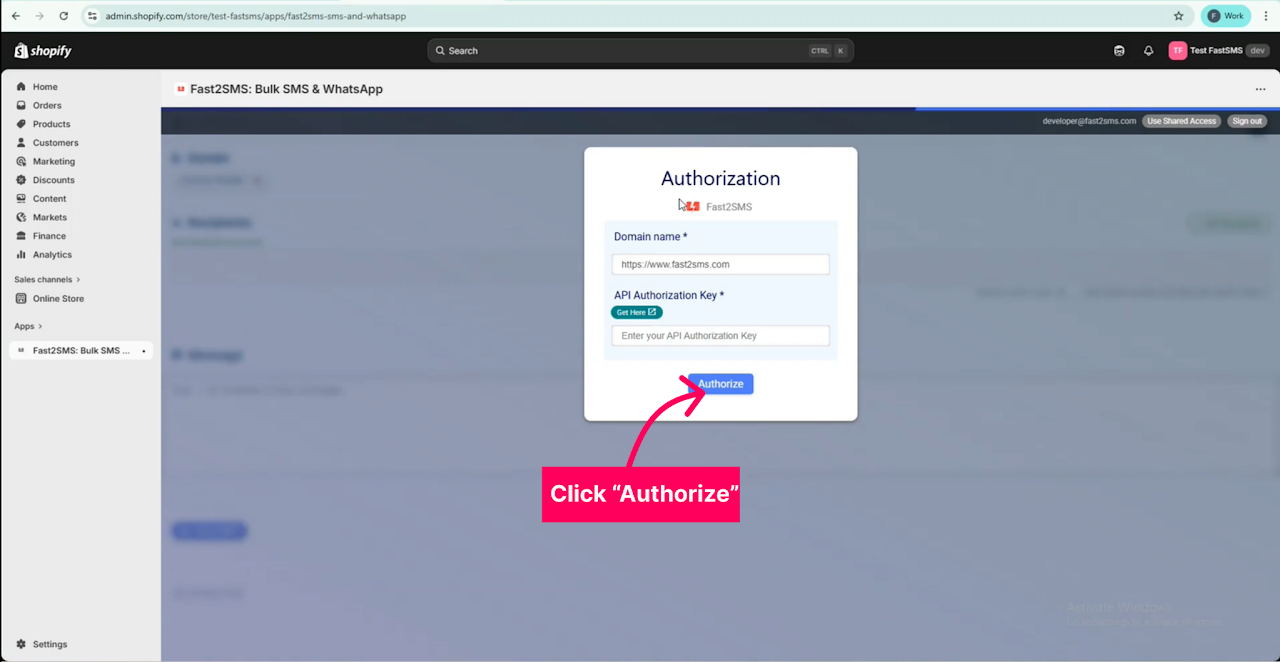
Step 4: Authorize Fast2SMS by entering the domain name and API key, then click the “Authorize Now” option.
Application Working
Sending Fast2SMS Messages from Shopify to customers
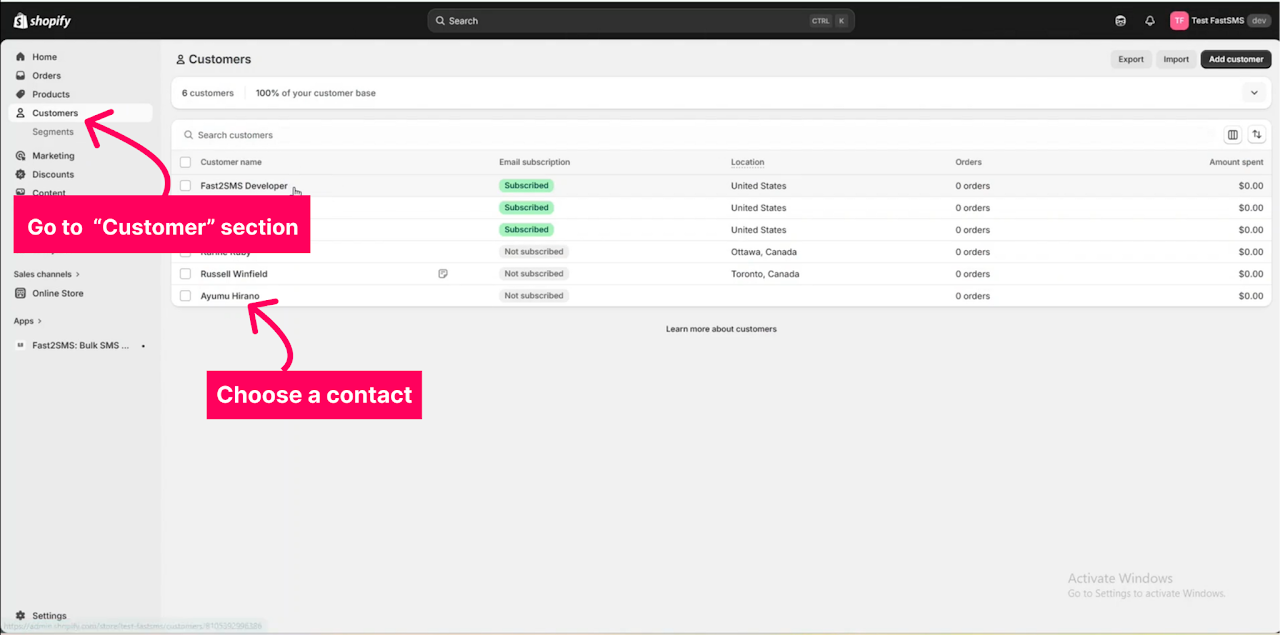
Step 1: Go to the “Customers” section and open any of the customers to whom you want to send the message.

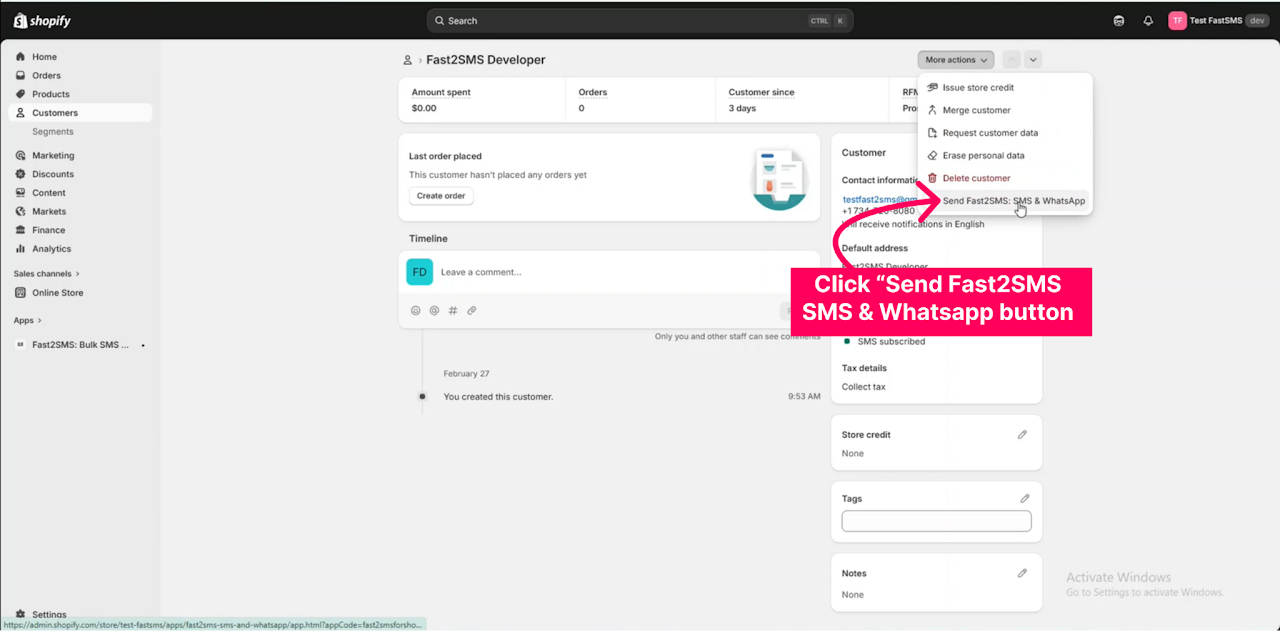
Step 2: Click the “More Actions” button and select the “Send Fast2SMS SMS & WhatsApp Message” option.

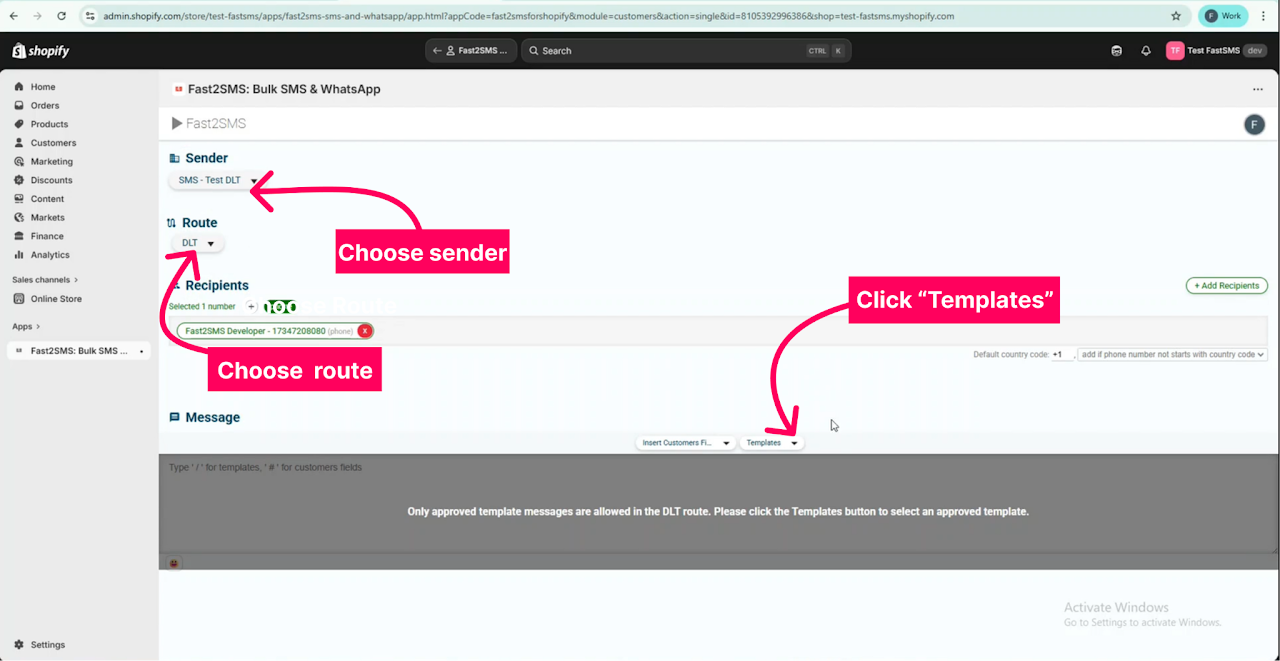
Step 3:
-
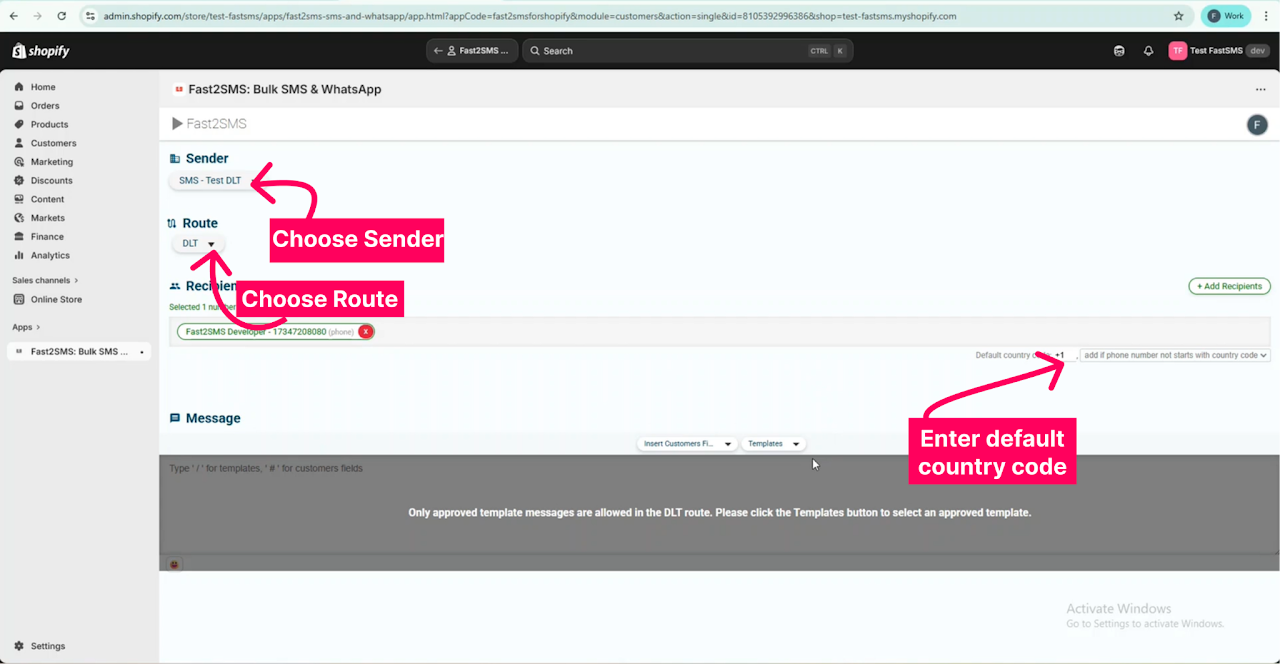
Select your Sender ID and the Route.
-
The values in your both phone field and mobile field will be automatically fetched in the Pop-up. You can select the option to which number you wish to send messages by clicking on the respective phone number field.
-
Enter your default country code value. Which will be used for sending messages to numbers that don’t have any country code in them.
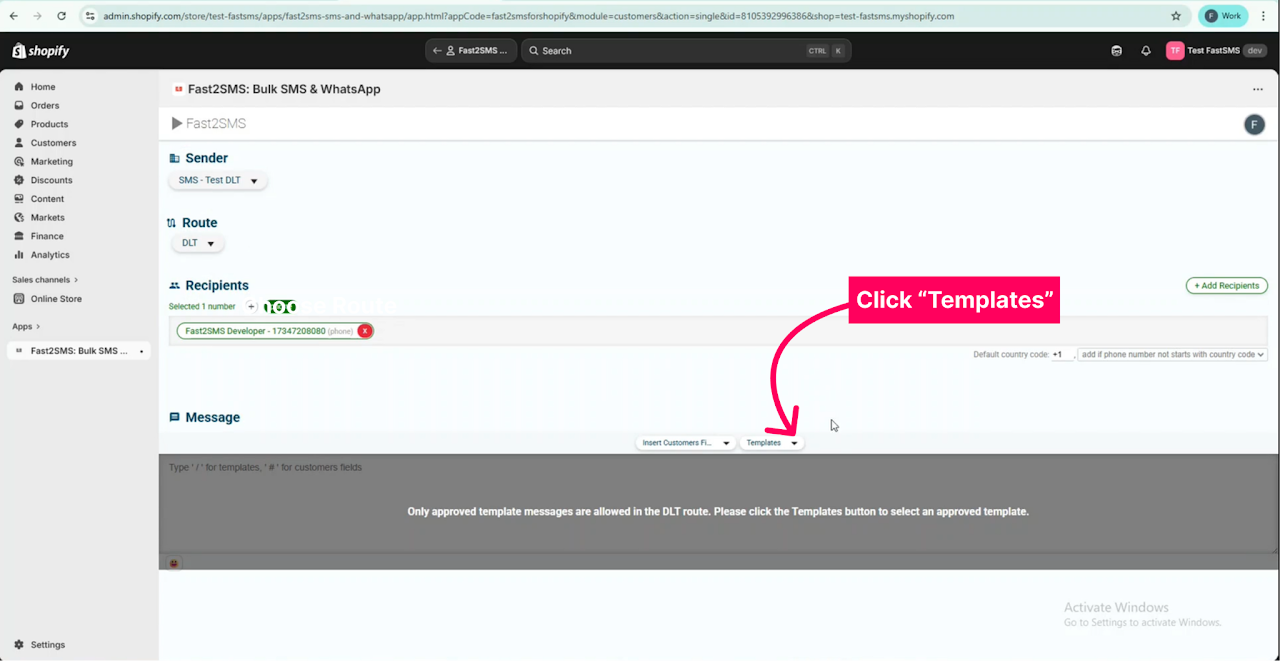
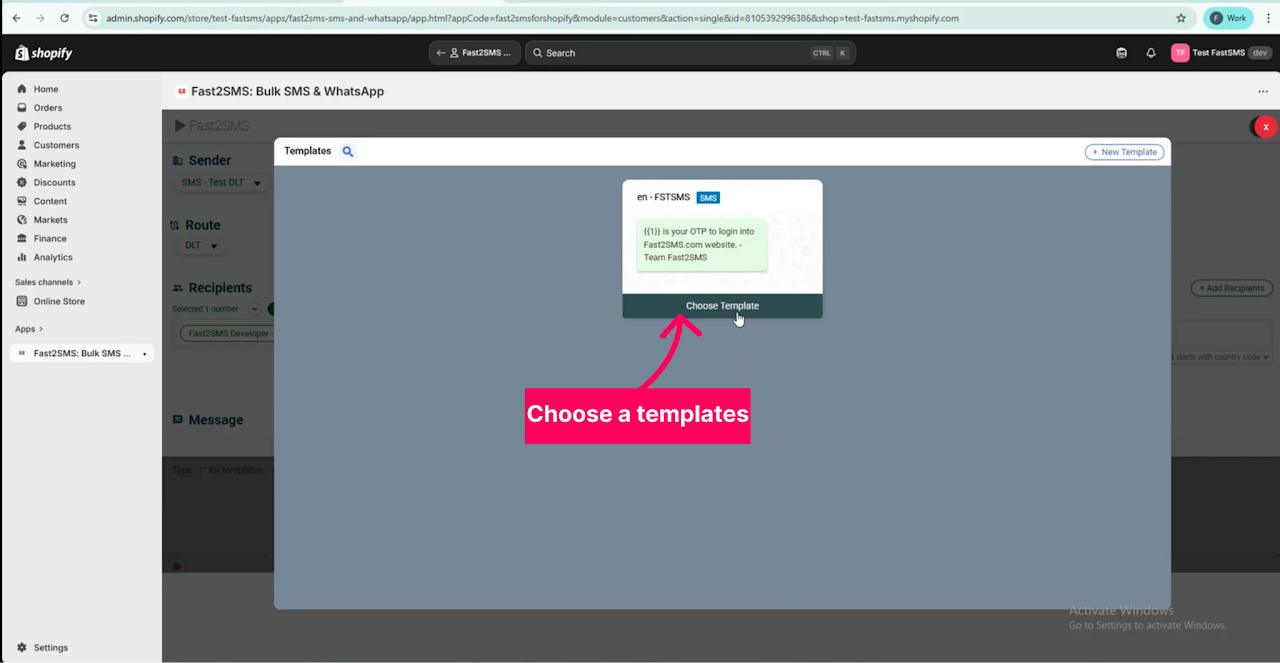
Step 4: Click on the “Templates” option to view the list of approved templates. Please note that only approved template messages are allowed in the DLT route.
Step 5: Choose your preferred template from the list by clicking the “Choose Template” option.
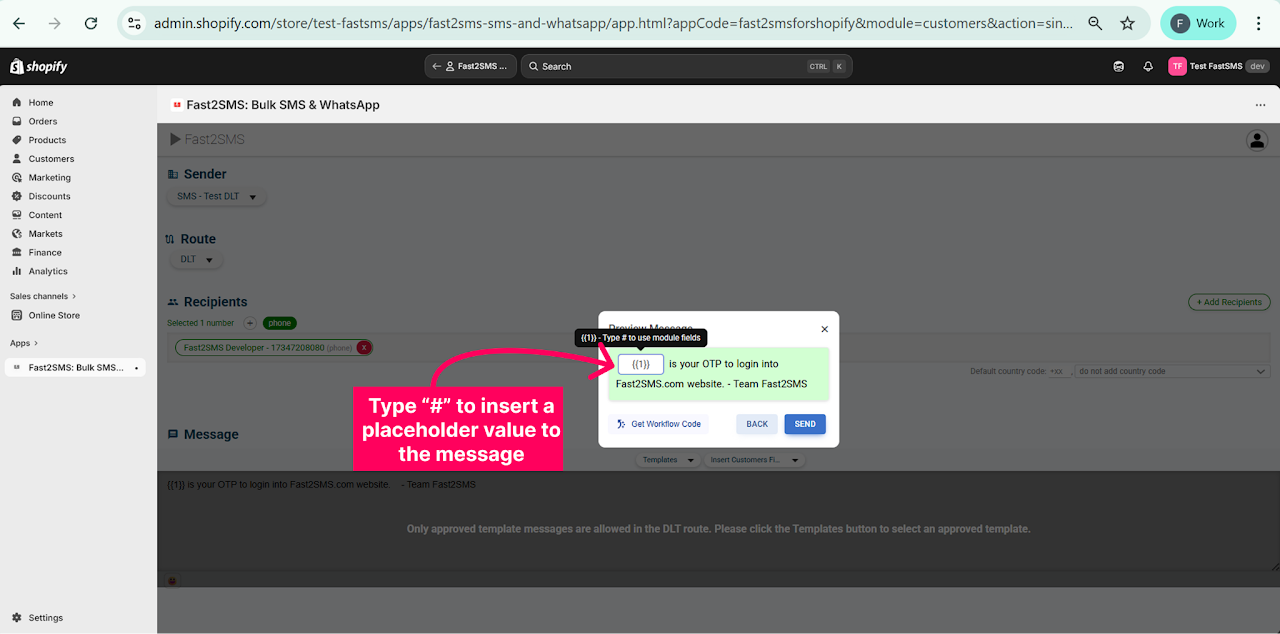
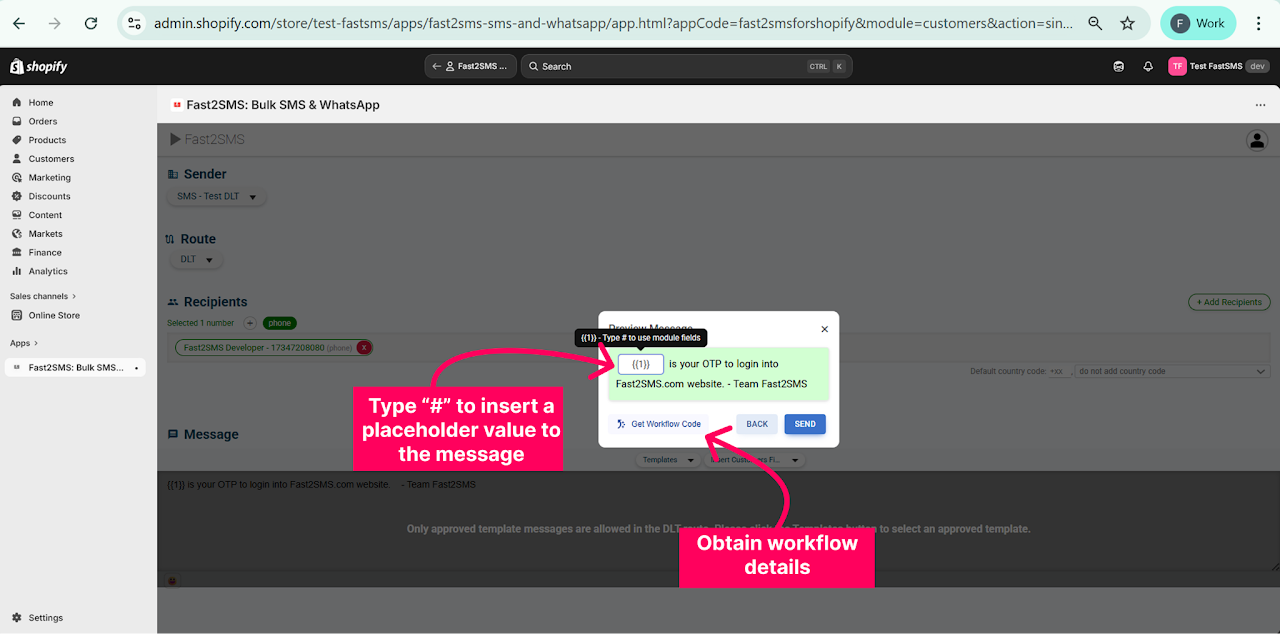
Step 6: The preview of the chosen template will be shown. Click “#” to add a placeholder value to the message template to send personalized messages.
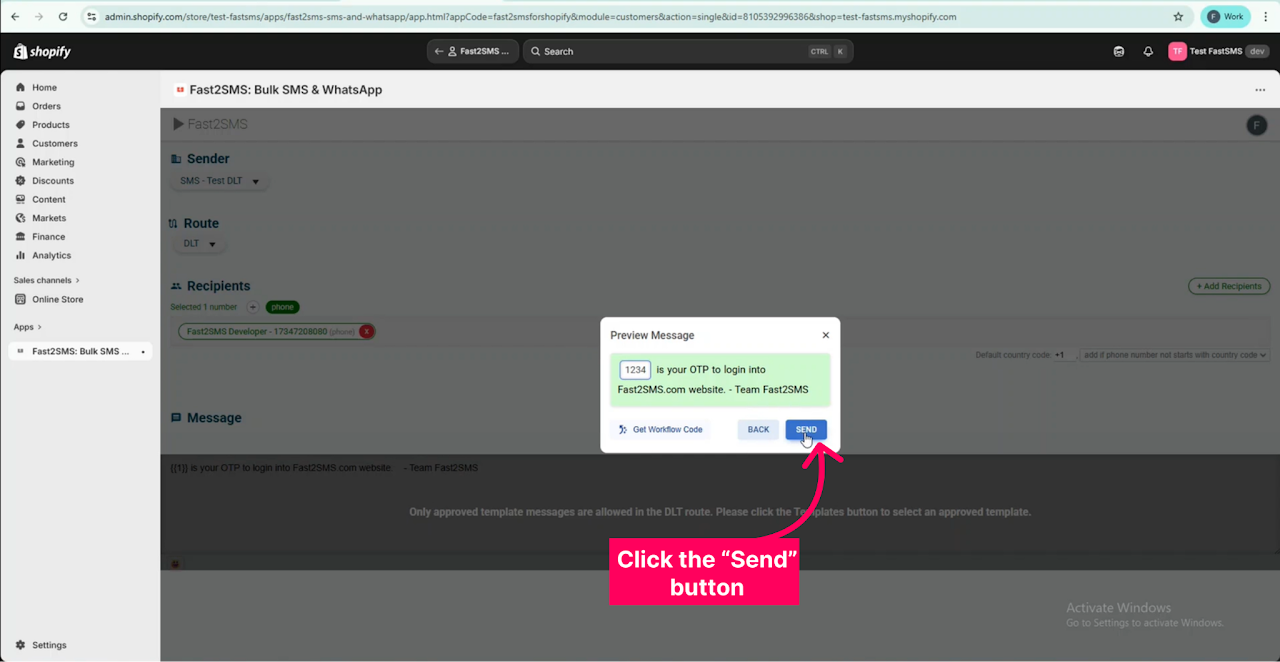
Step 7: Click the “Send” button to send the message.
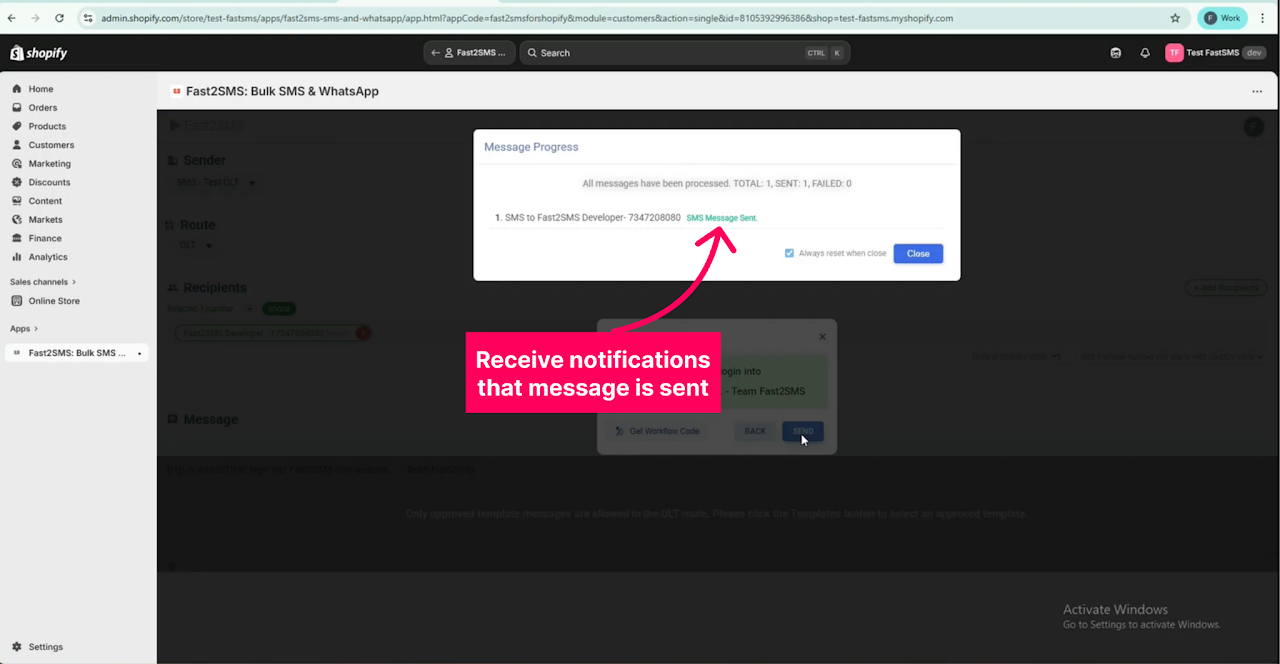
Step 8: A pop up appears to notify that the messages are sent.
Automation
Workflow codes
-
Go to any Shopify Customer.
-
Open any customer.
Access the Fast2SMS application.
-
Select the Sender and the route to send the automated message from.
-
Select the template message or enter the message to be sent by the automation.
-
Choose the template and fill in the placeholders
-
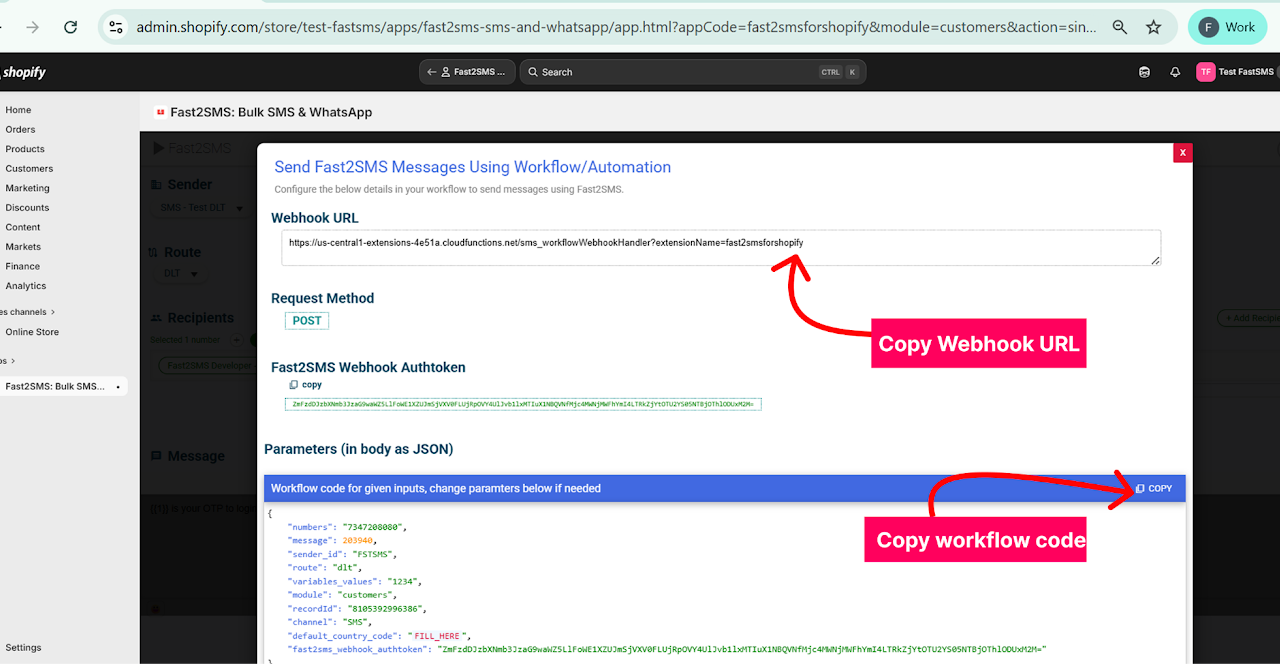
Click on ‘Get Workflow code’.
-
Here you can access the Webhook URL and Workflow code required.
Workflow Setup
-
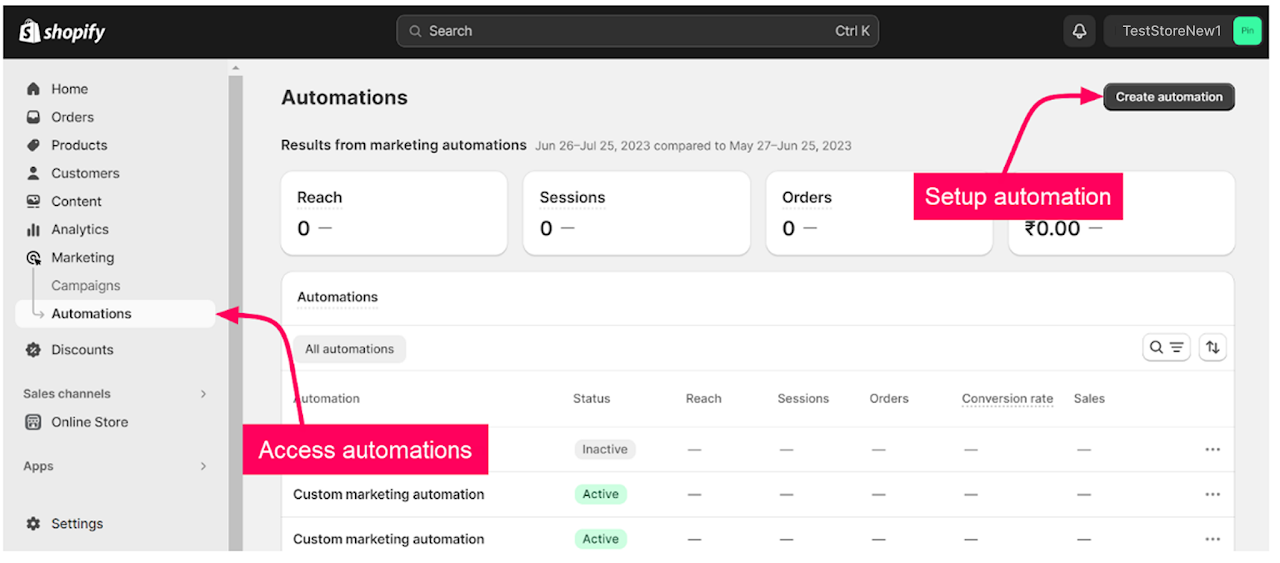
Click on Marketing at the panel on the left.
-
Select ‘Automations’.
-
Click on ‘Create Automation’.
-
Select the automation template or create a custom automation.
-
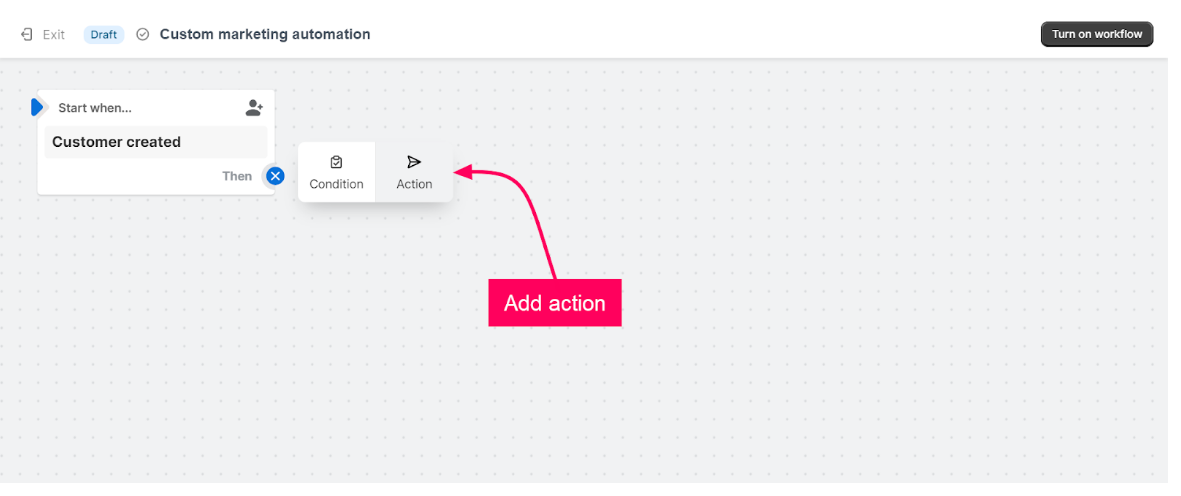
Select the trigger conditions for the automation.

-
Click on the “+” symbol to add the action.
-
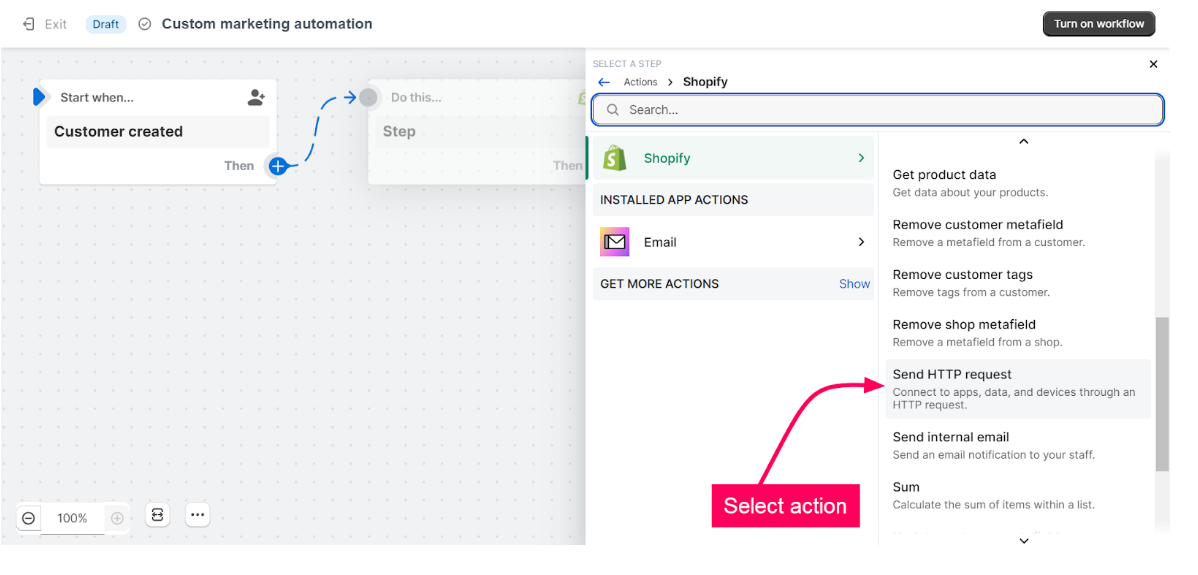
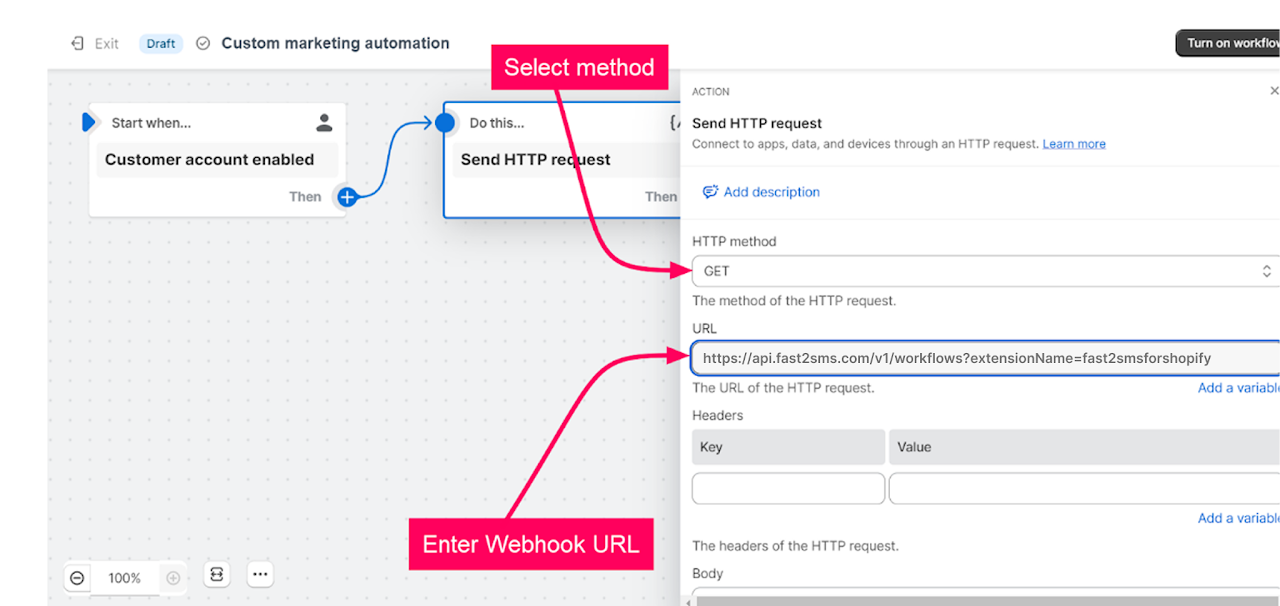
Select the action “Send HTTP request.”
-
Select the “HTTP” method as “Get.”
-
Copy the Webhook URL from the workflow code and enter it under URL.
-
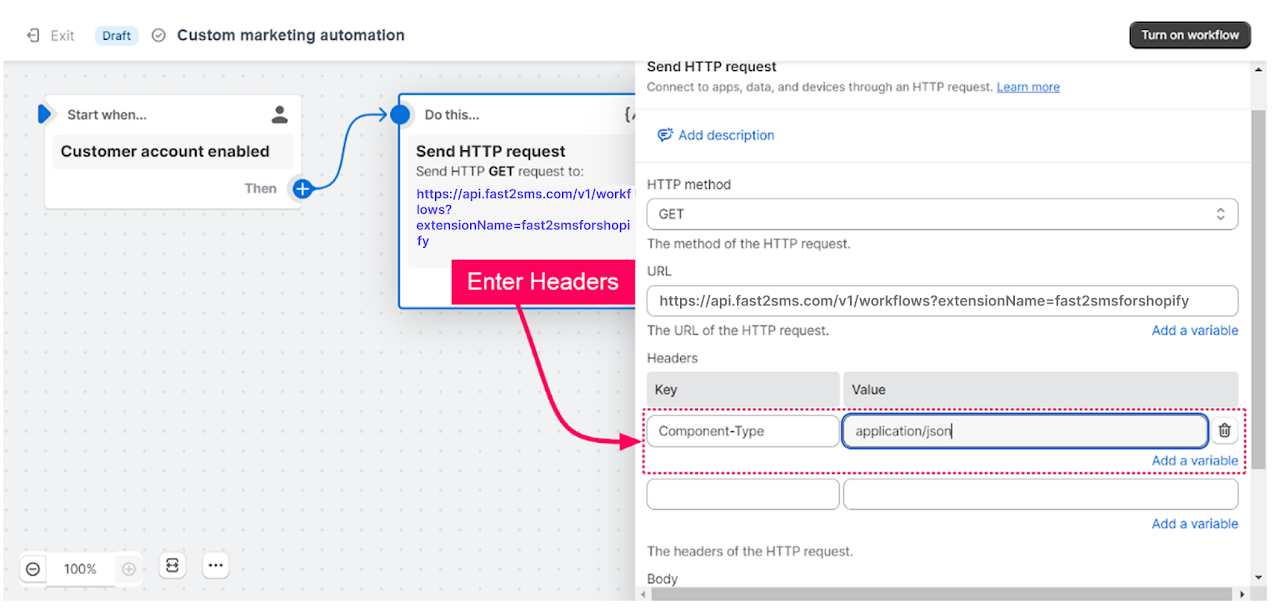
Under the Headers enter the below key and value
Key: Content type Value: application/jason
-
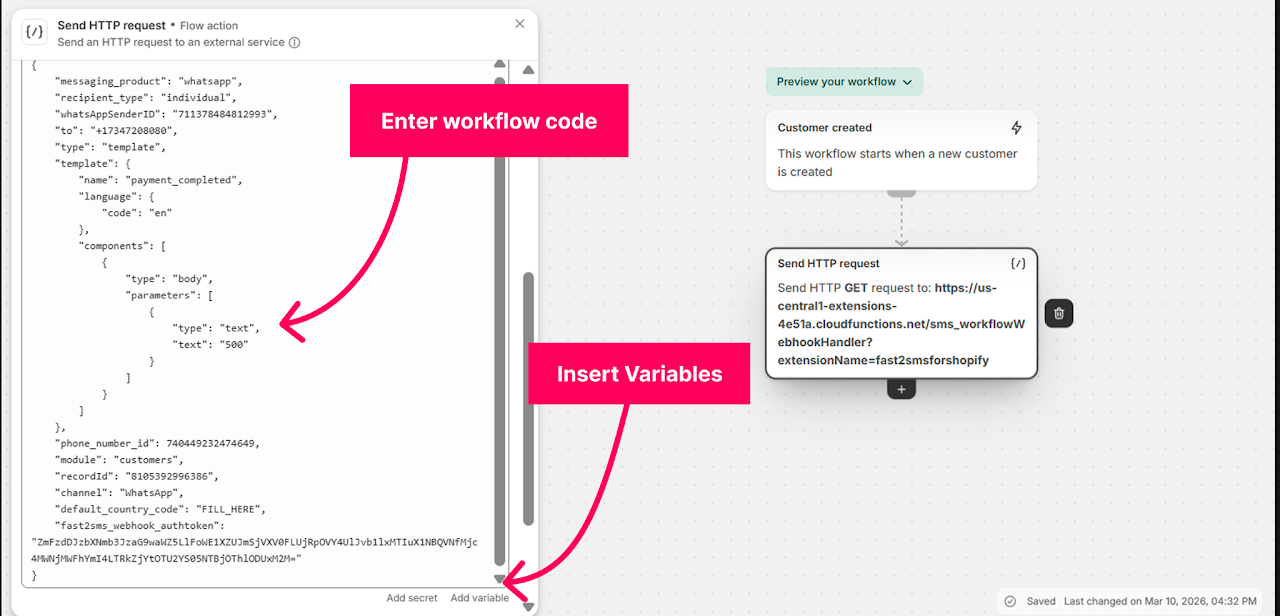
Copy the workflow code and paste it under Body.
-
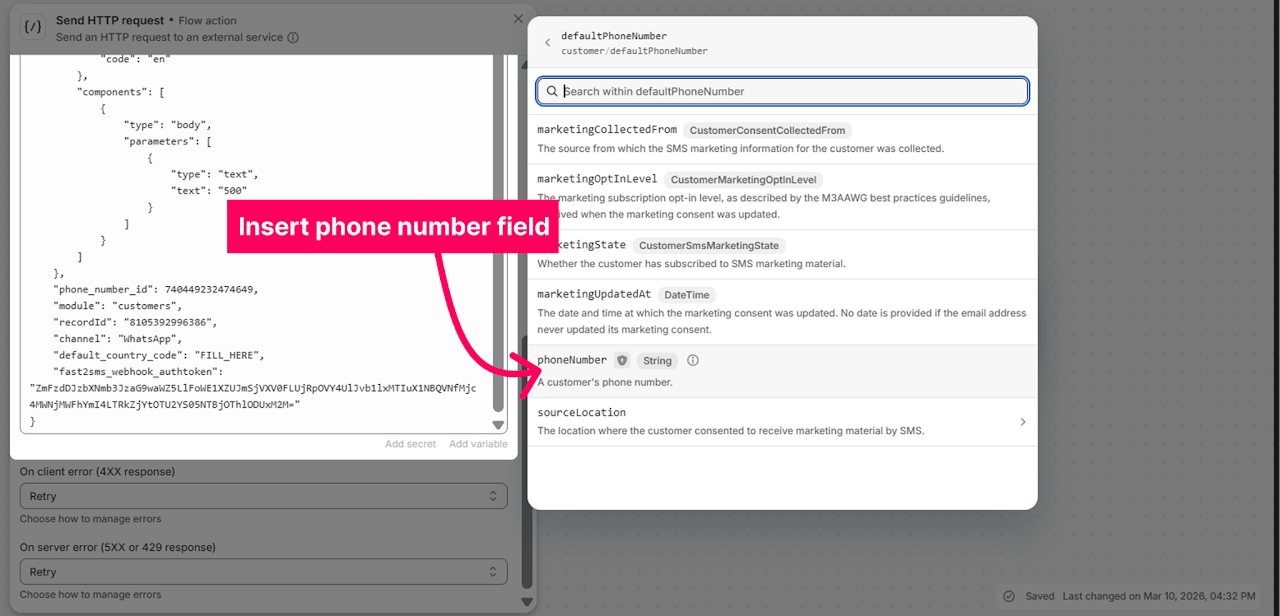
Erase the value of the “number”/ “to” parameter and insert the field containing the phone field of the customer.
-
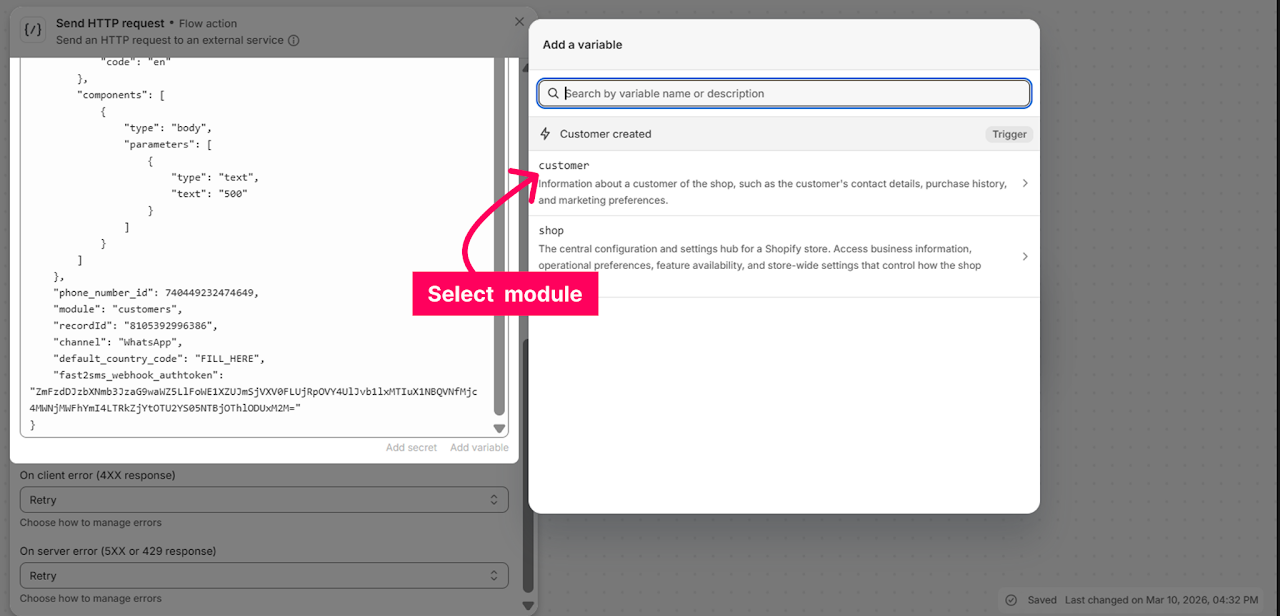
Click on Add a variable.
-
Select ‘Customers’.
-
Select the phone field.
-
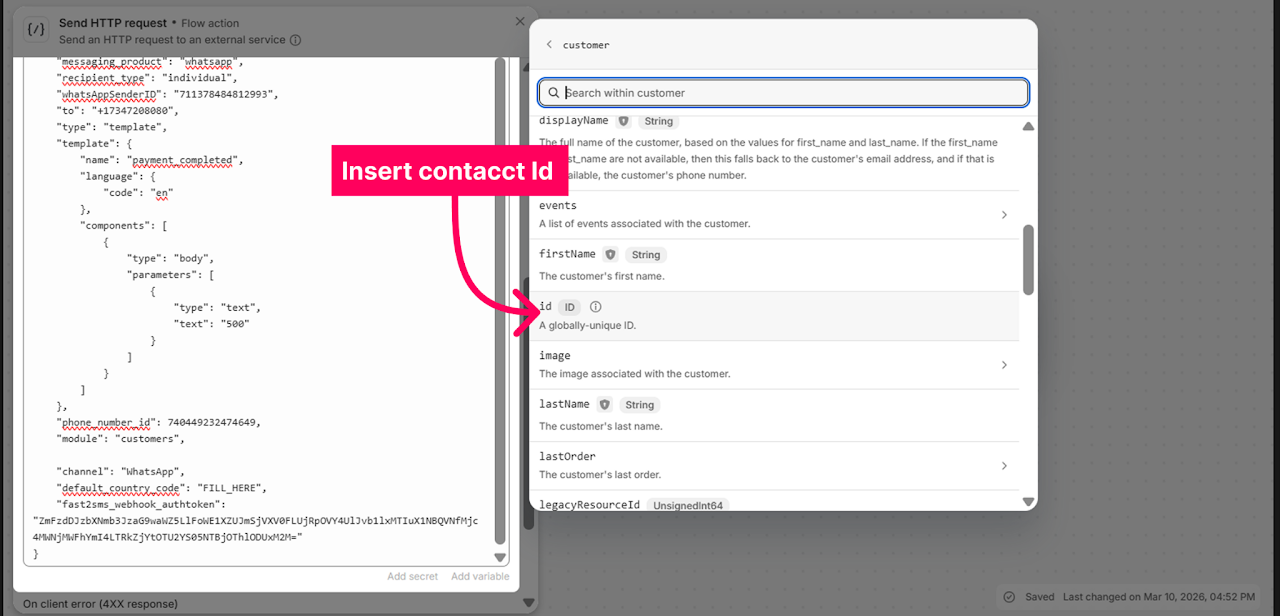
Erase the value of “record Id” parameter.
-
Click on add a variable and insert the field “Id” from the customer.
-
Similarly, you can enter the required variable for the parameters within the template.
-
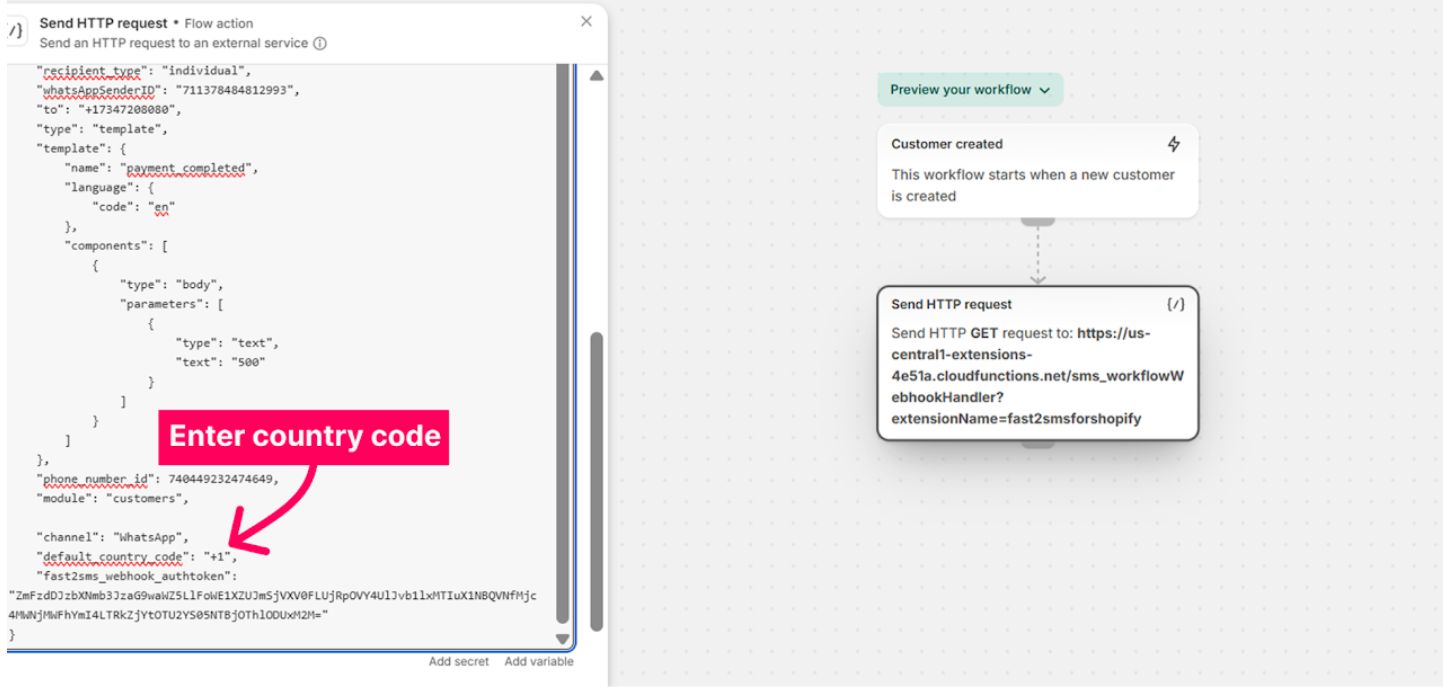
Erase the value adjacent to the “default_country_code” parameter.
-
Enter the country code that should be added in case the Customer contact numbers do not contain a country code.
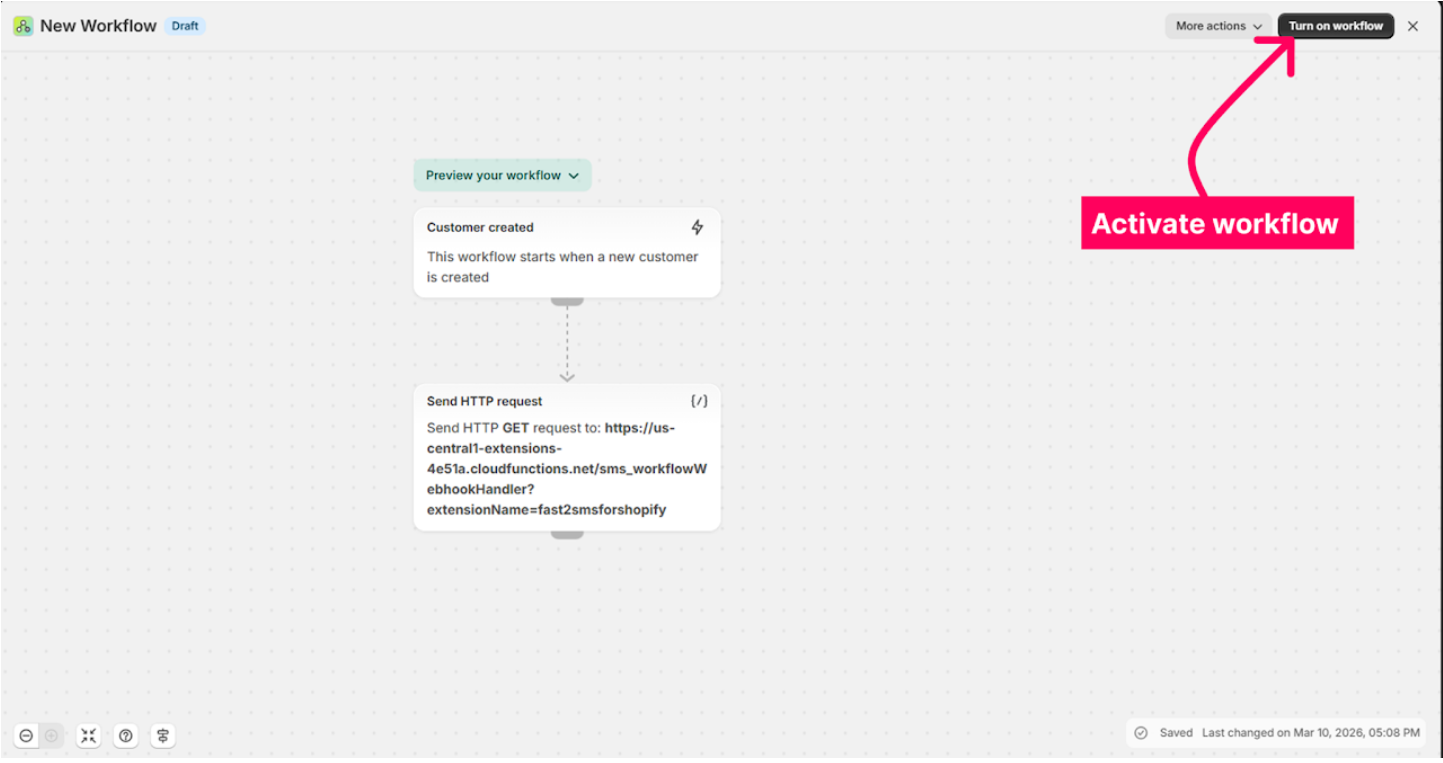
-
Click on “Turn on workflow” to activate the workflow.