How Address Book Works?
In the Address Book section, you will find all the details of your contacts, groups, QR Groups and QR Subscription. This section mainly deals with managing all your contacts details. Using this you can add new contacts, add multiple contacts, create groups, upload CSV file of your contacts, etc.
How to use Address Book?
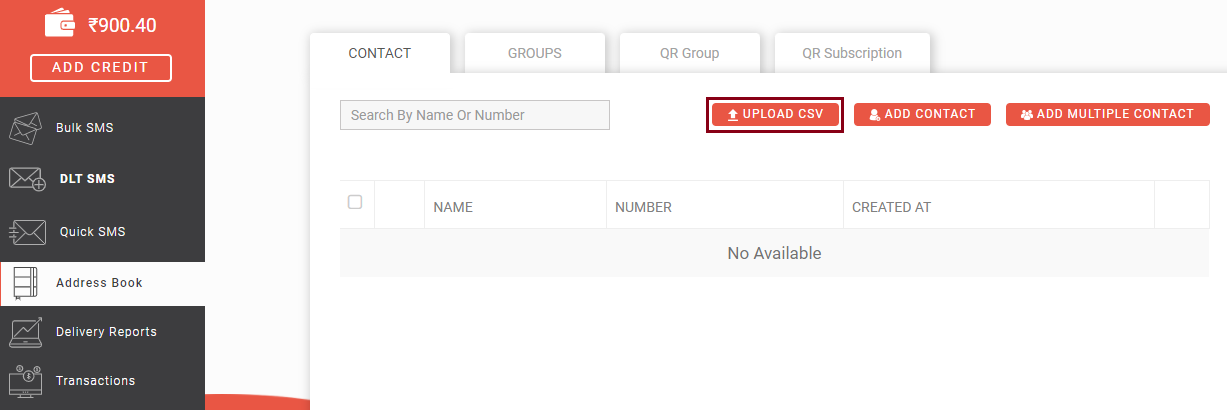
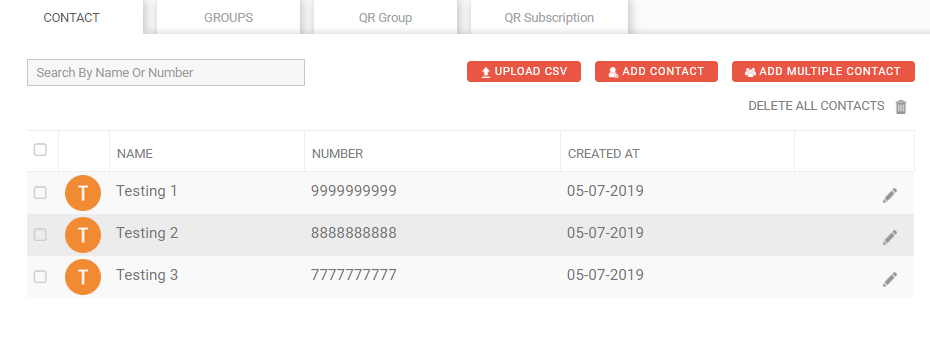
1. CONTACT
First tab in the Address Book section is of Contacts. As soon as you press Address Book from the left side of the panel, the default tab selected is Contact. In the Contact tab, 3 options are given
- Upload CSV
- Add Contact
- Add Multiple Contacts
We will discuss all these options in detail.
A. Upload CSV – CSV stands for comma separated values. It is the type of file in which data is saved in a table structured format.
Follow the below steps to upload CSV File
1. First create an excel database of your name and contact numbers. You can add other details as well like email id, marks, rank, etc. Save the file with an extension of .csv after the file name.
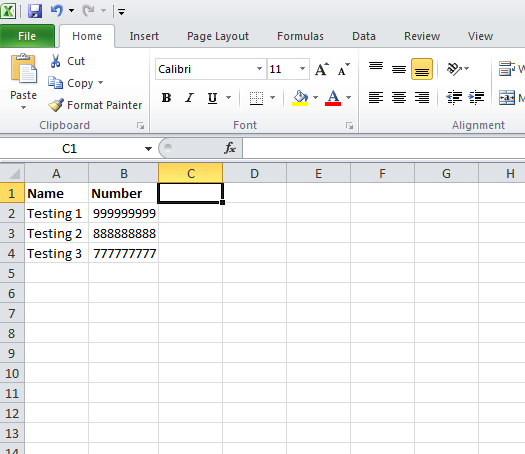
2. Next go to the address book option and in the Contact tab select Upload CSV.
3. Now the dialog box will appear. Select the file which you have saved earlier.
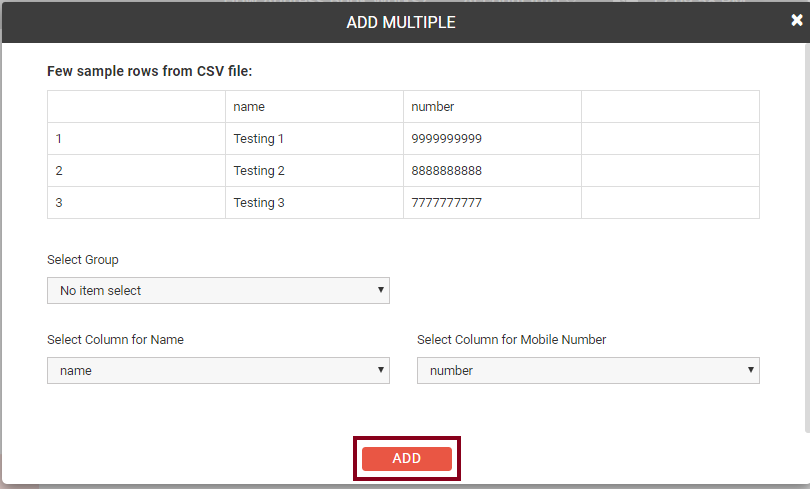
4. When the file gets selected a screen will pop up describing the details of your name and number which you have saved in the csv file. Select the column for name and number and then click on add button.
5. The contacts will get added and the list will be displayed as shown below. This is the process of adding contact by uploading CSV file.
Note : Click here to see the CSV file format
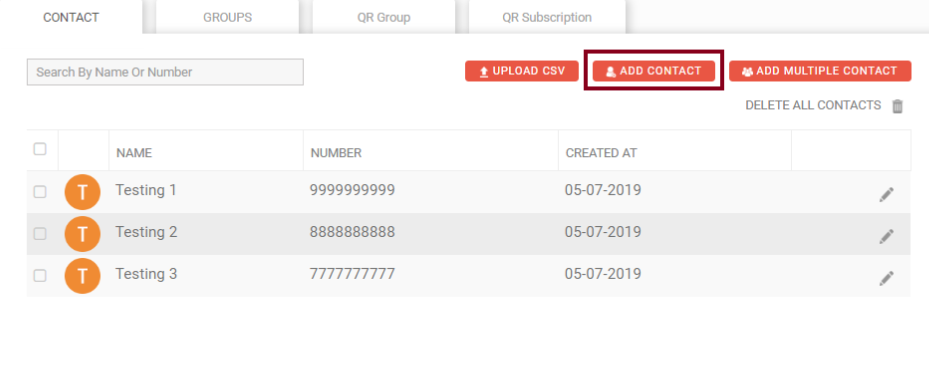
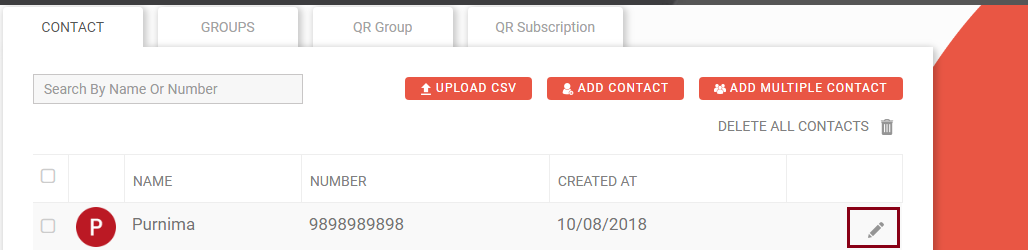
B. Add Contact
You will find Add Contact option next to Upload CSV in the Contact tab.
Once you click on it, another window appears on the screen.
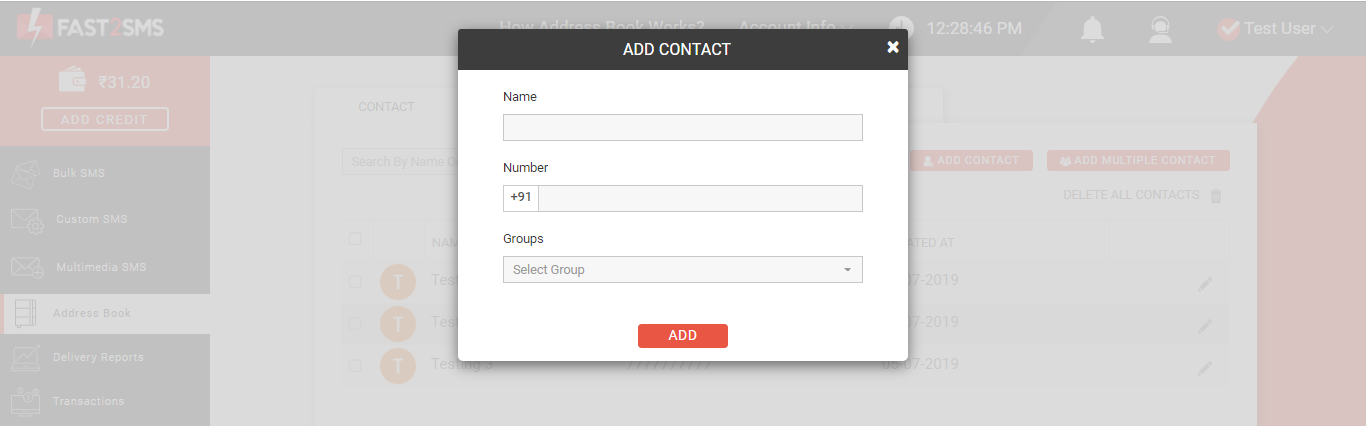
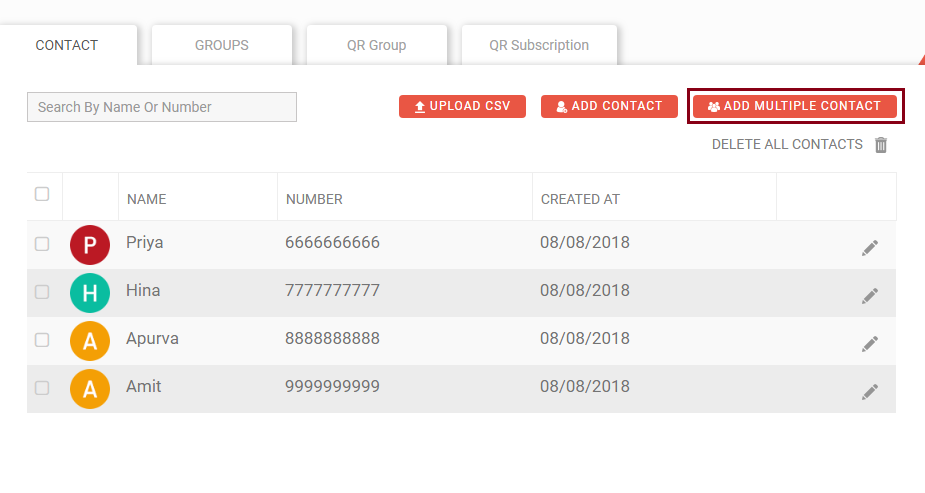
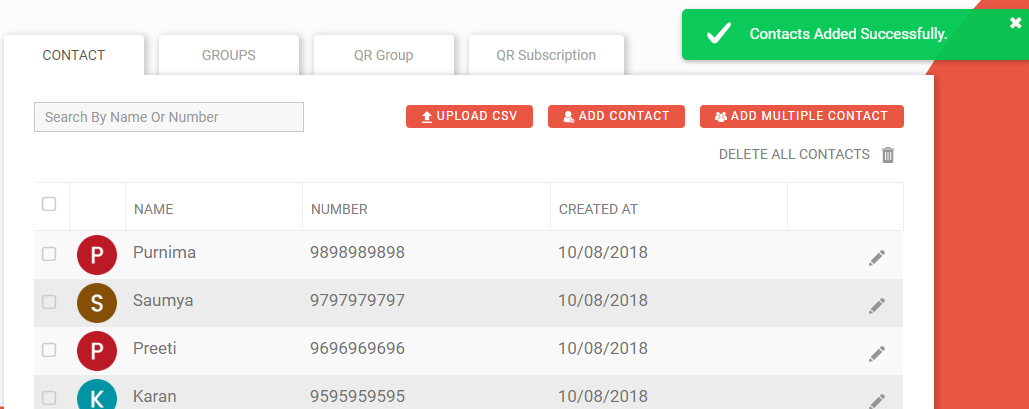
Start adding your contact details like name number and click on Add button. You can add any number of contacts. Here we have added 4 contacts as displayed in the image below.
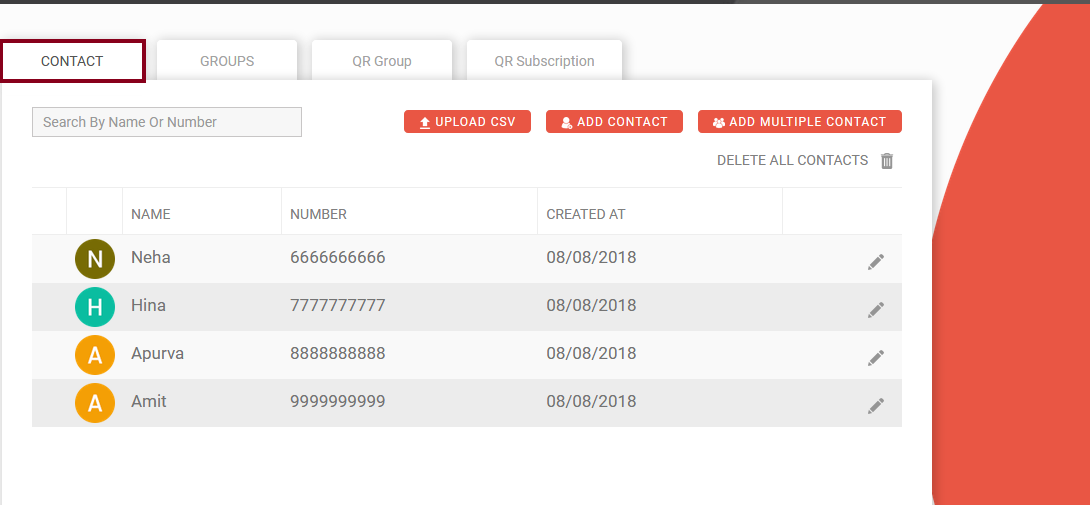
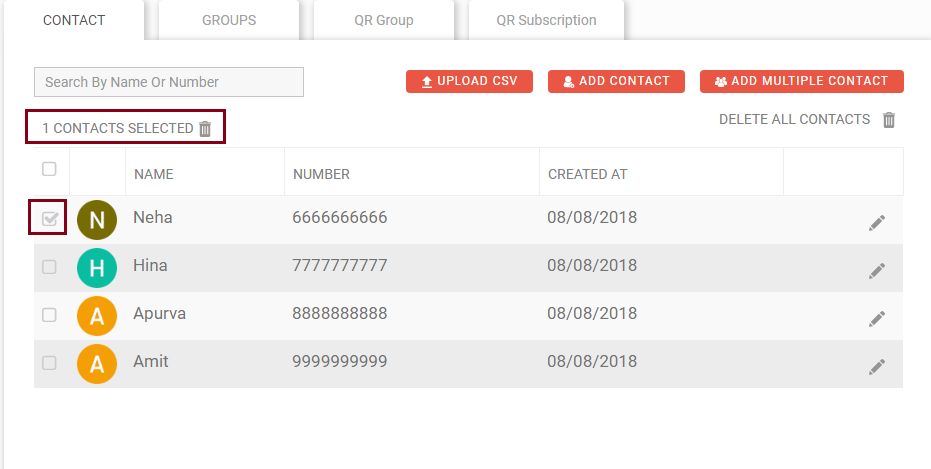
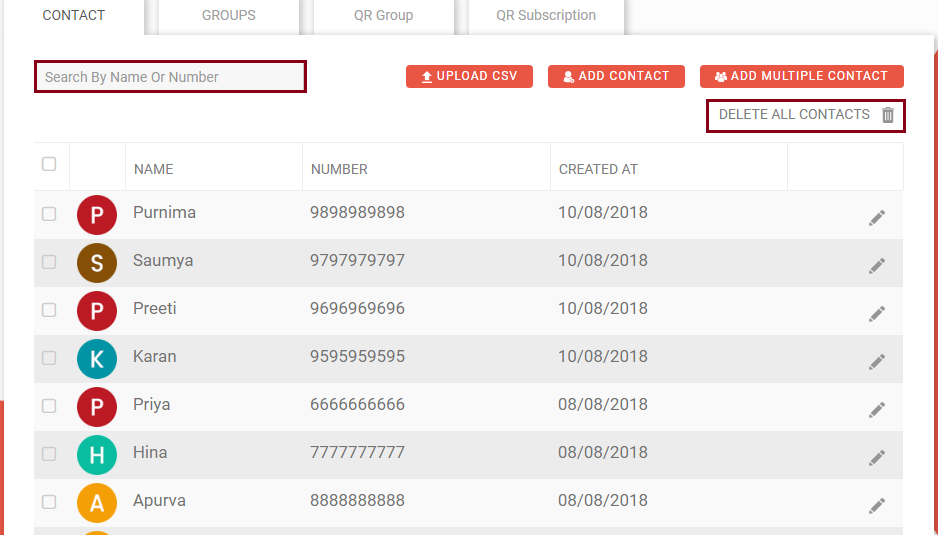
You can delete all the contacts by clicking on the Delete All Contacts icon on the right side. You can delete single contact by clicking just before the name you wish to delete. Suppose we want to delete Neha’s name. We can do it by clicking on the box in front of Neha’s name. As shown in the image below, a right tick in the box indicates that the contact is highlighted. And it showing that 1 contact is selected. We have just have to click on the delete icon to delete the contact.
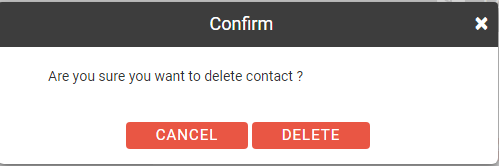
A dialog box will get open asking for permission to delete that contact. Press delete button to delete the contact.
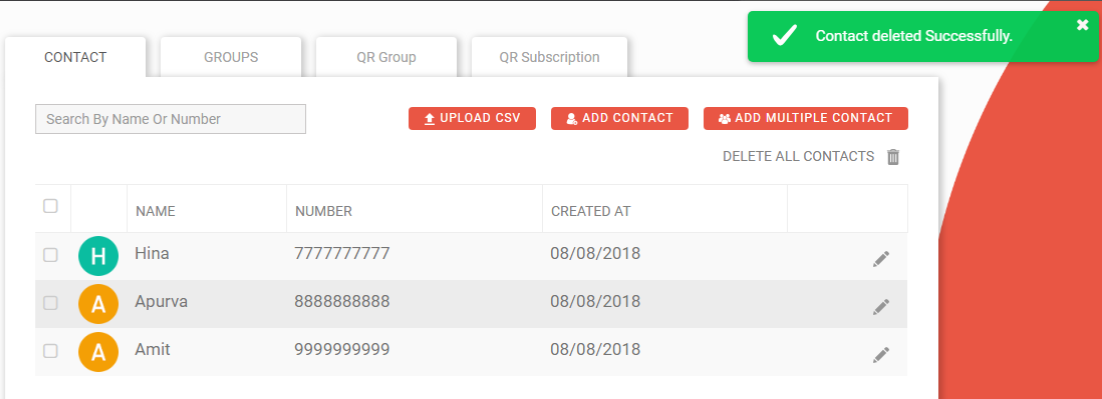
When we have pressed delete button, the contact gets deleted and the message appears on the screen as shown below. As we can see that Neha’s name is not visible now. It has been deleted.
Similarly we can select any number of contacts we wish to delete.
Note : Please be careful while deleting your contacts because once they are deleted they cannot be recovered even from our side. Contacts are not stored by us for security reasons.
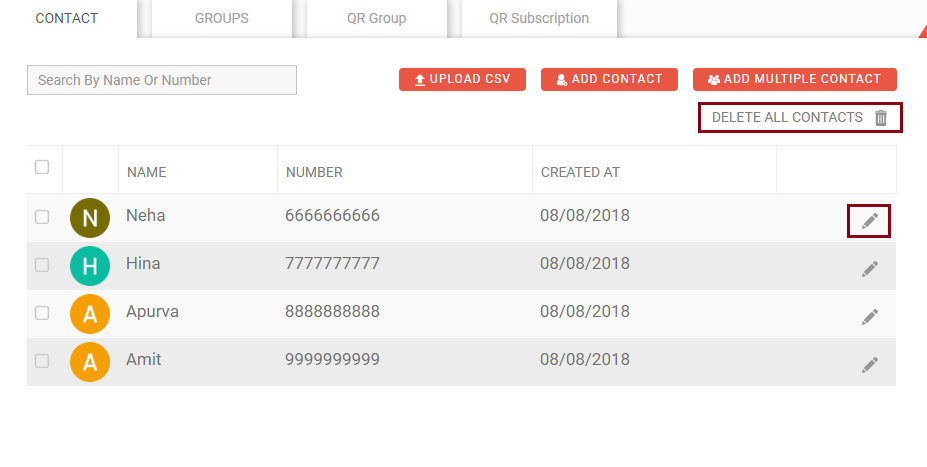
If you want to edit any contact details just click on the pencil icon at the right side and from there you can modify the details.
Let us suppose you want to edit the first contact ‘Neha’. When you press pencil icon for editing the contact, the following window shows up.
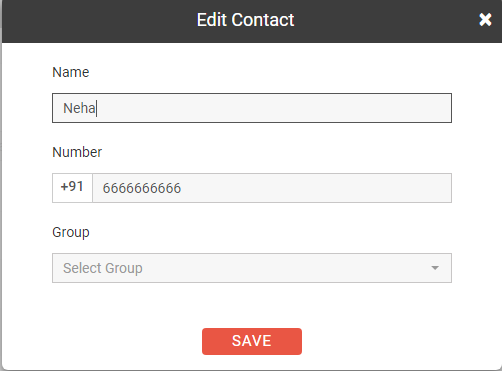
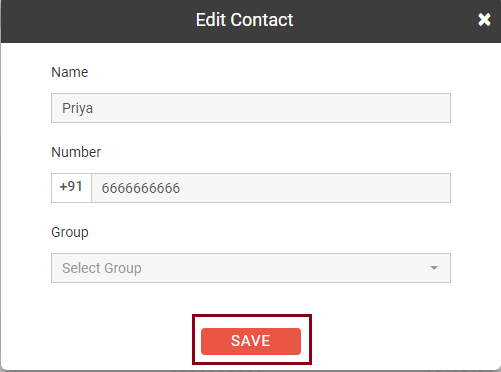
Instead of Neha you want to write Priya’s name so edit the name and then click on Save. It is shown in the following image.
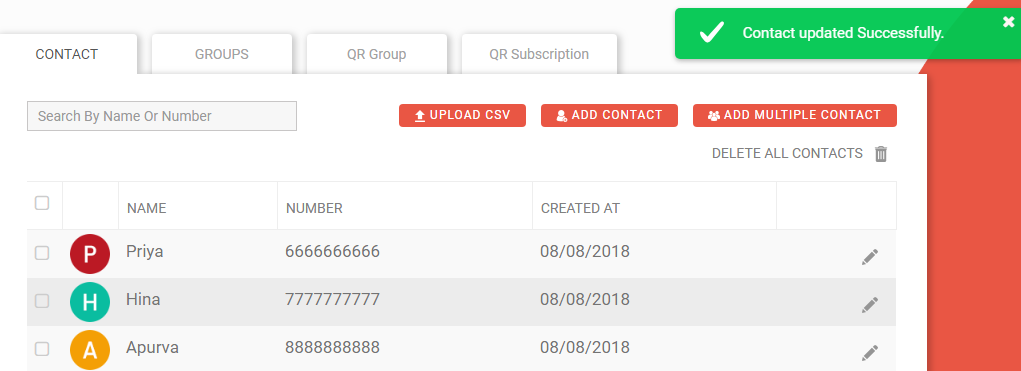
After pressing the Save button, a message will appear on the right side of the screen that contact is updated successfully. It is described in the image below.
Suppose you want to search the contact details of a person. You don’t need to go through the entire list of the contacts. In the left side of the page, there is a search box, you can search by name or number. As soon as you type the name or number you are looking for, immediately that contact gets displayed.
For example, you want to find Amit’s details in our contacts. As soon as you type Amit in the Search box, his details will be displayed below.

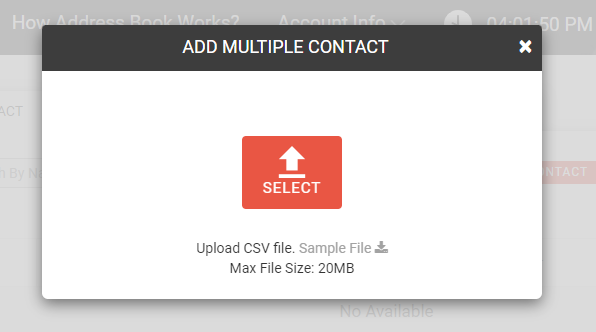
C. Add Multiple Contact
Add Multiple Contact option is next to Add Contact. In this option you can add multiple contacts at the same time. You don’t have to do it one by one and can add multiple list of contacts together. Let us understand this with the help of an example. Click on the option ‘Add Multiple Contact’.
As soon as you click on it, the following window gets opened.
You can start adding Name and Number of your contacts and then click on the + sign, highlighted in red to add more contacts. When you have finished adding all the contacts, then click on the Save button. All your contacts will be saved.
Here we have added 4 contacts. If you want to add more contacts click on the plus(+) sign above and if you wish to delete any contact click on the minus(-) sign next to each contact.
After you have added all the contacts click on the Save button.
When you press ‘Save’ the following message appears on the screen.
To search for a particular contact just enter the name or number of your contact and that contact will get displayed on the screen.
You can even delete all contacts by clicking on the ‘Delete All Contacts’ icon.
When you click on that icon, a confirmation dialog box appears asking the permission to delete all contacts.
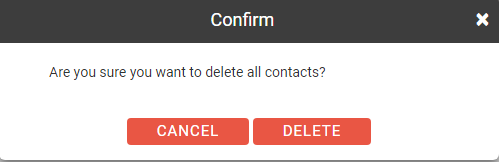
If you want to delete all our contacts then, press Delete otherwise press Cancel to close this window.
You can delete single contact also. Just click on the check box in front of the name, and press the delete icon. A message will come asking permission to delete that contact. Press Delete button to delete the contact and cancel to restore it.
To edit a contact name or number, click on the pencil icon at the right side of the contact. Suppose you want to change the spelling of one of your contact’s name. Click on the pencil icon next to that contact.
As soon as you press that icon, edit contact window will get open.
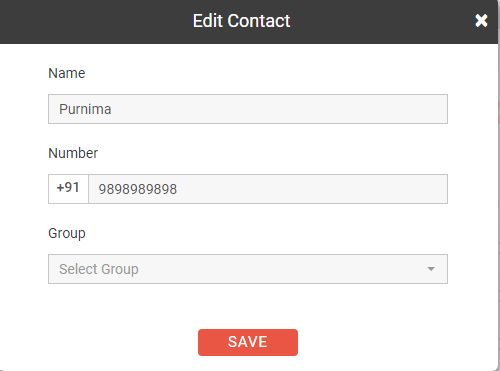
Now we are changing the spelling of Purnima to Poornima. After we have changed the spelling click on Save.
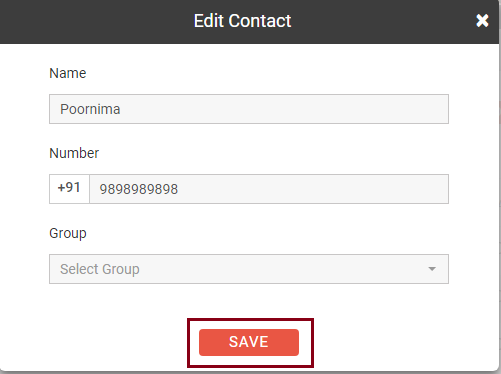
When we click on Save, Contact will be updated.
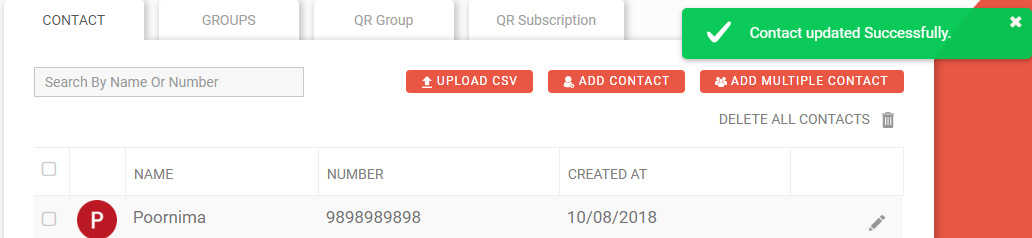
Note : By default in the contact list only 10 contacts will be displayed. When you click on the next page other contacts will be visible. If there are more than 10 contacts it will be displayed in the form of pagination like 1, 2, 3, 4 and so on depending on the number of contacts.
As we can see that this is the first page of the contacts, at the bottom of the contacts page numbers are displayed.
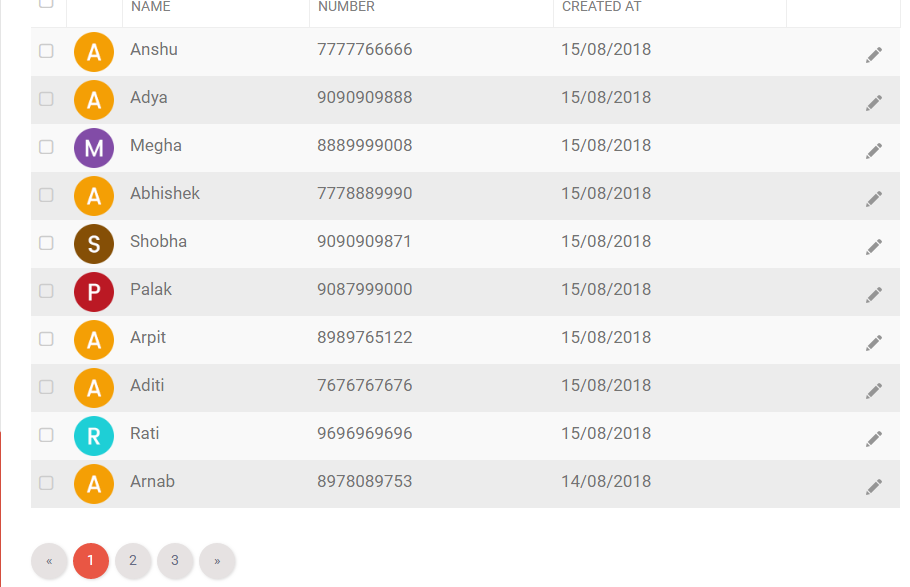
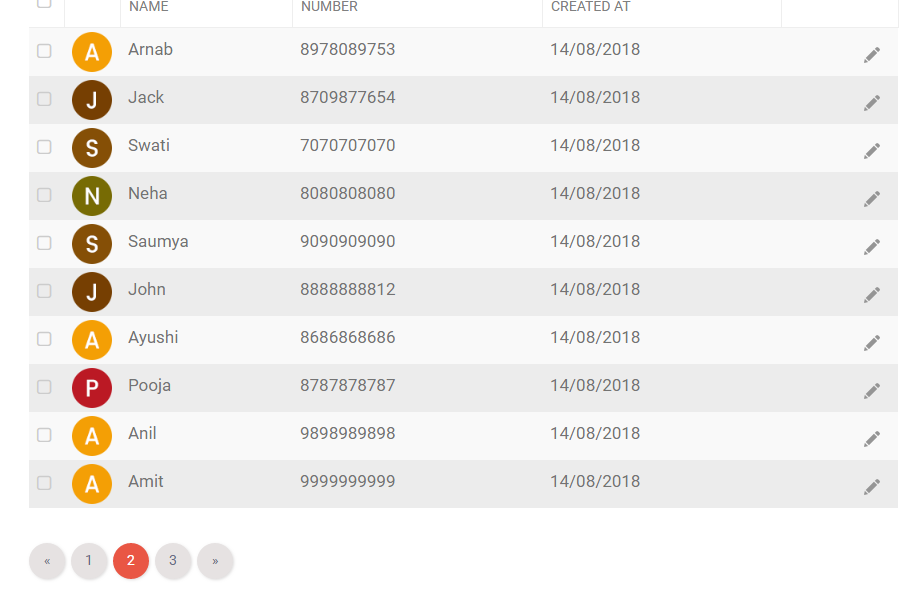
If we want to view other contacts as well we can click on the 2nd page.
When we click on the second page, it will show the other contacts which we have saved. You can see 10 contacts in one page.
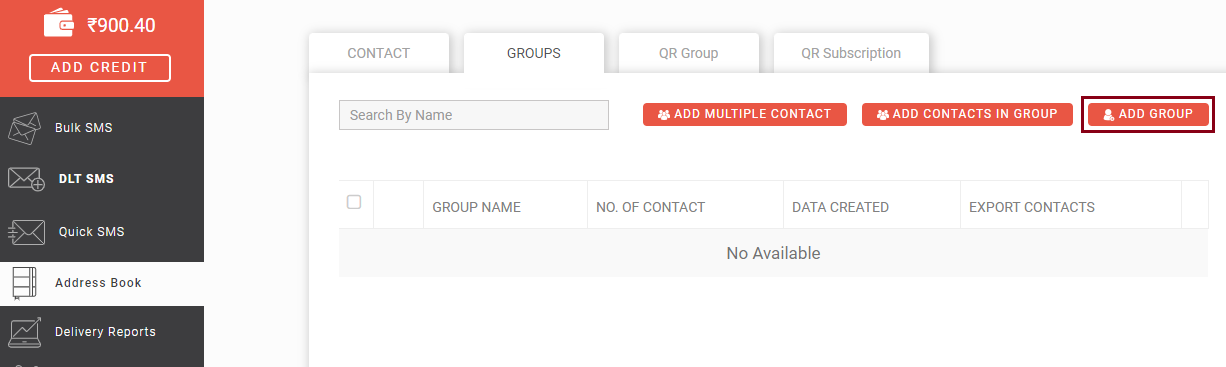
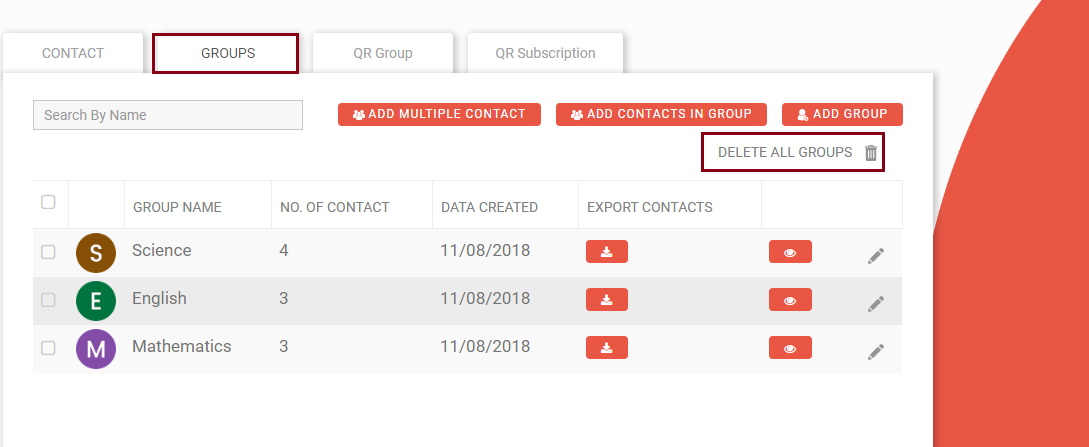
2. GROUPS
Creating a group of similar contacts will make our work easy and manageable. We can group our contacts of same type in one group and another type in different groups. Suppose we run a coaching institute where we teach different subjects like Mathematics, English and Science. We want to keep a record of students subject wise. So it can be easily done in Fast2SMS.
To create group, select the address book, then click on the second option Groups. In that Groups option click on ‘Add Group’.
When we press ‘Add Group’, a dialog box shows up on the screen.
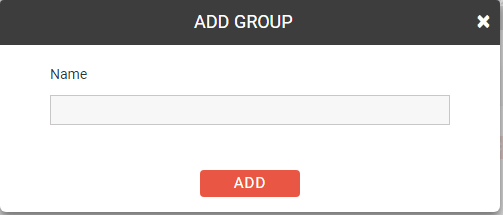
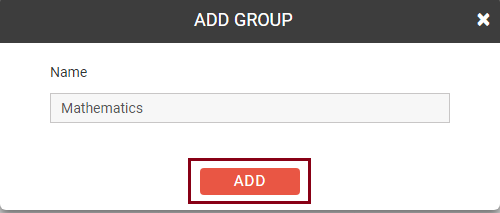
Type the name of the group you wish to add and then click on Add button.
Group gets added successfully and the message appears on the screen.
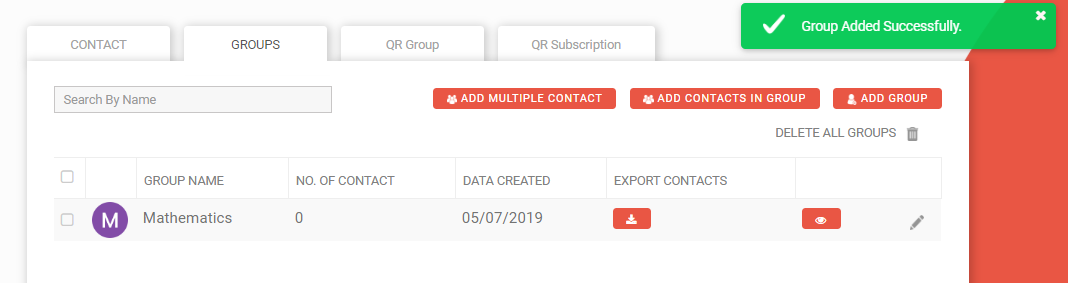
Similarly we can add 2 more groups English and Science.
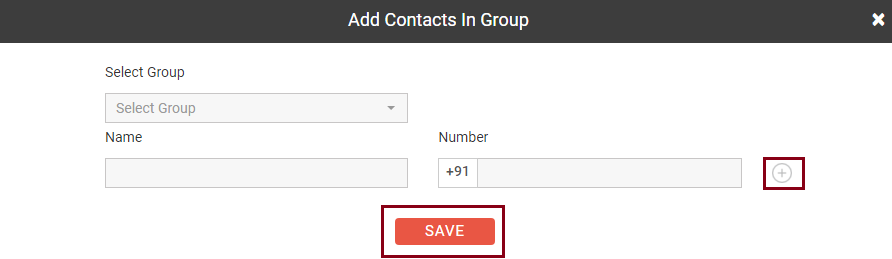
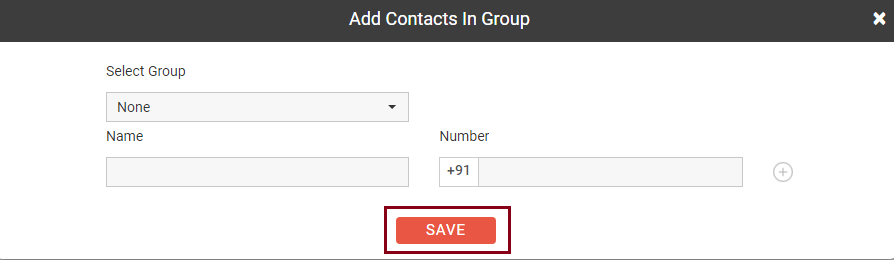
Now we can start adding contacts in group. The contacts which we have created earlier are the ones we have to add in the groups. For adding contacts click on ‘Add Contacts in Group’ option.
As we press the option ‘Add Contact in Group’, the following dialog box appears.
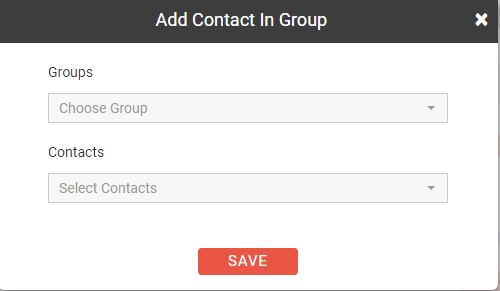
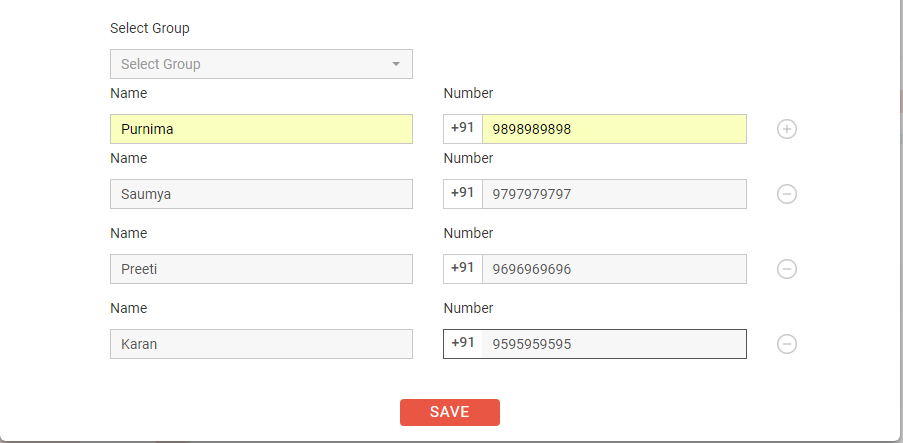
Now choose group, select the contacts which you want in that particular group. And then click on Save.
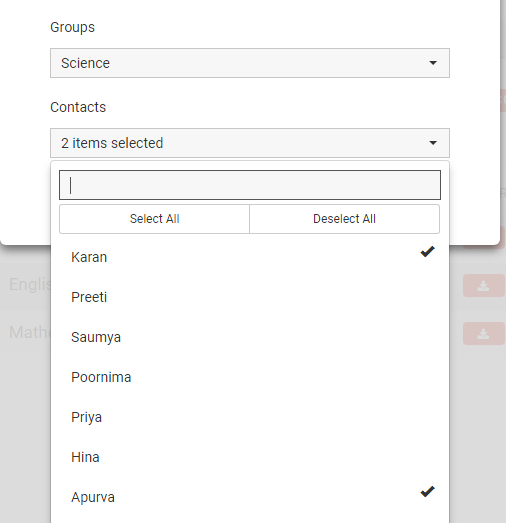
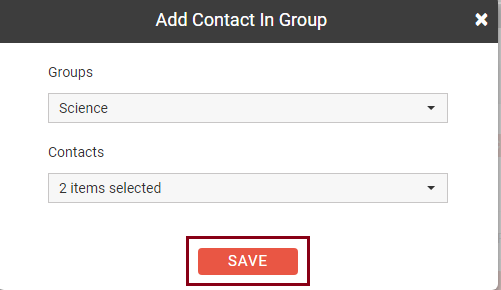
When we have selected the contacts, click on Save, to save those contacts in the group.
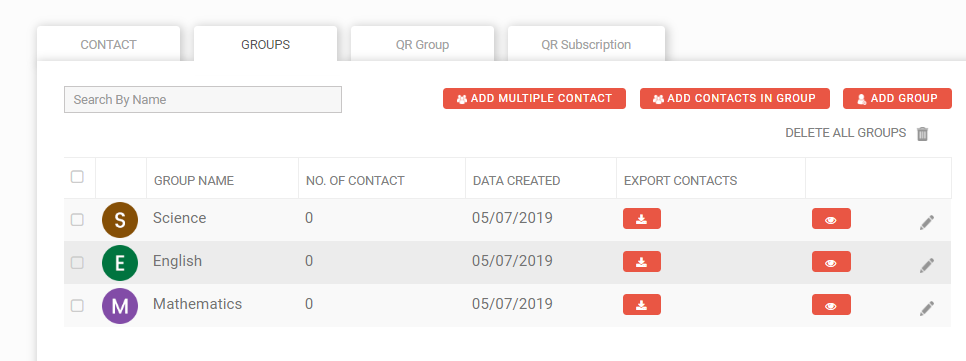
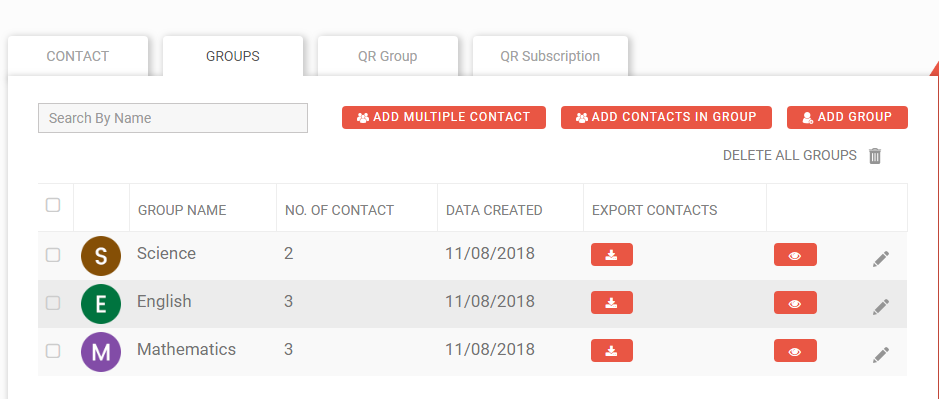
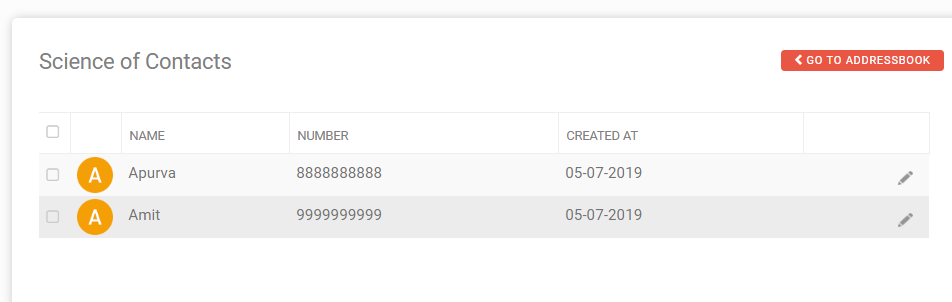
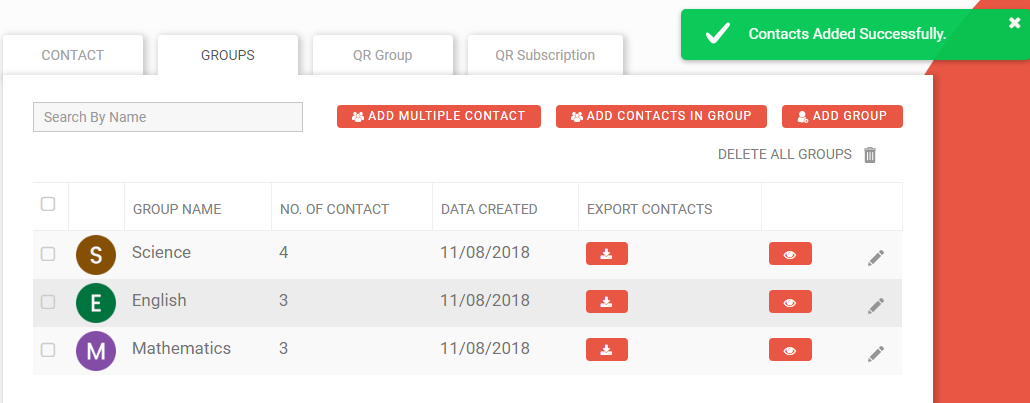
When we press Save, the 2 contacts which we have selected gets saved in the group Science. As we can see that number of contacts showing in the Science group is 2 whereas in English and Mathematics it is 0.
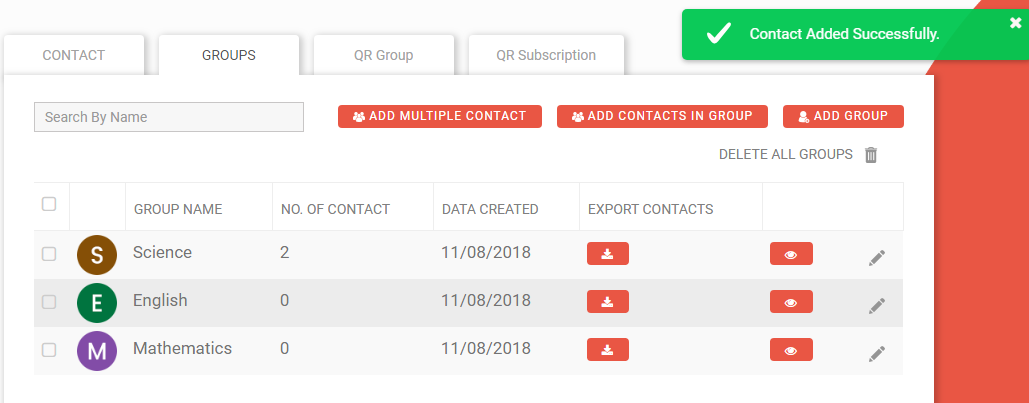
In the same way we can add contacts created previously in the groups English and Mathematics. As we can see 3 contacts have been added to the group English and 3 to the group Mathematics.
There are different options next to the group name. Let’s discuss them one by one.
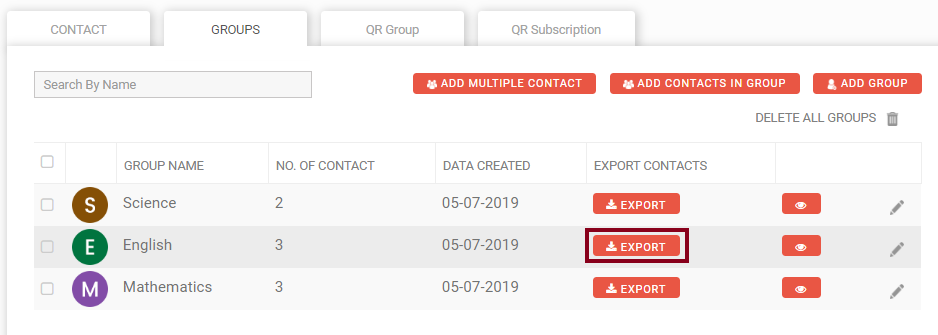
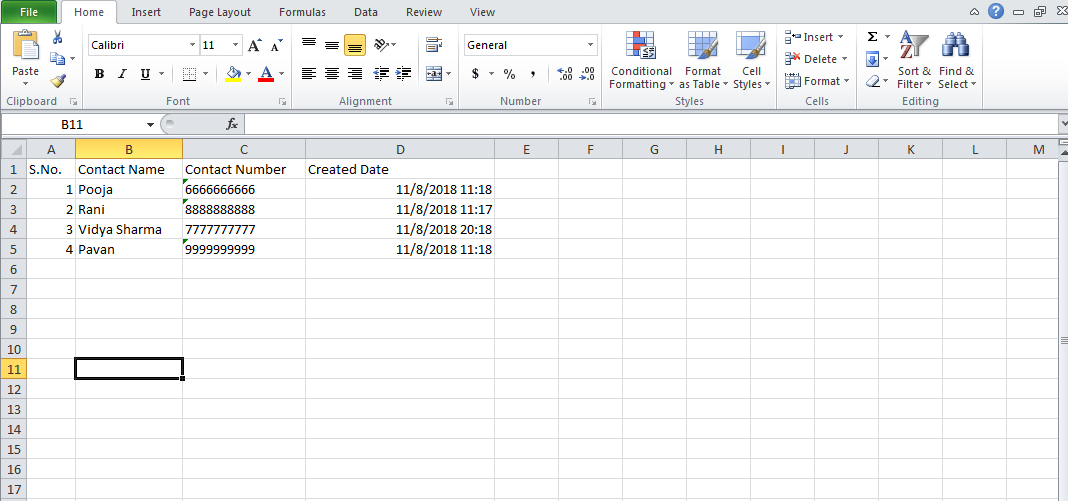
Export Contacts – In this we can create an excel sheet of our contacts. Just press the export icon next to the contact you want to view, the excel sheet automatically gets downloaded. Suppose we want to download the excel sheet of English group, simply click on the export icon and the list is ready to be viewed. As we can see the excel sheet gets downloaded below in the left side at the bottom of the screen.
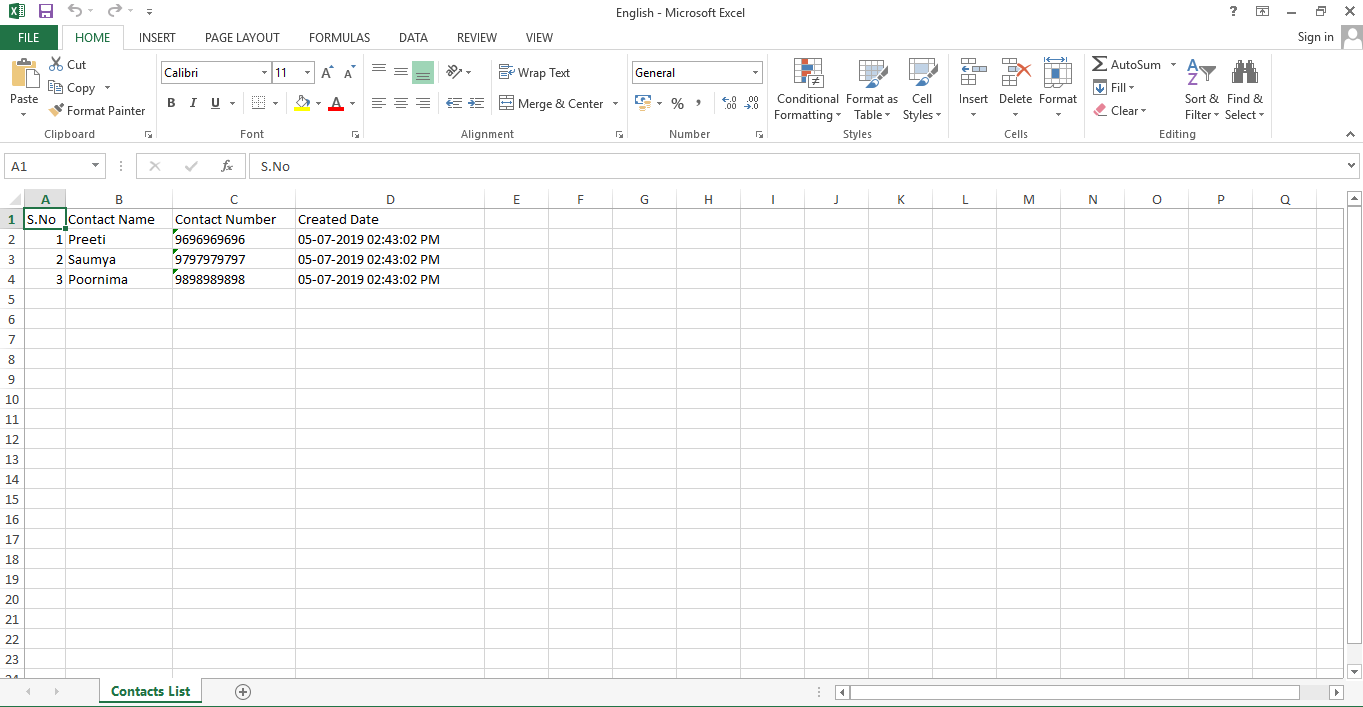
Click on the sheet to view its content. As we click on it, excel file gets open with the contacts list. As we can see contact name, contact number, date of creation and time gets displayed. We can save this file for keeping a record of students.
We have to press the icon highlighted in red in the image below to view the contacts in a group.
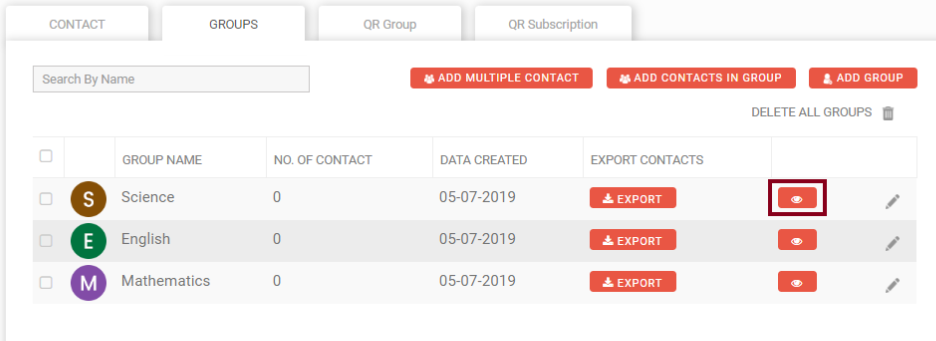
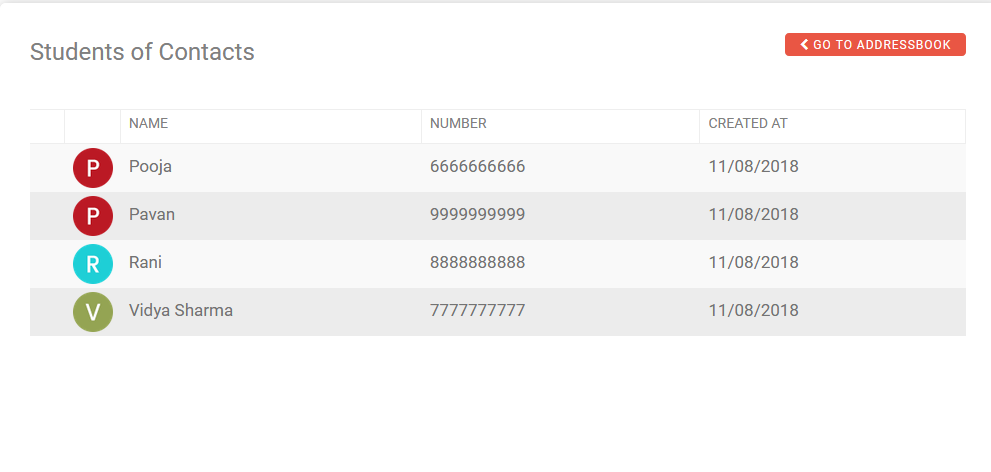
Suppose we want to view the contacts of the students in the Science group. When we click on that icon, the contact details of that specific group gets displayed on the screen. We can even edit the name or number of our contacts by clicking on the pencil icon at the right side.
In the Groups section there is also an option of ‘Add multiple contacts’. In this option we can add multiple contacts together in a group. It means we can create new contacts and add them together.
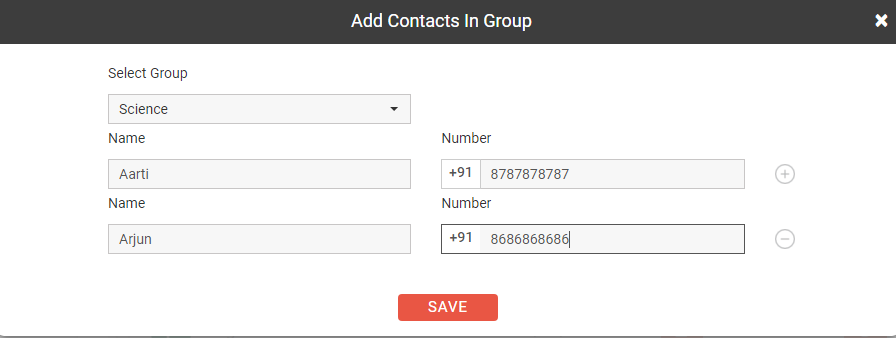
When you click on the ‘Add Multiple Contact’ option, select the group which you have created previously. And then enter the name and number. After that click on Save.
Here we have added 2 new contacts in the Science Group. After adding contact name and number press save.
After we press Save, the contacts gets saved and message appears on the screen as shown below. As we can see that Science group is now showing 4 contacts.
You can delete all groups together or if you want don’t want to delete all groups, you can select a particular group to delete that from your list. Let’s see how to do it.
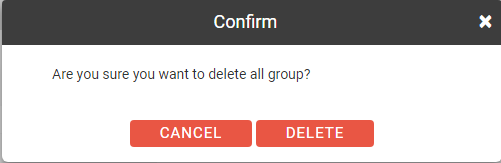
To delete all the groups, select the Delete All Groups icon.
When you select it, a message appears on your screen like the one below. Press Delete button to delete all the groups and press cancel to cancel the group deletion.
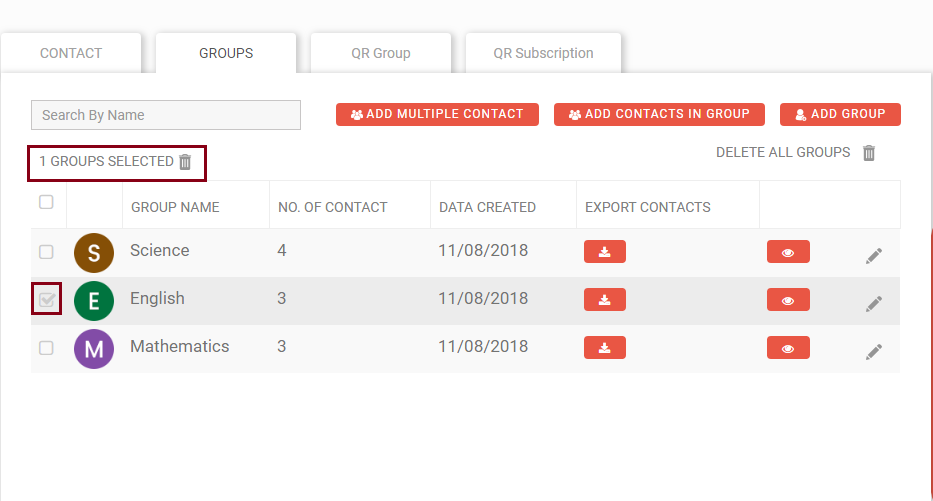
If you want to delete just one group or two groups or any number but not all groups, then you can select the groups which you want to delete and click on the delete icon. Here we are deleting the English Group. Click on the checkbox next to English and then select the Delete icon.
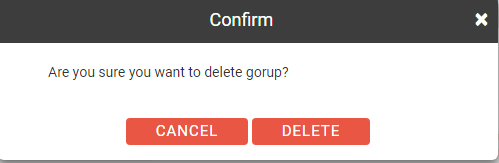
As we press the delete icon, the following message will appear asking us the permission to delete that group. Press Delete to delete the group otherwise press Cancel button.
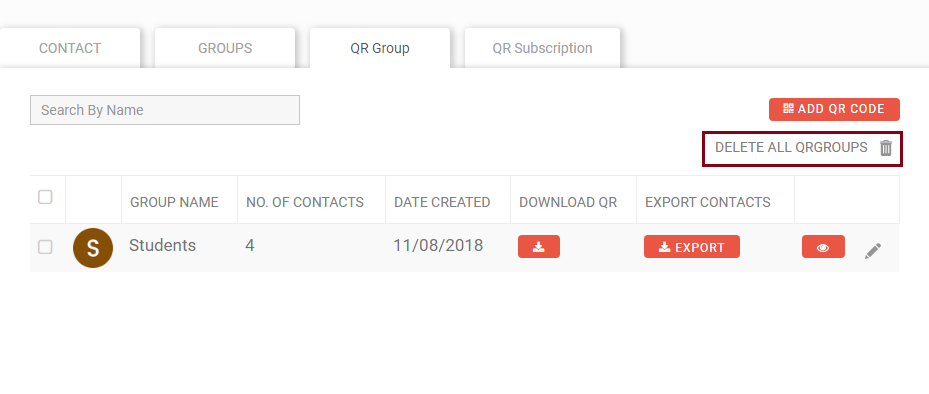
3. QR Group
QR is the short name for Quick Response. QR is a unique and special feature offered by Fast2SMS. Till now this feature is not provided by any other Bulk SMS service provider.
Benefits of using the QR feature
Suppose you are a youtuber and want to know the name and number of your subscribers. It can be easily done using the QR code. You just have to share the QR link with your subscribers. They will fill up the form; the database gets stored and is ready to be downloaded. You can get it printed. You can view the contact details even from the dashboard.
Anyone can avail the benefit of this unique feature. If you are a shop owner you can share the QR link with your customers and collect the whole record of your customer’s name and number. It will be useful for sending them new products launched, discount on different schemes, festival offers etc. Moreover, it will ensure credibility and develop a connection with your customers. It will surely lead to an increase in the conversion rates, resulting in more sales.
Process of using QR Group
1. Go to the Address Book option and click on QR Group.
2. When we press the QR Group option, the following screen will show up.
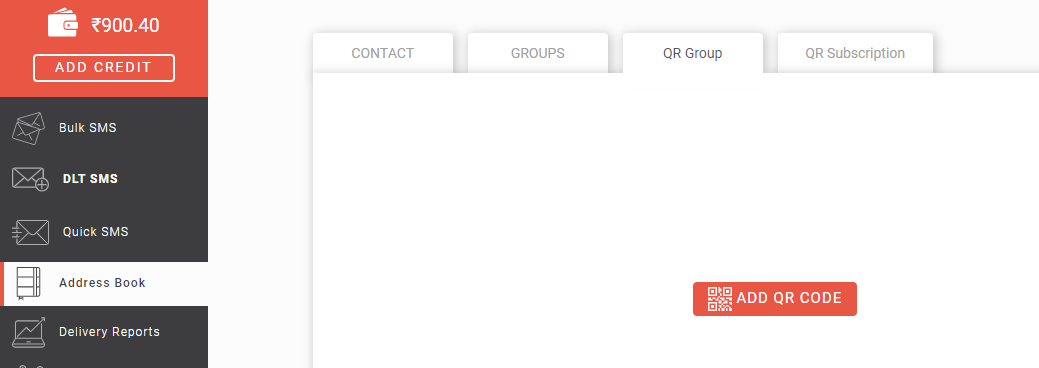
3. When we click on the Add QR Code, the following screen appears.
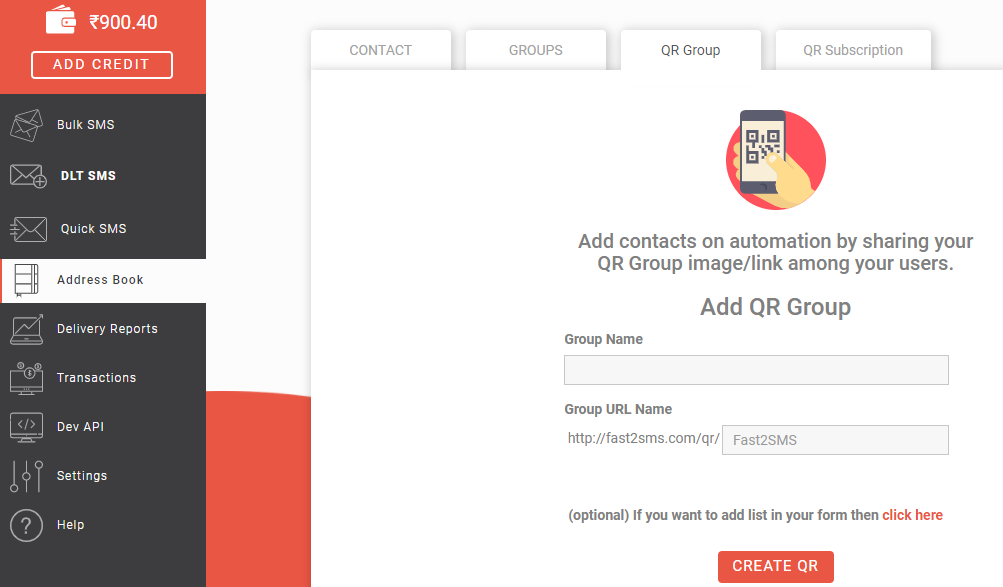
4. Next step is to enter our Group Name whichever we want to keep. And then add the URL name.
5. Here we are keeping the Group Name and Group URL as Students. And after entering these details, there is an optional feature to add list in the form. Click on the click here link to add list.
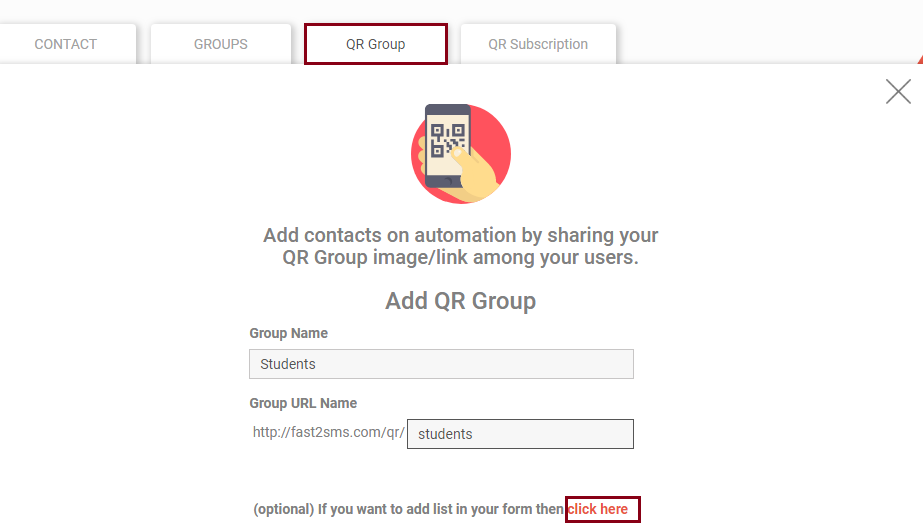
6. When we click on the click here link, the list options will be displayed.
Note : You cannot edit these options once you have created them.
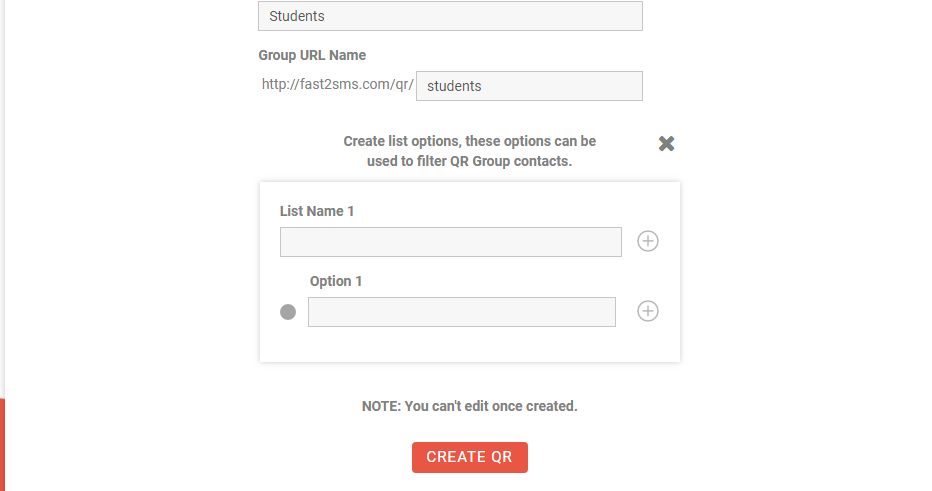
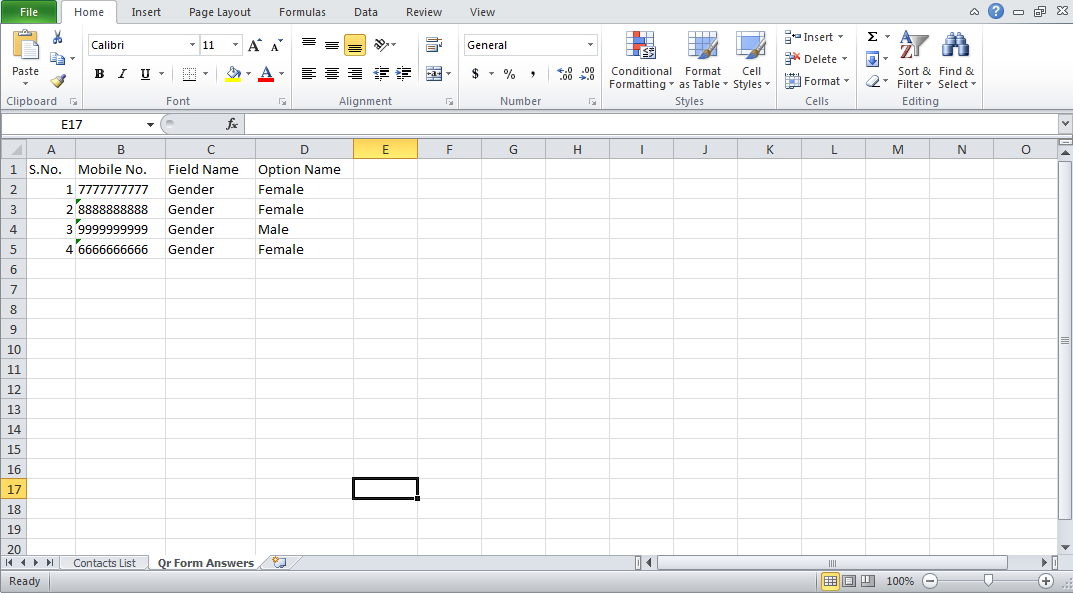
7. Next step is to enter details on the list name. These options are used to filter the QR Group contacts and be more specific. We have created a list based on the Gender. After we have added the options, click on Create QR.
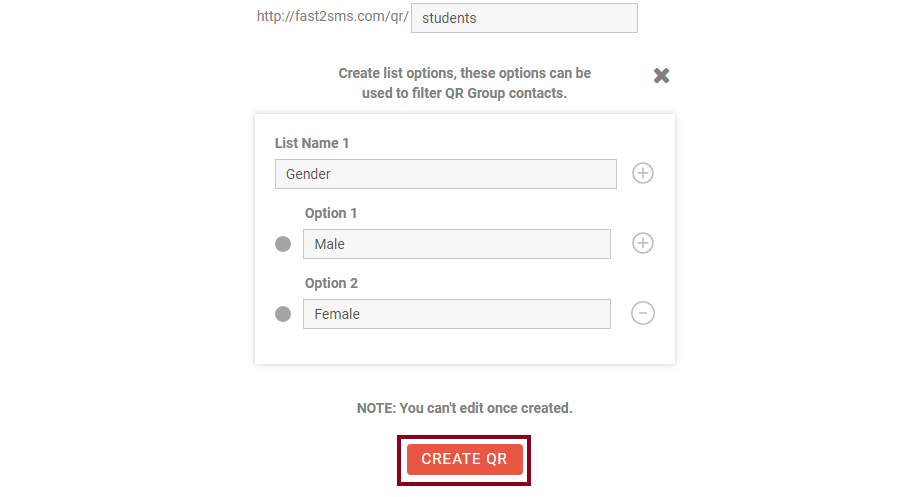
8. As we click on the Create QR button, the group gets added successfully and it is shown on the screen.
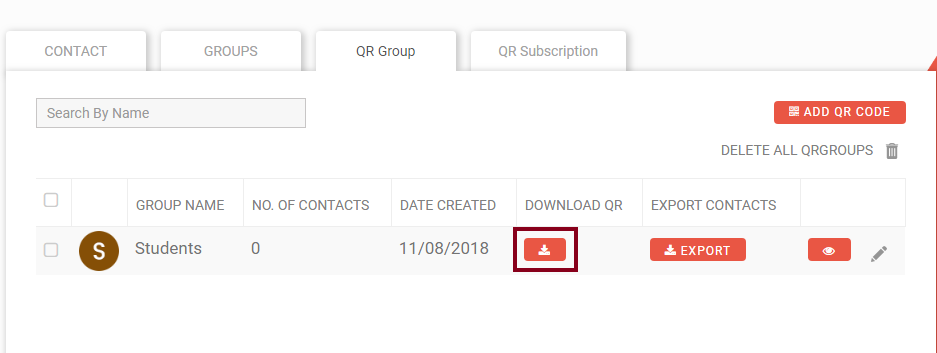
9. When we click on Download QR , the QR link will be shown as below. You can share the link with anyone, to get their name and numbers.
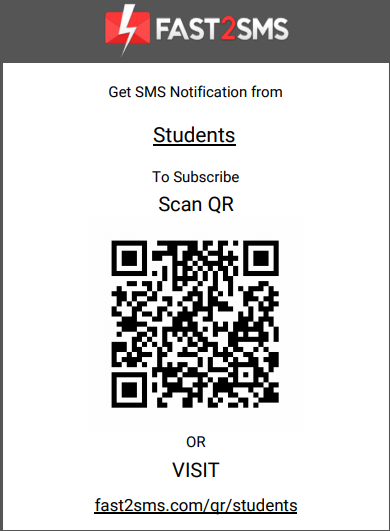
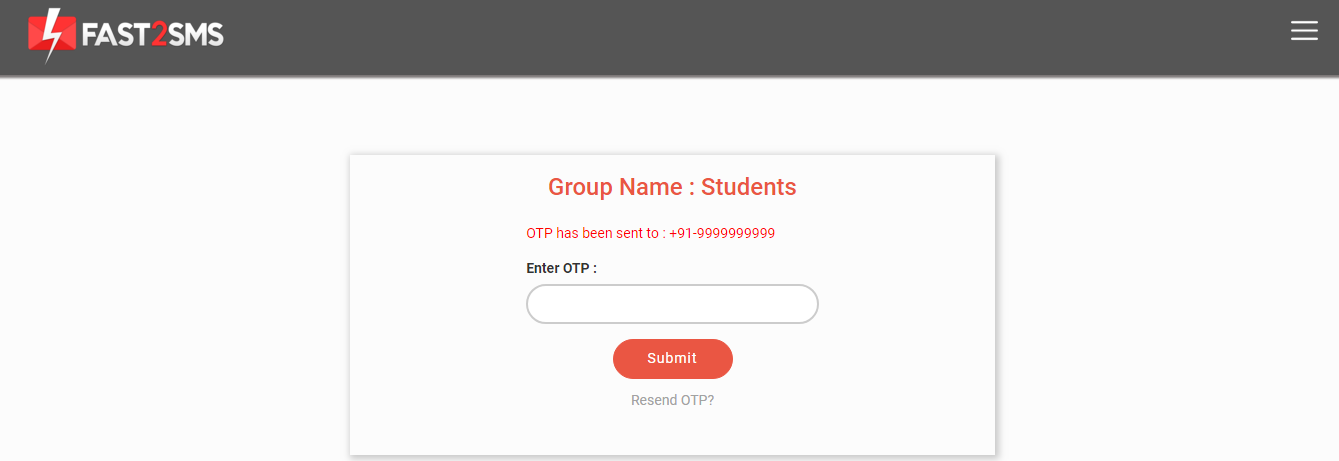
10. When anyone scans the QR code or visits the link fast2sms.com/qr/students, they have to fill their name and number and click on the submit button.
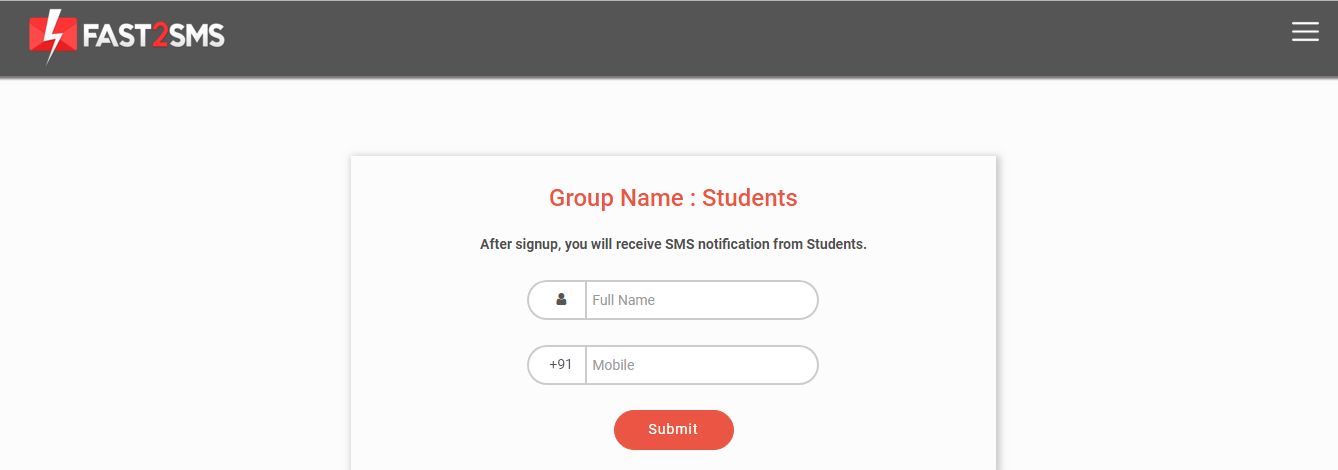
11. The person will enter his or her details like name, mobile number and then click on Submit.
12. After that OTP will be sent to that person’s mobile. He or she has to enter the OTP and then click on Submit.
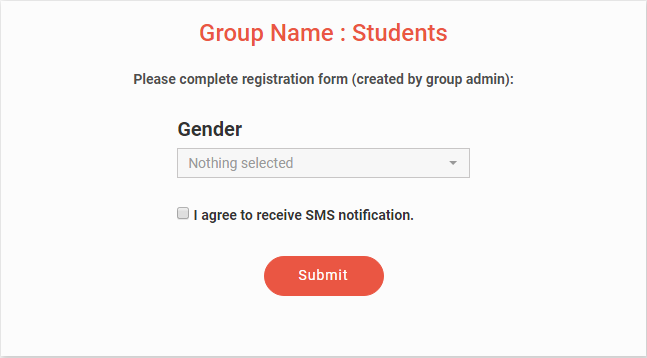
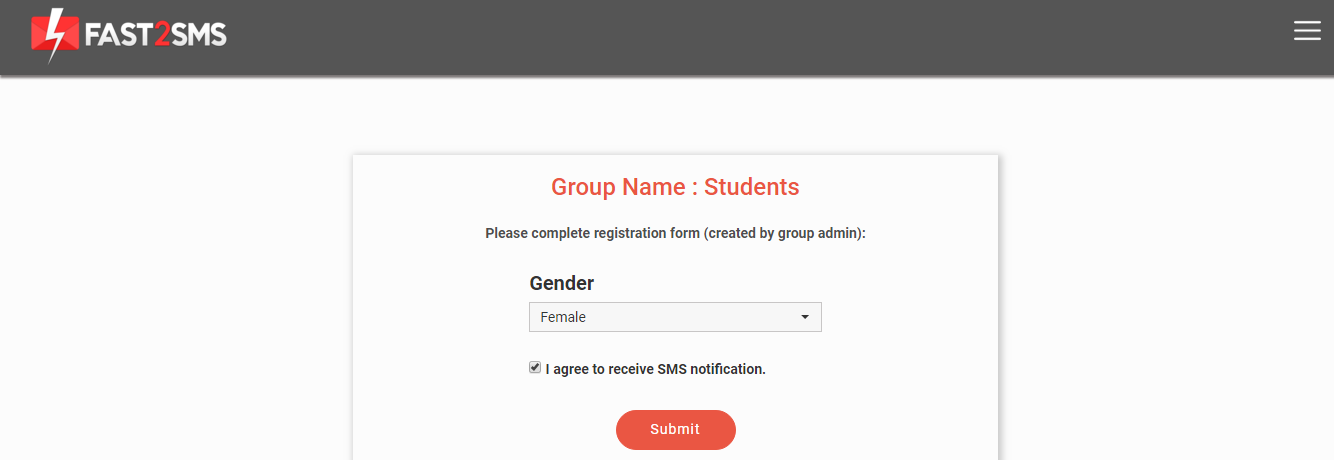
13. After they have pressed the Submit button, another window gets opened asking to complete the registration form which we have made at the time of creating QR. They will select their gender, click on the check box and then press the Submit button.
14. Press Submit button after filling all the details.
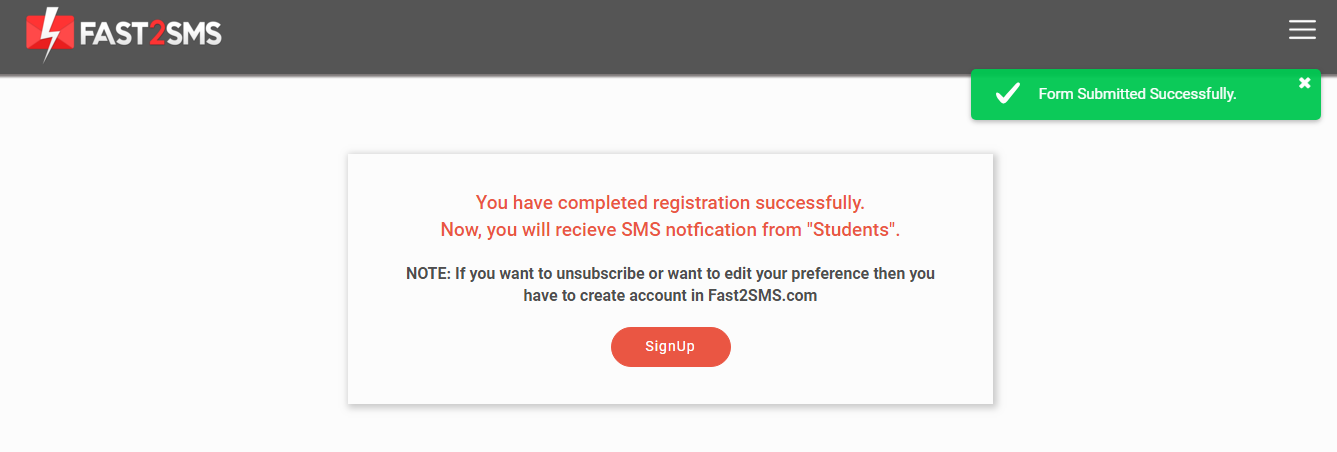
15. After we have pressed Submit button, registration gets completed and that person will receive SMS notifications from our group ‘Students’.
16. We can even export our contacts by selecting the export contacts option.
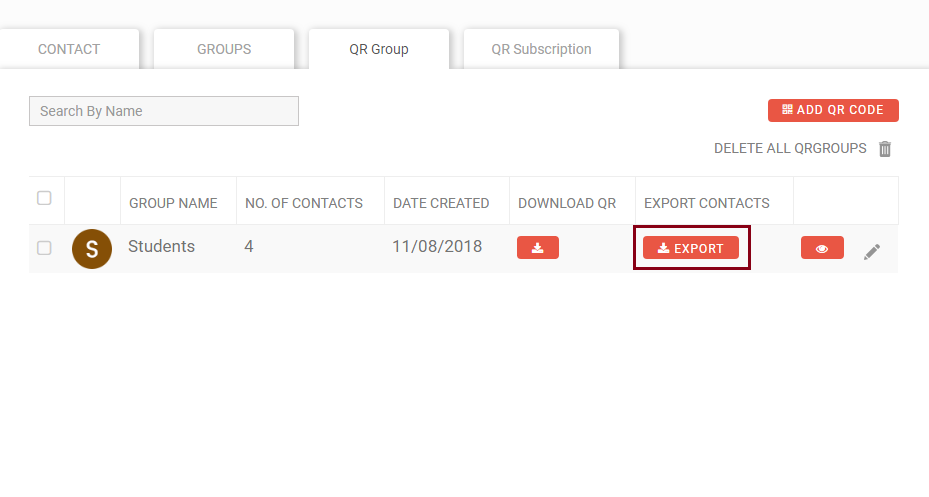
17. When we click on the Export Contacts option, an excel file of our contacts will get open. Now we can save this file and even take a printout of it.
2 excel sheets will get open.
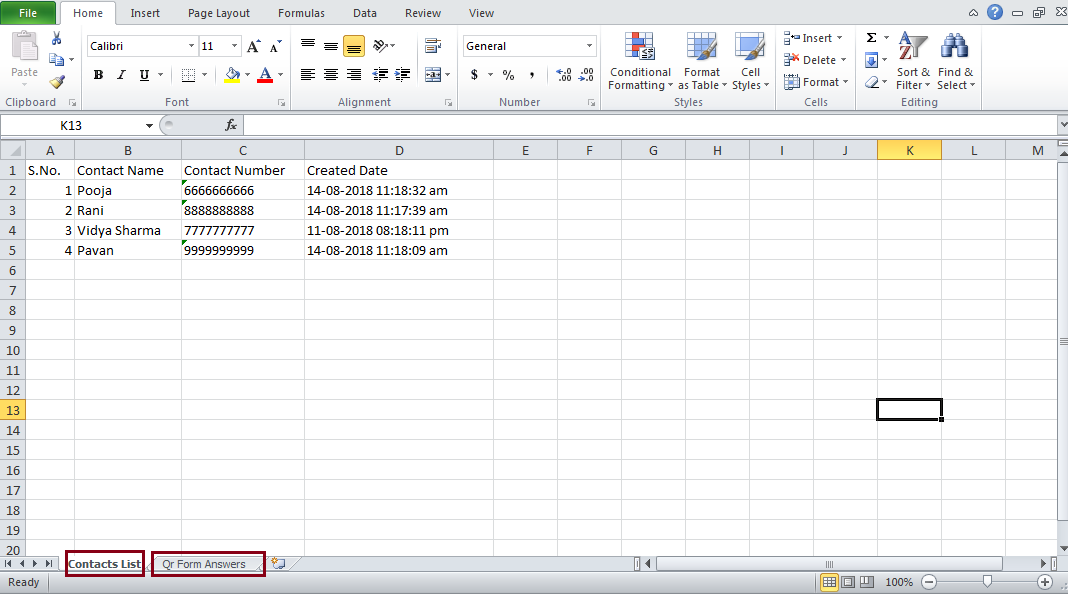
First one which is shown below is the Contact List excel sheet.
Next is the Qr form Answers excel sheet. When you click on it, the sheet will look like the one shown below. Here the answers for questions asked in the optional form will be there.
18. Next to Export Contacts is the option of ‘View Contact’. In this option you can view all your contacts directly in the panel itself.

When you click on ‘View Contact’ button, all your contact details will be visible as shown below
19. Next to ‘View Contact’, there is an edit option.
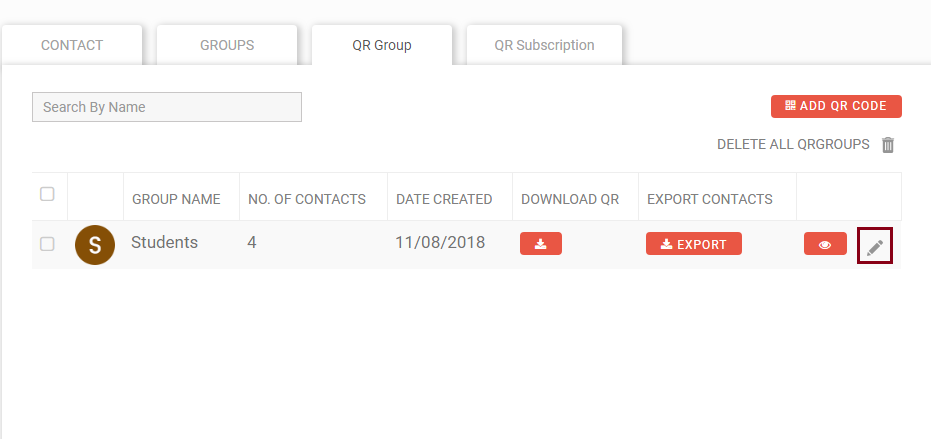
When you click on the pencil icon to edit, the following window will get open.
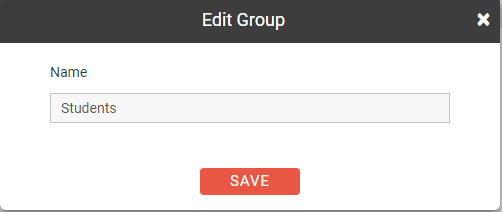
Edit the group name and then click on the Save button.
Note : You can edit only the group name. You cannot edit other fields and links.
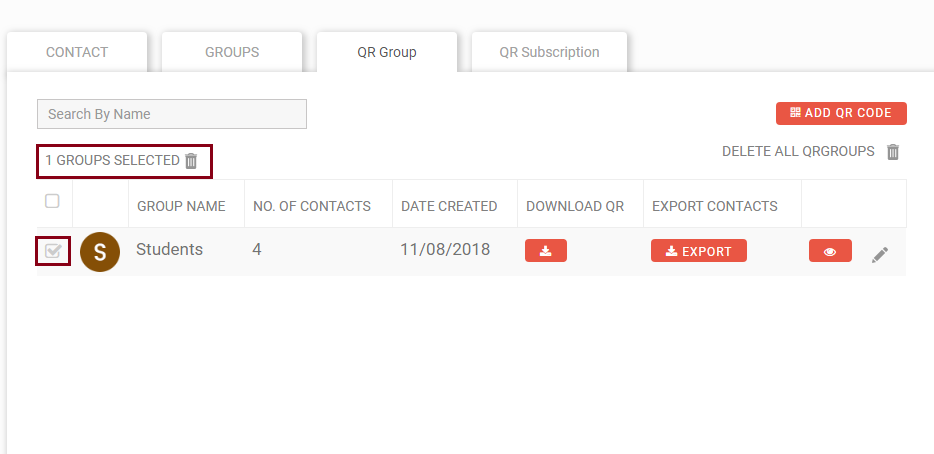
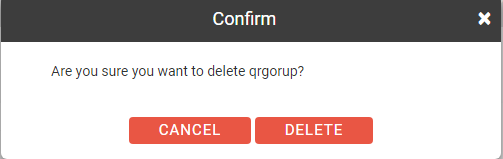
20. You can delete your QR group if you wish to. For deleting QR groups, select the group by clicking on the checkbox next to it. Above a message will be displayed ‘1 Group Selected’. Next to it a delete icon is present. Click on that icon to delete the group. Once you click on the icon, a message will appear asking to confirm the deletion. Press delete button to delete otherwise press Cancel button.
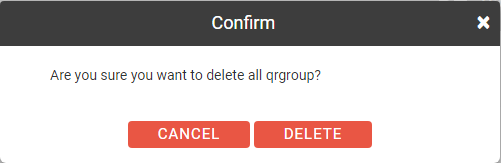
You can even delete all your groups at a single click. For deleting all QR groups, click on the ‘Delete All QR Groups’ option. A message will appear asking permission to delete all QR groups. Press Cancel to cancel the deletion and Delete to delete all QR Groups.
4. QR Subscription
In the QR Subscription option, all the QR groups which we have subscribed will appear here.
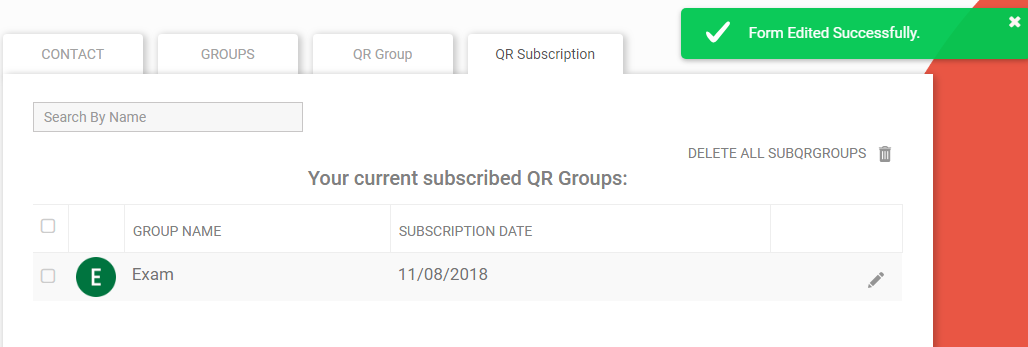
We have subscribed to a group Exam. So it will appear in our QR Subscription as shown below.
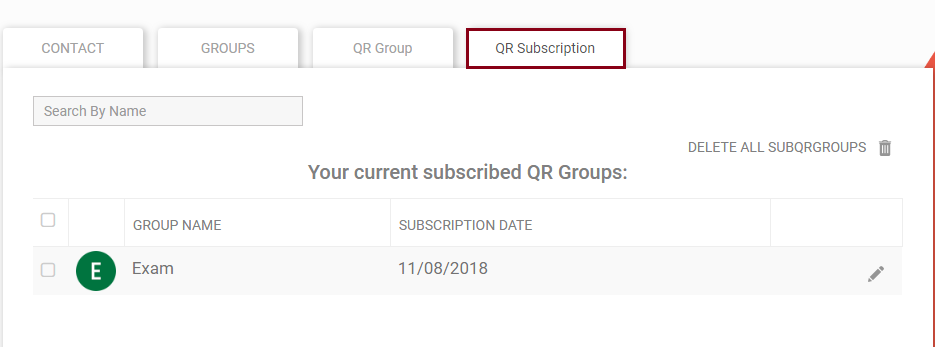
If we want to delete our QR Subscription group and don’t want to receive SMS notification from that group we can select the ‘Delete All Sub Groups’ option. If any modification or editing is to be done by us we can click on the pencil icon in the right side.
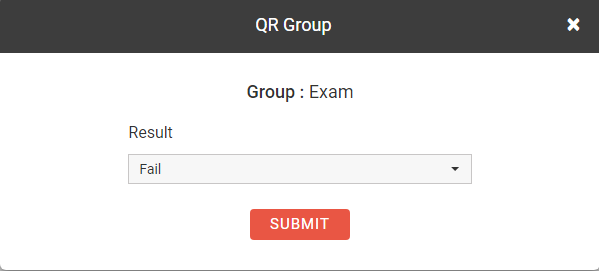
When we clicked on the pencil icon, a window appears on the screen as described below.
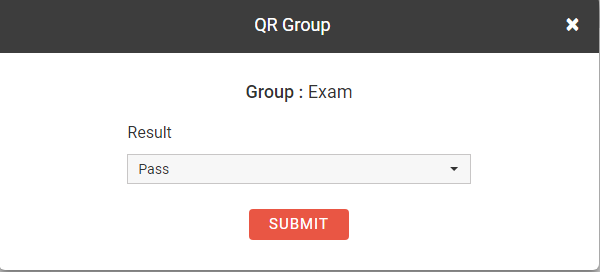
If we want to change the previously filled option we can select that and then click on the Submit button.
The form gets edited and the message appears on the right side of the screen.
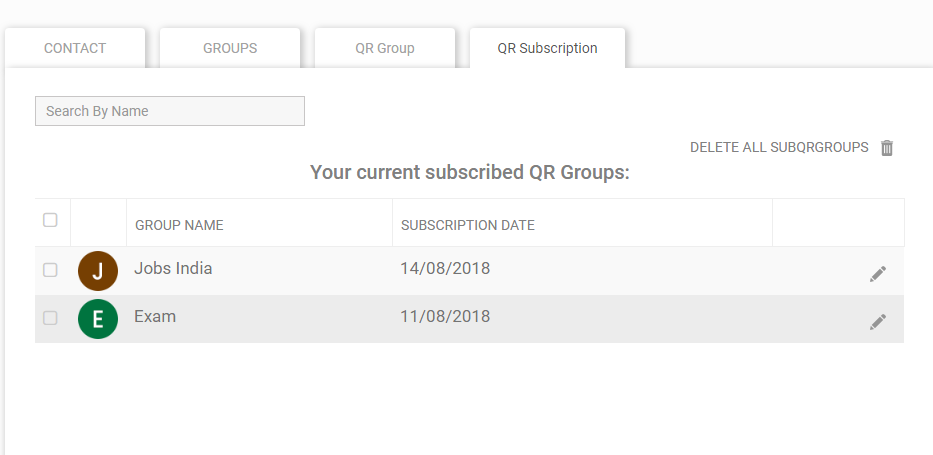
We have subscribed to one more group Jobs India.
If we want to delete subscription from a particular group we can click on the check box next to the group name and then select the delete icon.
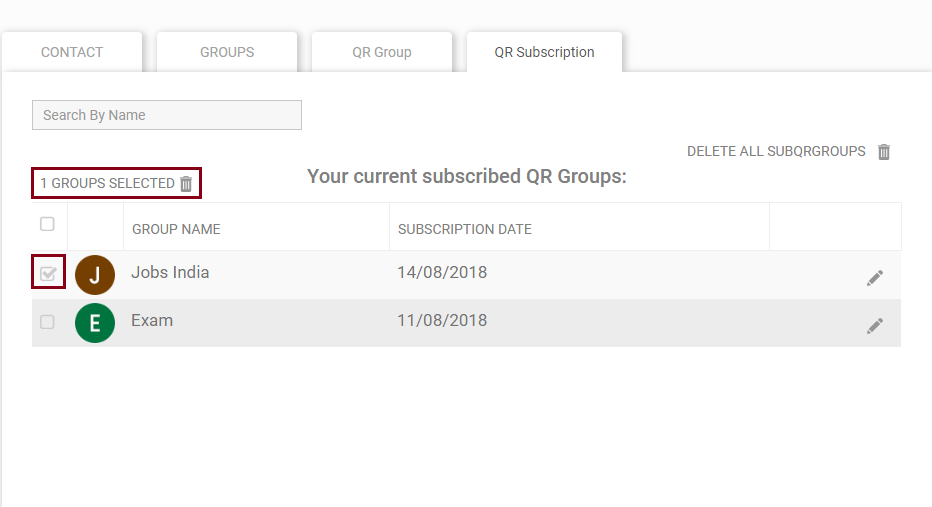
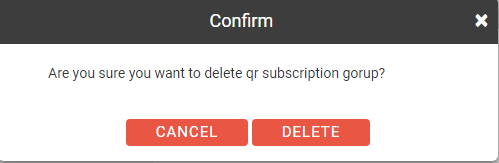
Click on the Delete button to delete the QR subscription. If you don’t want to delete it, press Cancel.
This way we can manage our QR Group Subscription.
Note : If a person wants to unsubscribe from a QR group and doesn’t want to receive SMS notifications from us, they have to create an account in Fast2SMS and then they can delete the required QR group.
This is how Address Book works.