
Bulk SMS campaigns can be much more effective when every recipient feels the spark of personalization in the message. Instead of sending the same text to everyone, you can include variables like the customer’s name, order ID or any other information directly from an Excel file.
In this article, you will get to know how can we define variables in Excel and their usage in Fast2SMS to create personalized message in just a few minutes.
Step 1: Format your data file properly
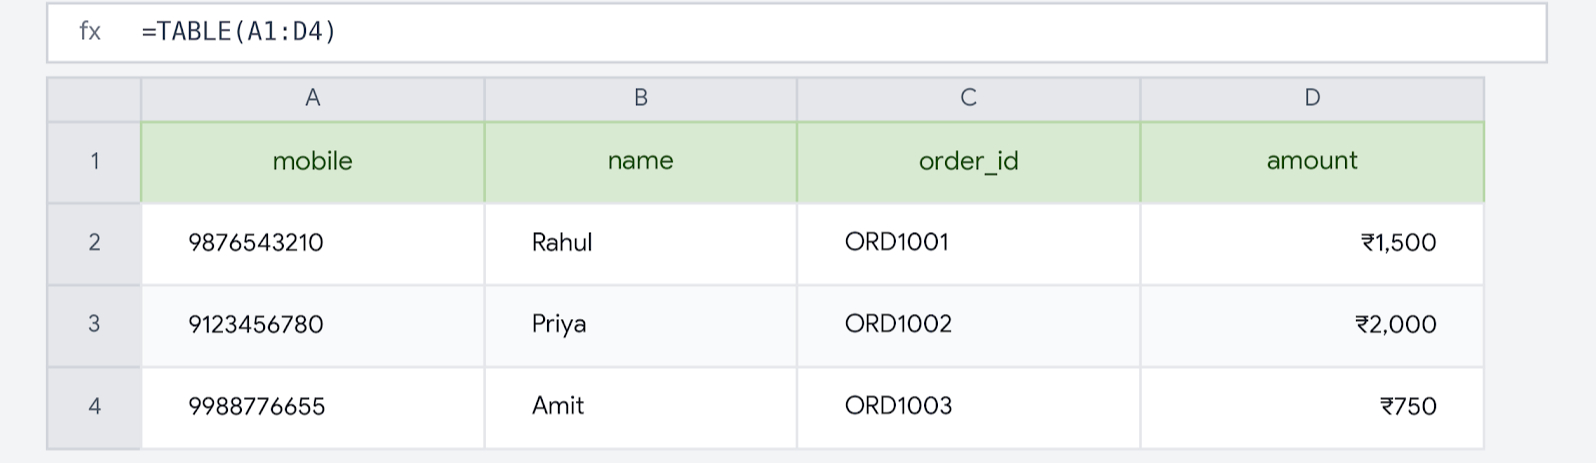
Everything starts with a clean spreadsheet. Open Excel and arrange your contact list into clear columns.
-
Use the first row strictly for column headers (e.g.,
mobile,name,order_id,amount). -
Ensure all phone numbers are valid 10-digit numbers without spaces, prefixes like
+91, or special symbols. -
Ensure there are no empty cells in columns you plan to use inside your message.
For example: 👇
Step 2: Open the Bulk SMS section
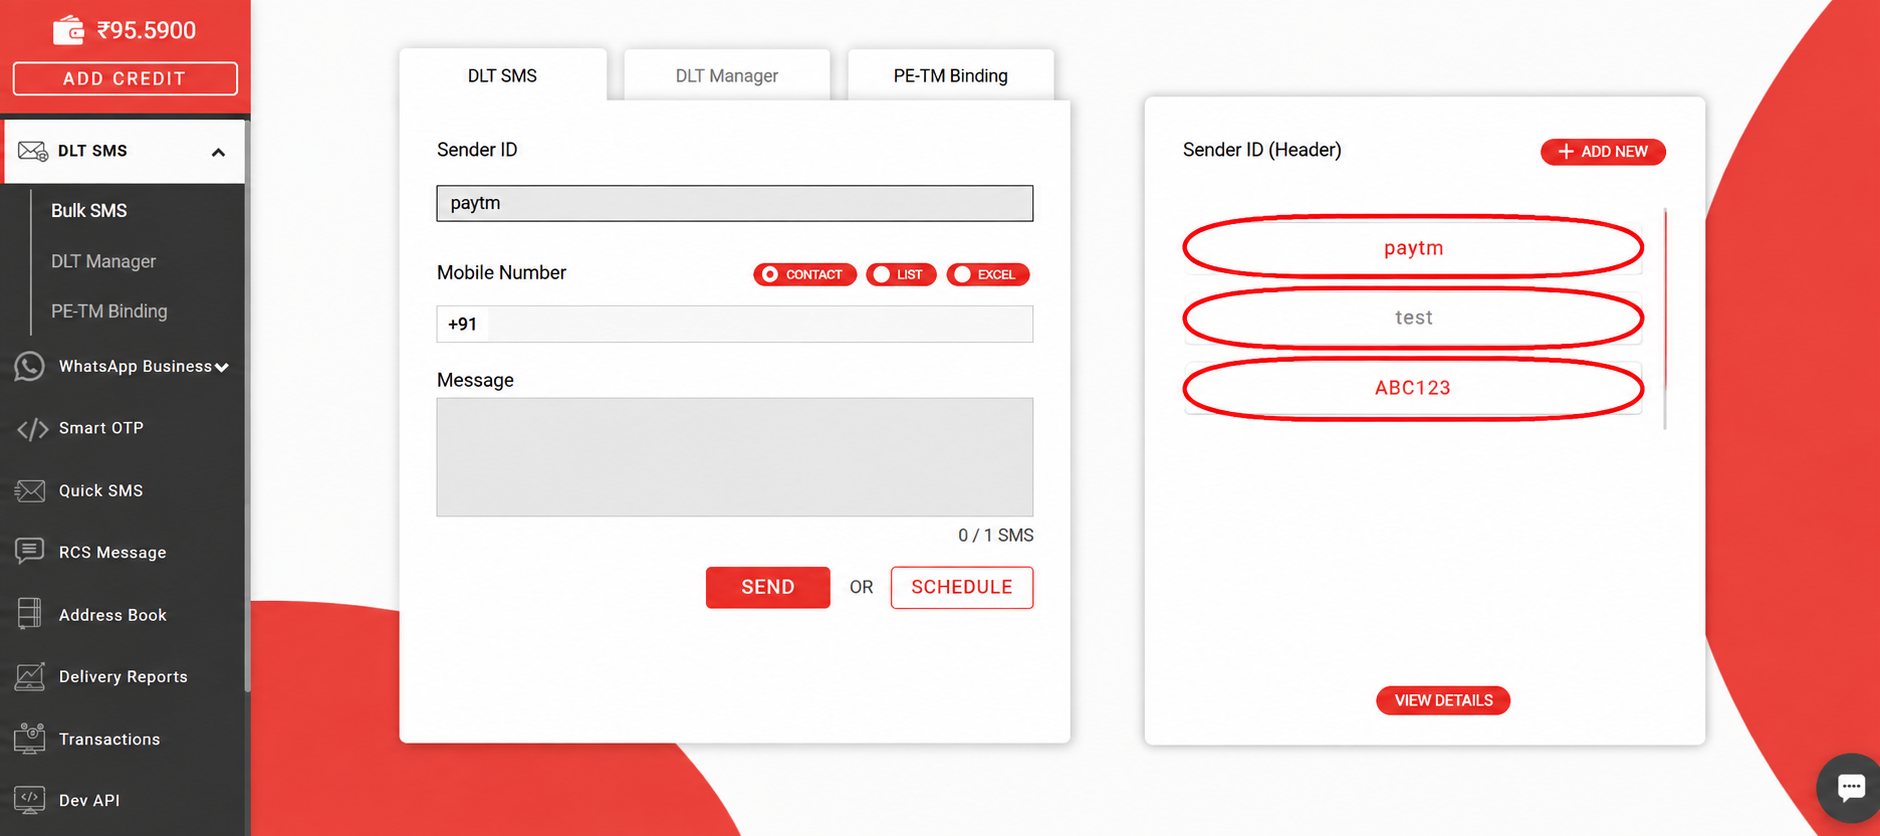
Sign in to your Fast2SMS dashboard. From the main navigation menu on the left, head into the Bulk SMS section and you will be redirected to DLT SMS.

Step 3: Choose your Sender ID and Template
Select your registered Sender ID. Next, pick the approved DLT template you want to send. Approved templates use variable placeholders, typically formatted as {#var#} where custom values will be inserted.
Template Text: 👇
“Dear {#name#}, your order {#order_id#} of Rs. {#amount#} has been confirmed.”
Step 4: Import your Excel Sheet
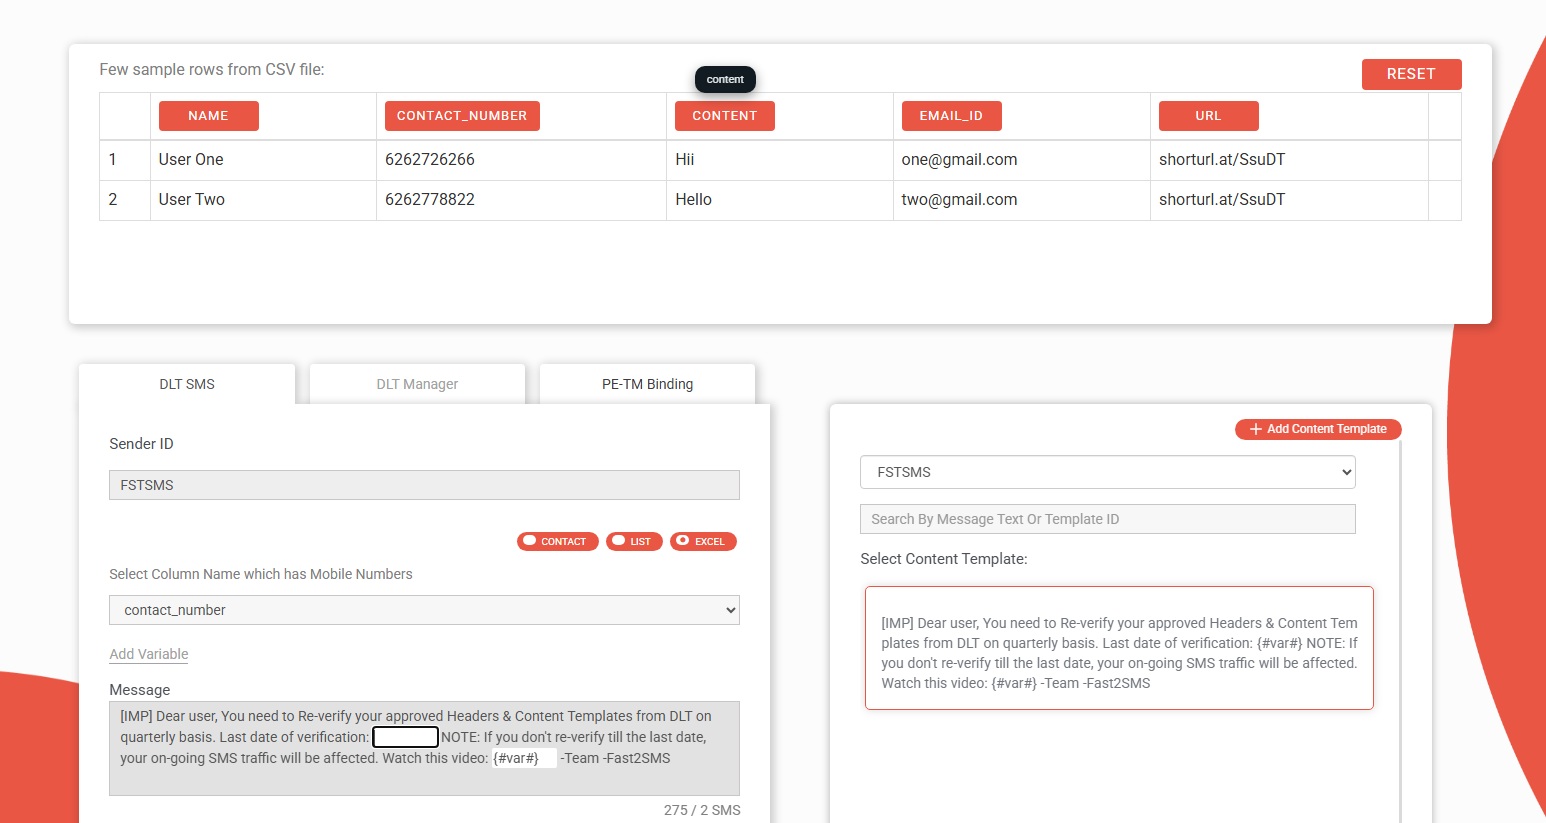
Select the option to upload or import your recipient list, then upload your saved .csv file. The Fast2SMS parser will read the file and automatically extract your header names (contact number, name, url) so you can connect them to the template in the next step.
Step 5: Map variables to column headers
Now, match the template placeholders with the respective columns from your uploaded file:
-
{#contact_number#}-> contact number -
{#name#}-> name -
{#url#}-> url
Double-check this mapping carefully. If you accidentally map {#contact_number#} to name, your recipients will receive broken or confusing messages.

Step 6: Verify with live previews
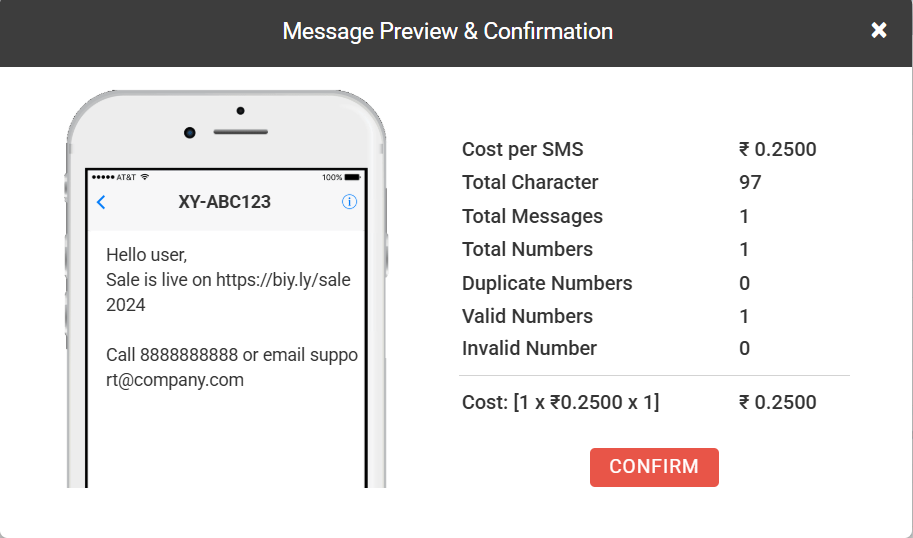
Before triggering the campaign, inspect the generated previews. Fast2SMS will show you what the actual message will look like for rows in your file:
-
Preview for Rahul:
“Dear Rahul, your order ORD1001 of Rs. 1500 has been confirmed.”
-
Preview for Priya:
“Dear Priya, your order ORD1002 of Rs. 2000 has been confirmed.”
Use this step to check for punctuation, proper spacing around placeholders, and accurate data mapping.
Preview of message preview: 👇
Step 7: Review parameters and send
Take a quick final check of the recipient count, selected Sender ID, and sample previews. Once satisfied, click Send. Fast2SMS will iterate through the dataset, dynamically populate the placeholders for each contact, and deliver each text.
Common issues to avoid
-
Template tampering: Do not modify any static words in the approved DLT template text. Any deviation from the registered phrasing will cause carrier level rejection.
-
Missing values: If a row has a blank space in a mapped column, that recipient’s text may either drop the text variable or fail delivery altogether.
-
Character counts: Dynamic data varies in length. A long customer name or multi digit ID can push your text beyond the standard 160-character limit, splitting it into a multi SMS and consuming extra credits.