To send bulk RCS messages in Fast2SMS, open Bulk RCS, choose your approved RCS bot, add the mobile numbers, pick a message type (Plain, Rich, Carousel or Media), check the cost and click Send. This guide walks through each step, explains the limits for text, buttons and media, and lists the errors you may see.
It is for businesses that already have an approved RCS brand. If you have not registered yet, the panel takes you to Create RCS first.
Before you start
- An approved RCS bot. The bot list only shows brands that the operator has approved and that are active. While approval is pending, the page shows “Your RCS brand is pending approval. You cannot send RCS messages until it is approved.”
- Wallet balance for the whole campaign. Use Add Amount at the top of the panel.
- Customers who opted in to hear from your brand. Personal messages are not allowed on RCS.
- Indian mobile numbers: 10 digits starting with 6, 7, 8 or 9 (with or without +91).
How to send bulk RCS messages in Fast2SMS
-
Open Bulk RCS
Switch to RCS from the app menu at the top left and click Bulk RCS in the sidebar. The page is called RCS SMS. On the right, the FEATURES box shows your current per-message cost and the rules for the bot type, for example “Open Template (No DLT Approval)” and “Max 4 promo RCS/number/month”.
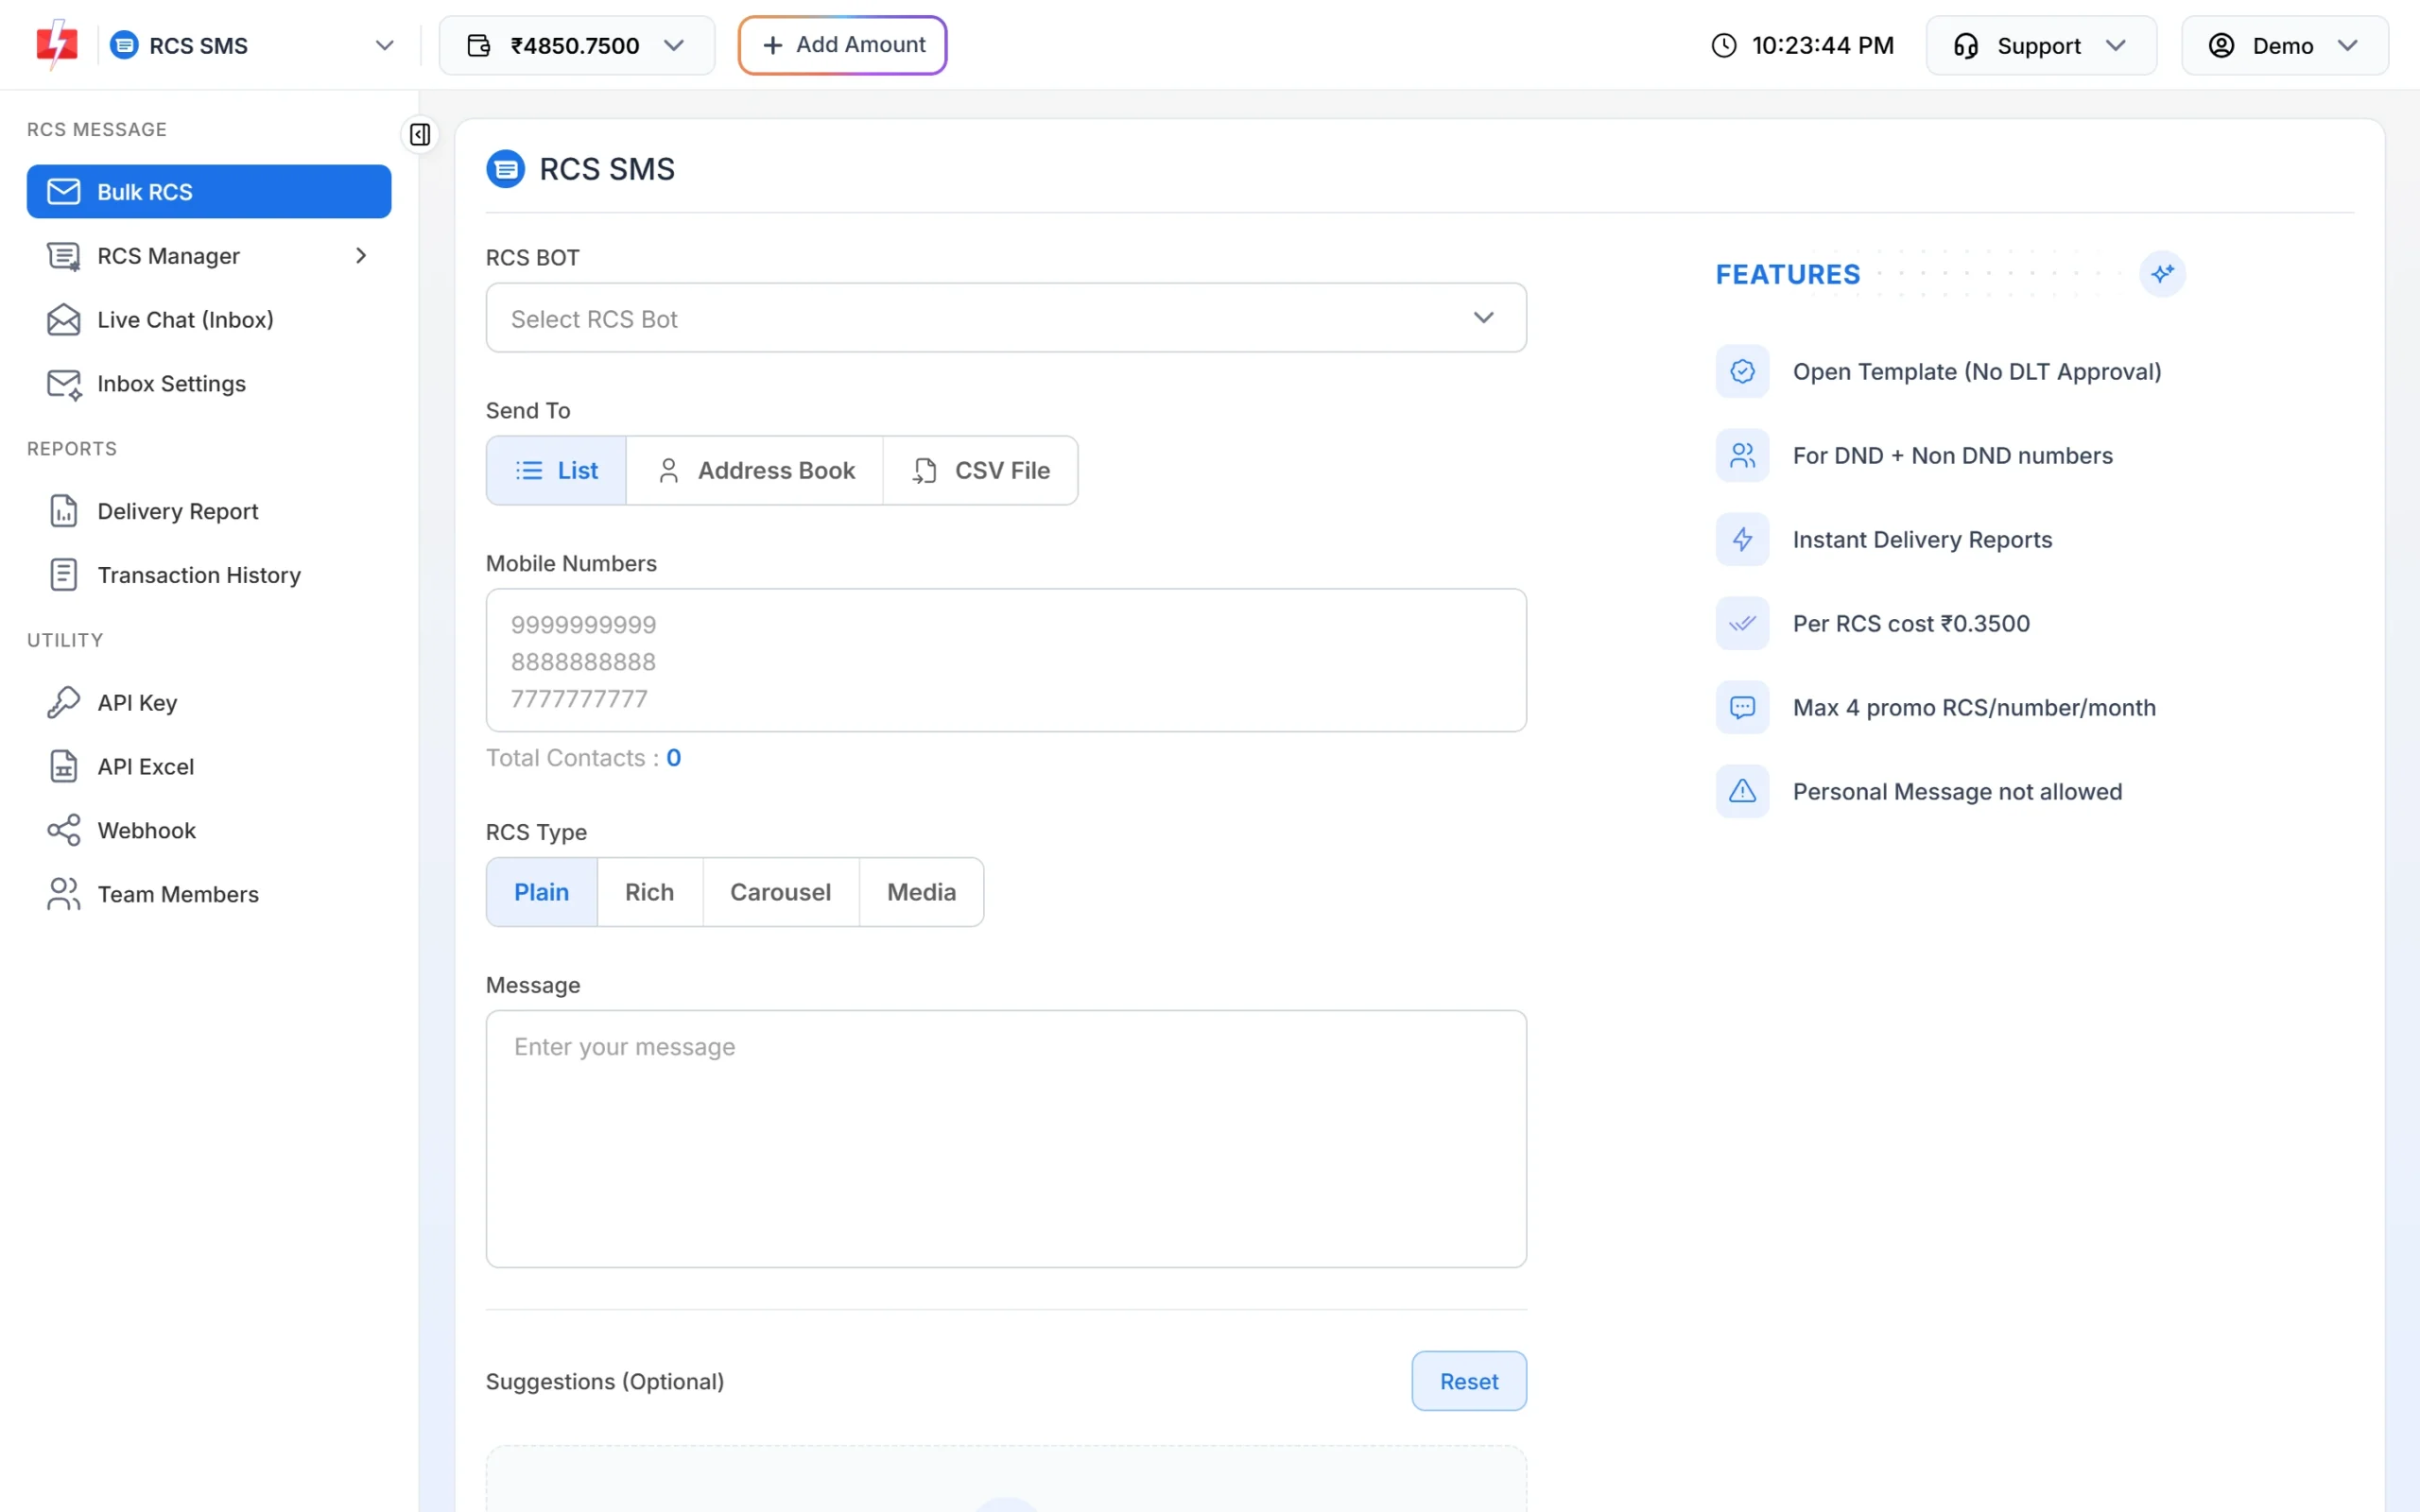
The Bulk RCS form. -
Choose your RCS bot
Click RCS BOT. Each bot is listed with its category in brackets, such as (Promotional) or (Transactional). Pick the one that fits the message. Offers and sale messages go from a promotional bot. Order, payment and service updates go from a transactional bot. Use Add New RCS Bot to register another brand.
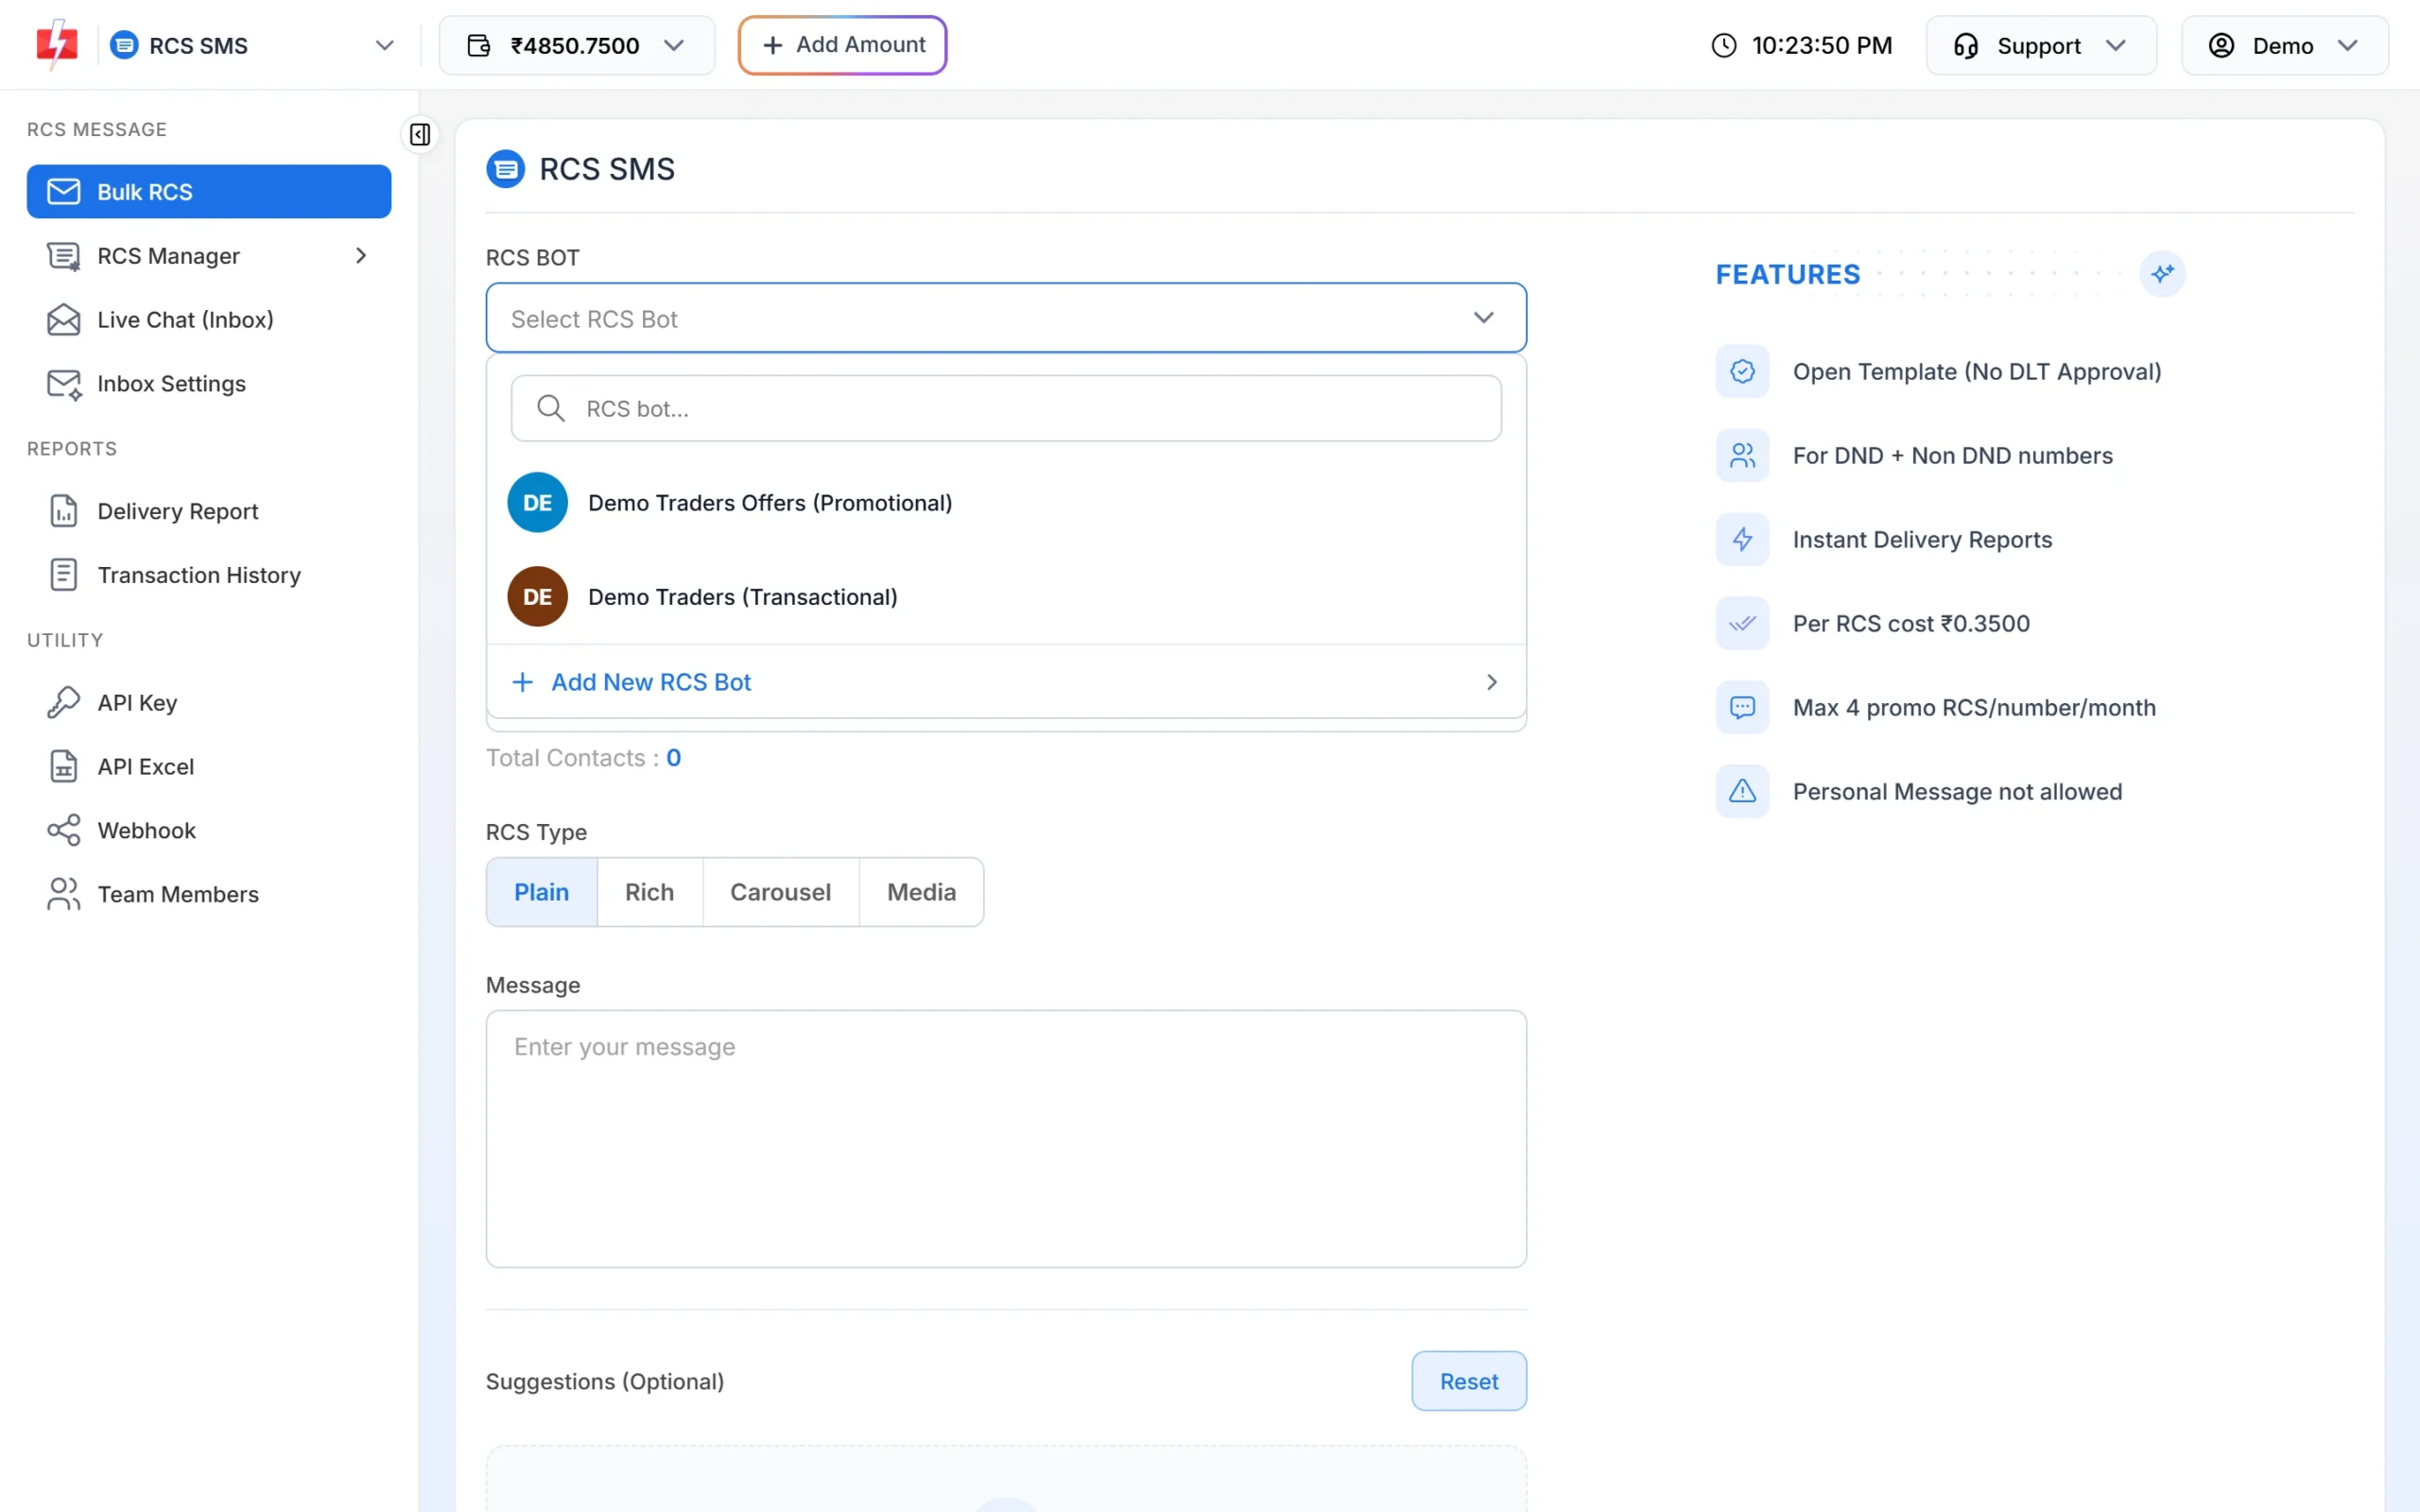
Only approved, active bots appear here. -
Add the mobile numbers
Under Send To you have three ways:
- List: type or paste numbers, one per line. Total Contacts updates as you add them.
- Address Book: pick saved contacts or whole groups.
- CSV File: upload a file (up to 20 MB) and choose the column that has the numbers. Download Sample CSV for the format.
Duplicate and invalid numbers are removed before sending, so you are not charged for them.
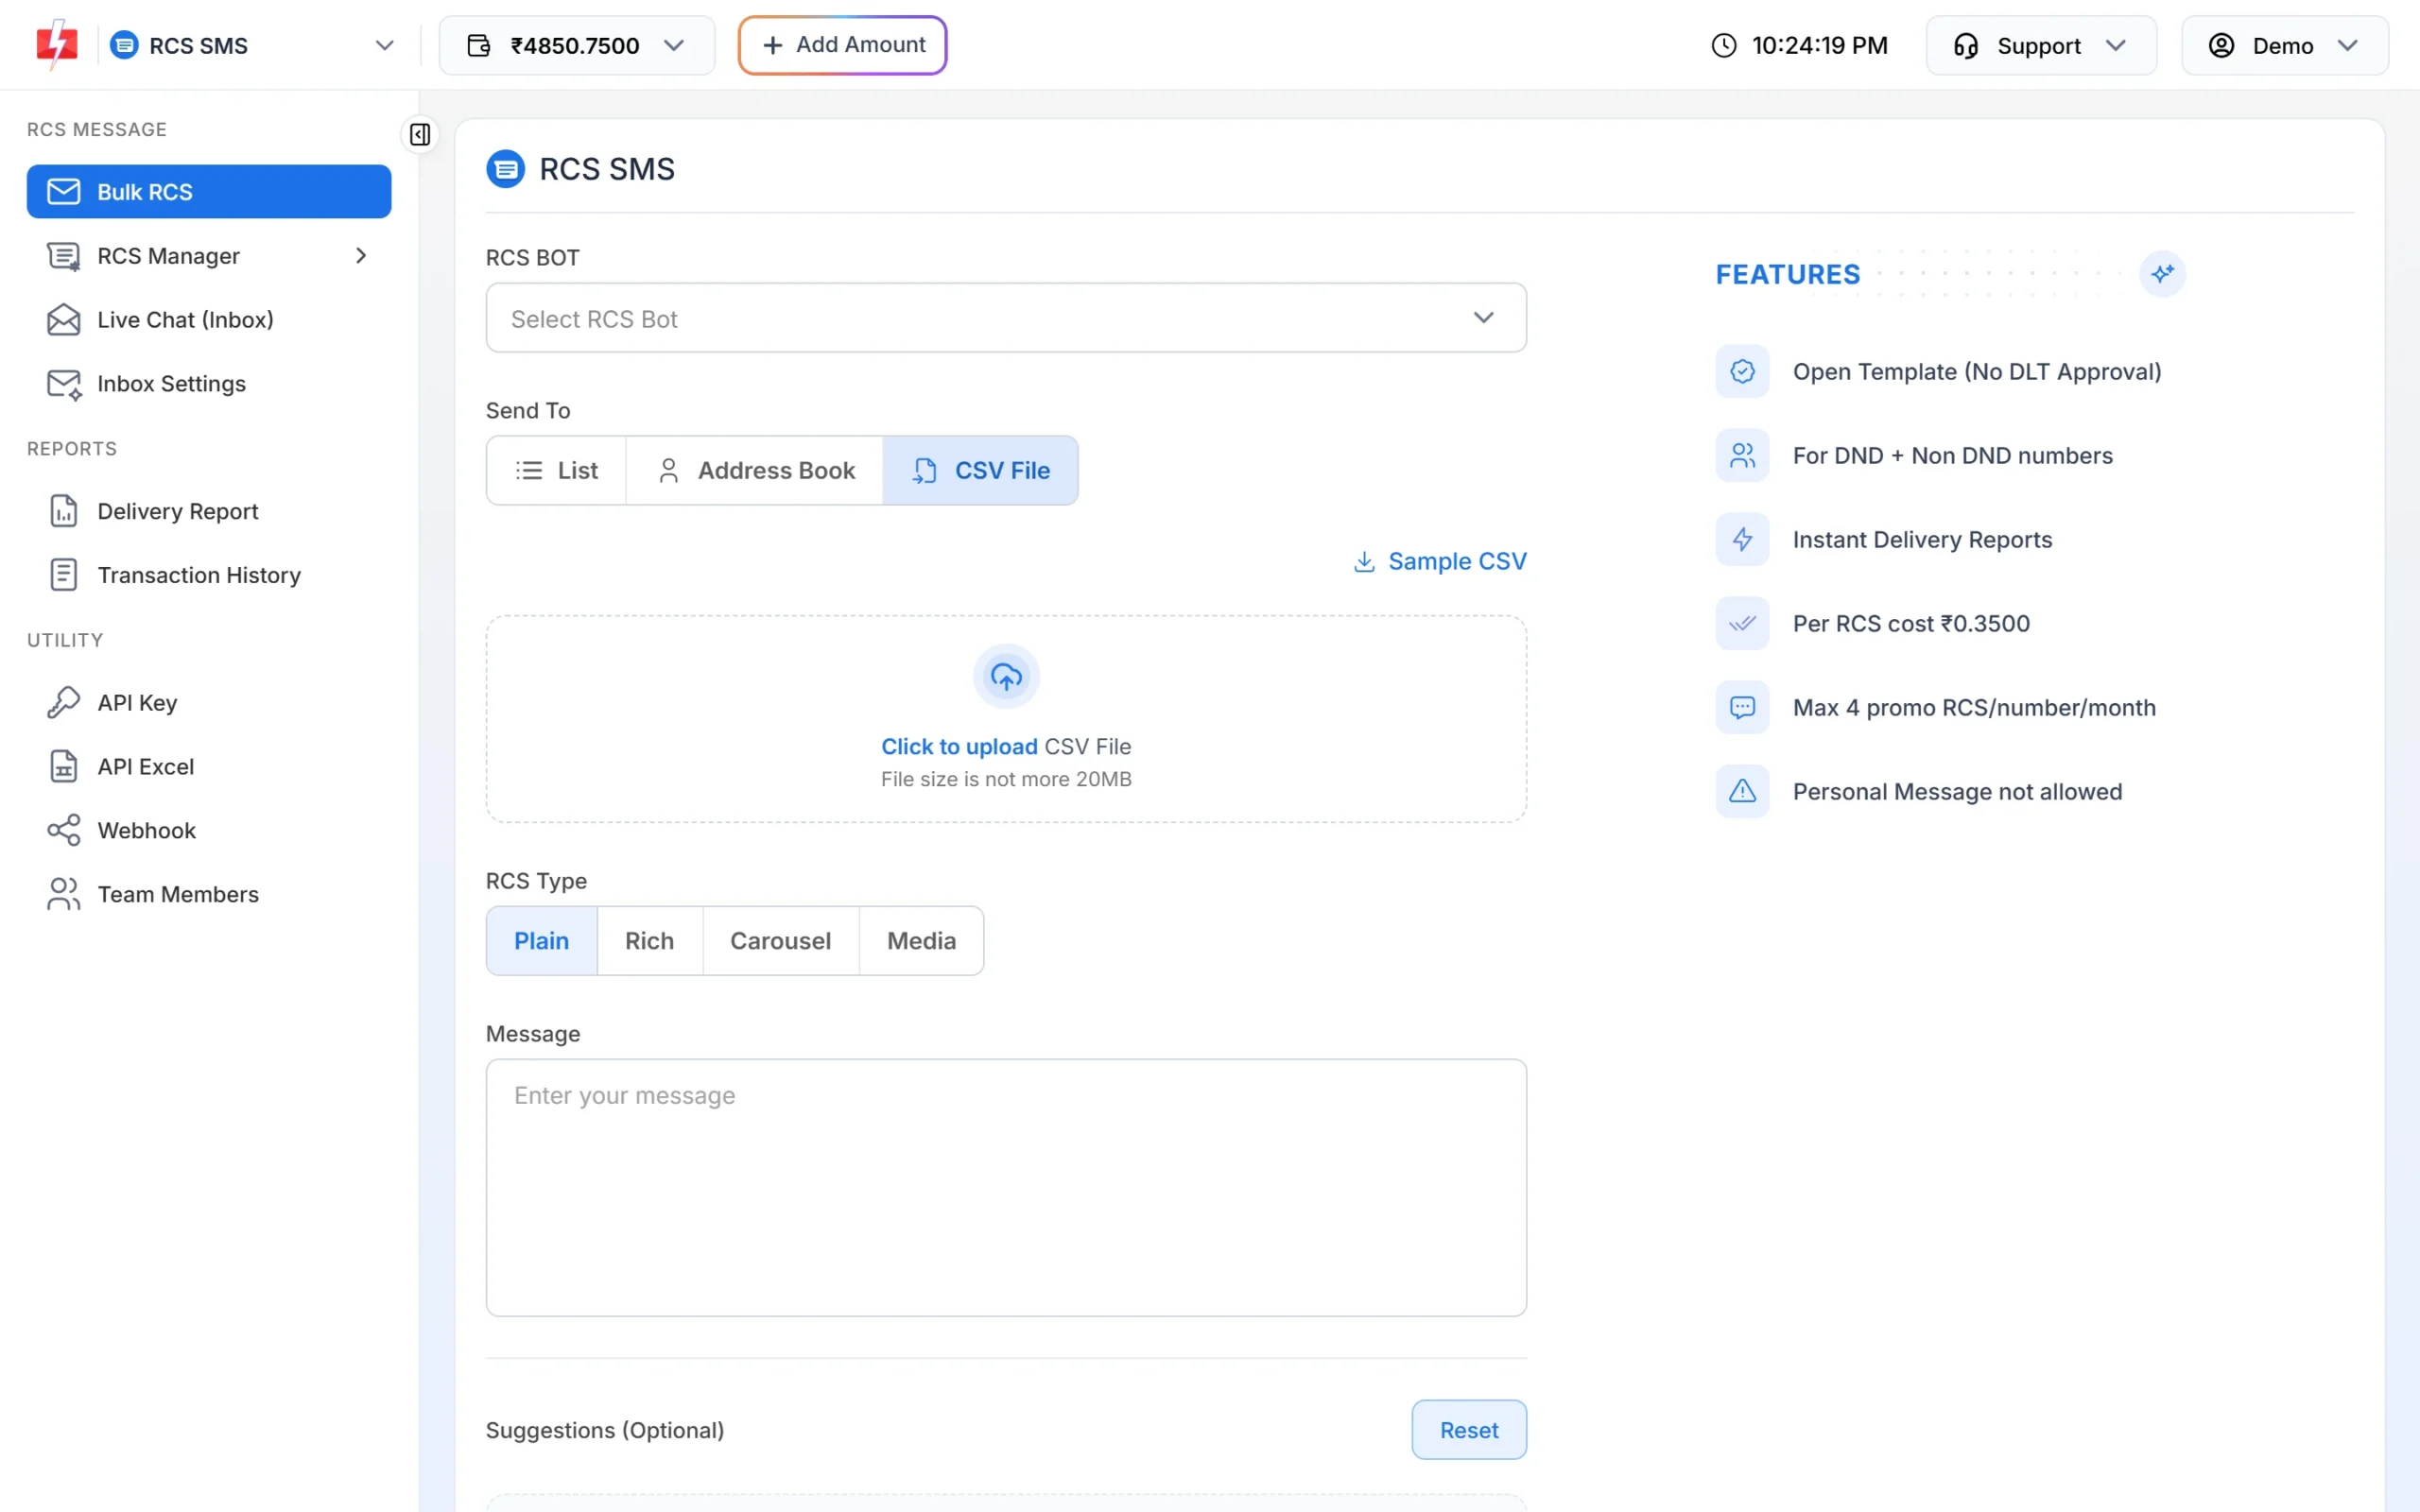
Upload a CSV file when the list is long. -
Pick the RCS Type and write the message
Choose one of the four types under RCS Type. Each is explained in the table below. For Plain, just type the message. For Rich, add an optional Title, the Message and an optional image, video, audio or PDF under Media (optional).
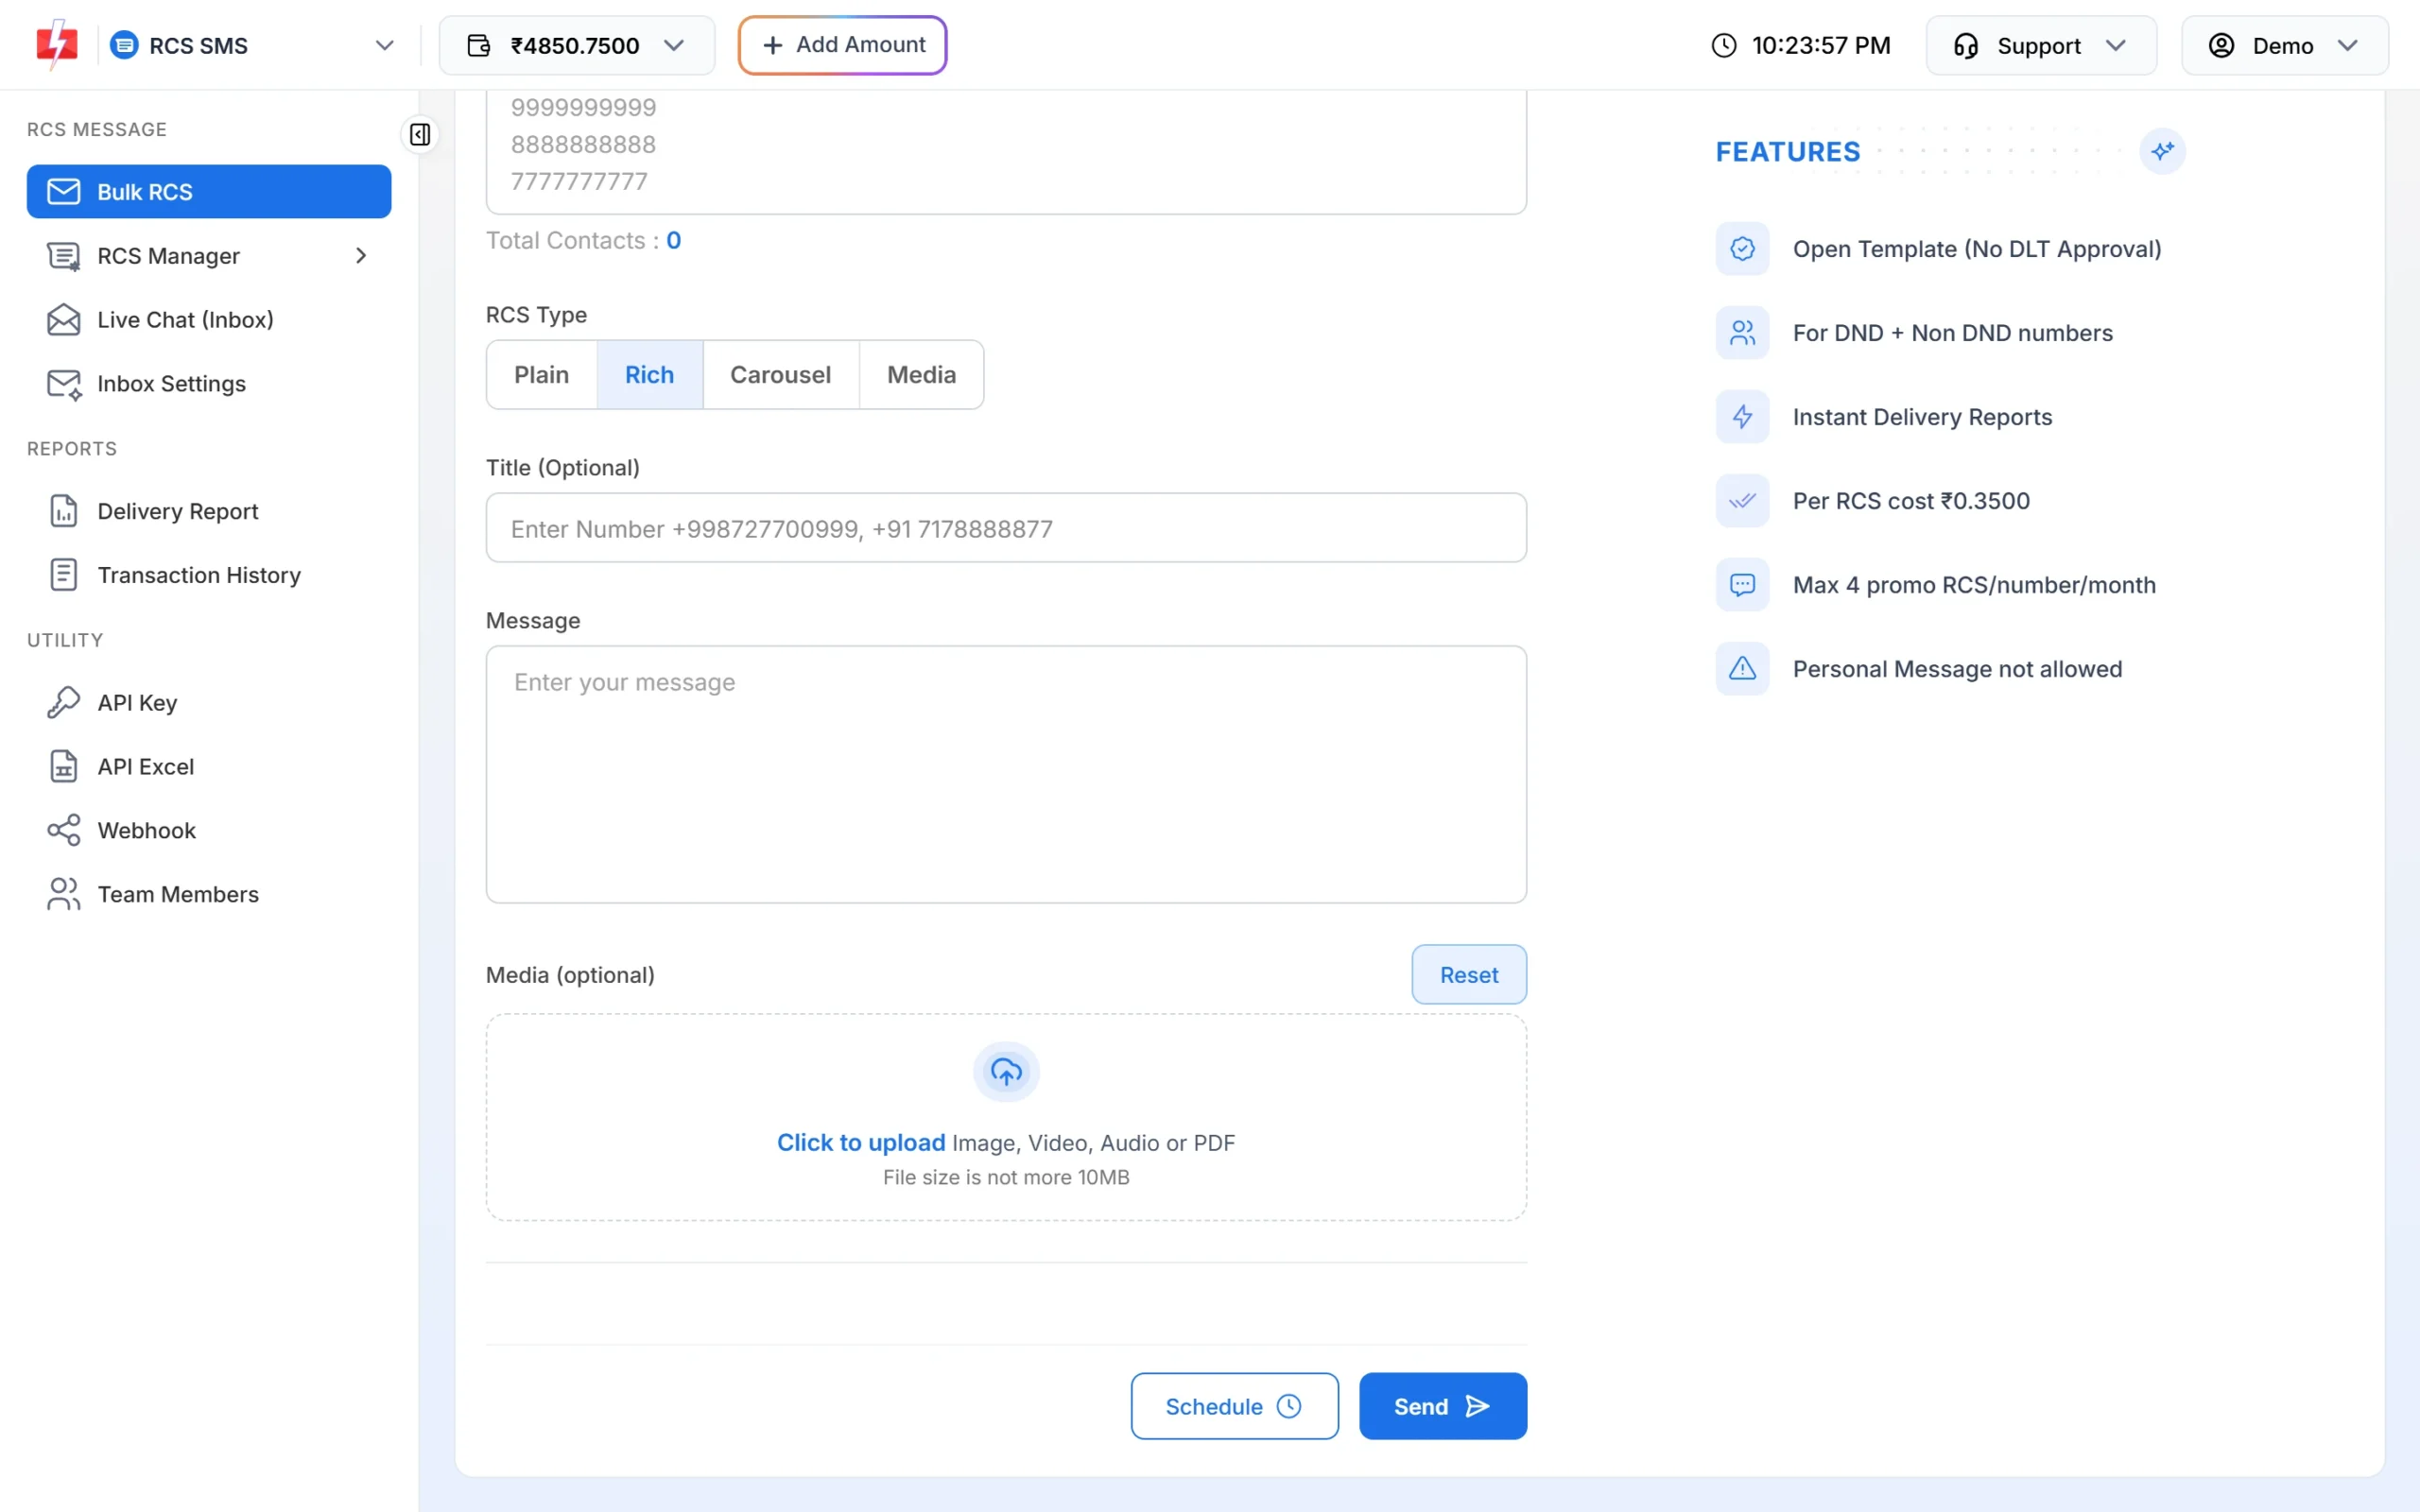
A Rich message: title, text, media and buttons. -
Build a carousel or a media message (optional)
For Carousel, fill each card: Card Title, Card Description, Card Media and its own suggestions. A carousel needs 2 to 10 cards. For Media, upload up to 10 files under Multiple Media. The Media type has no buttons.
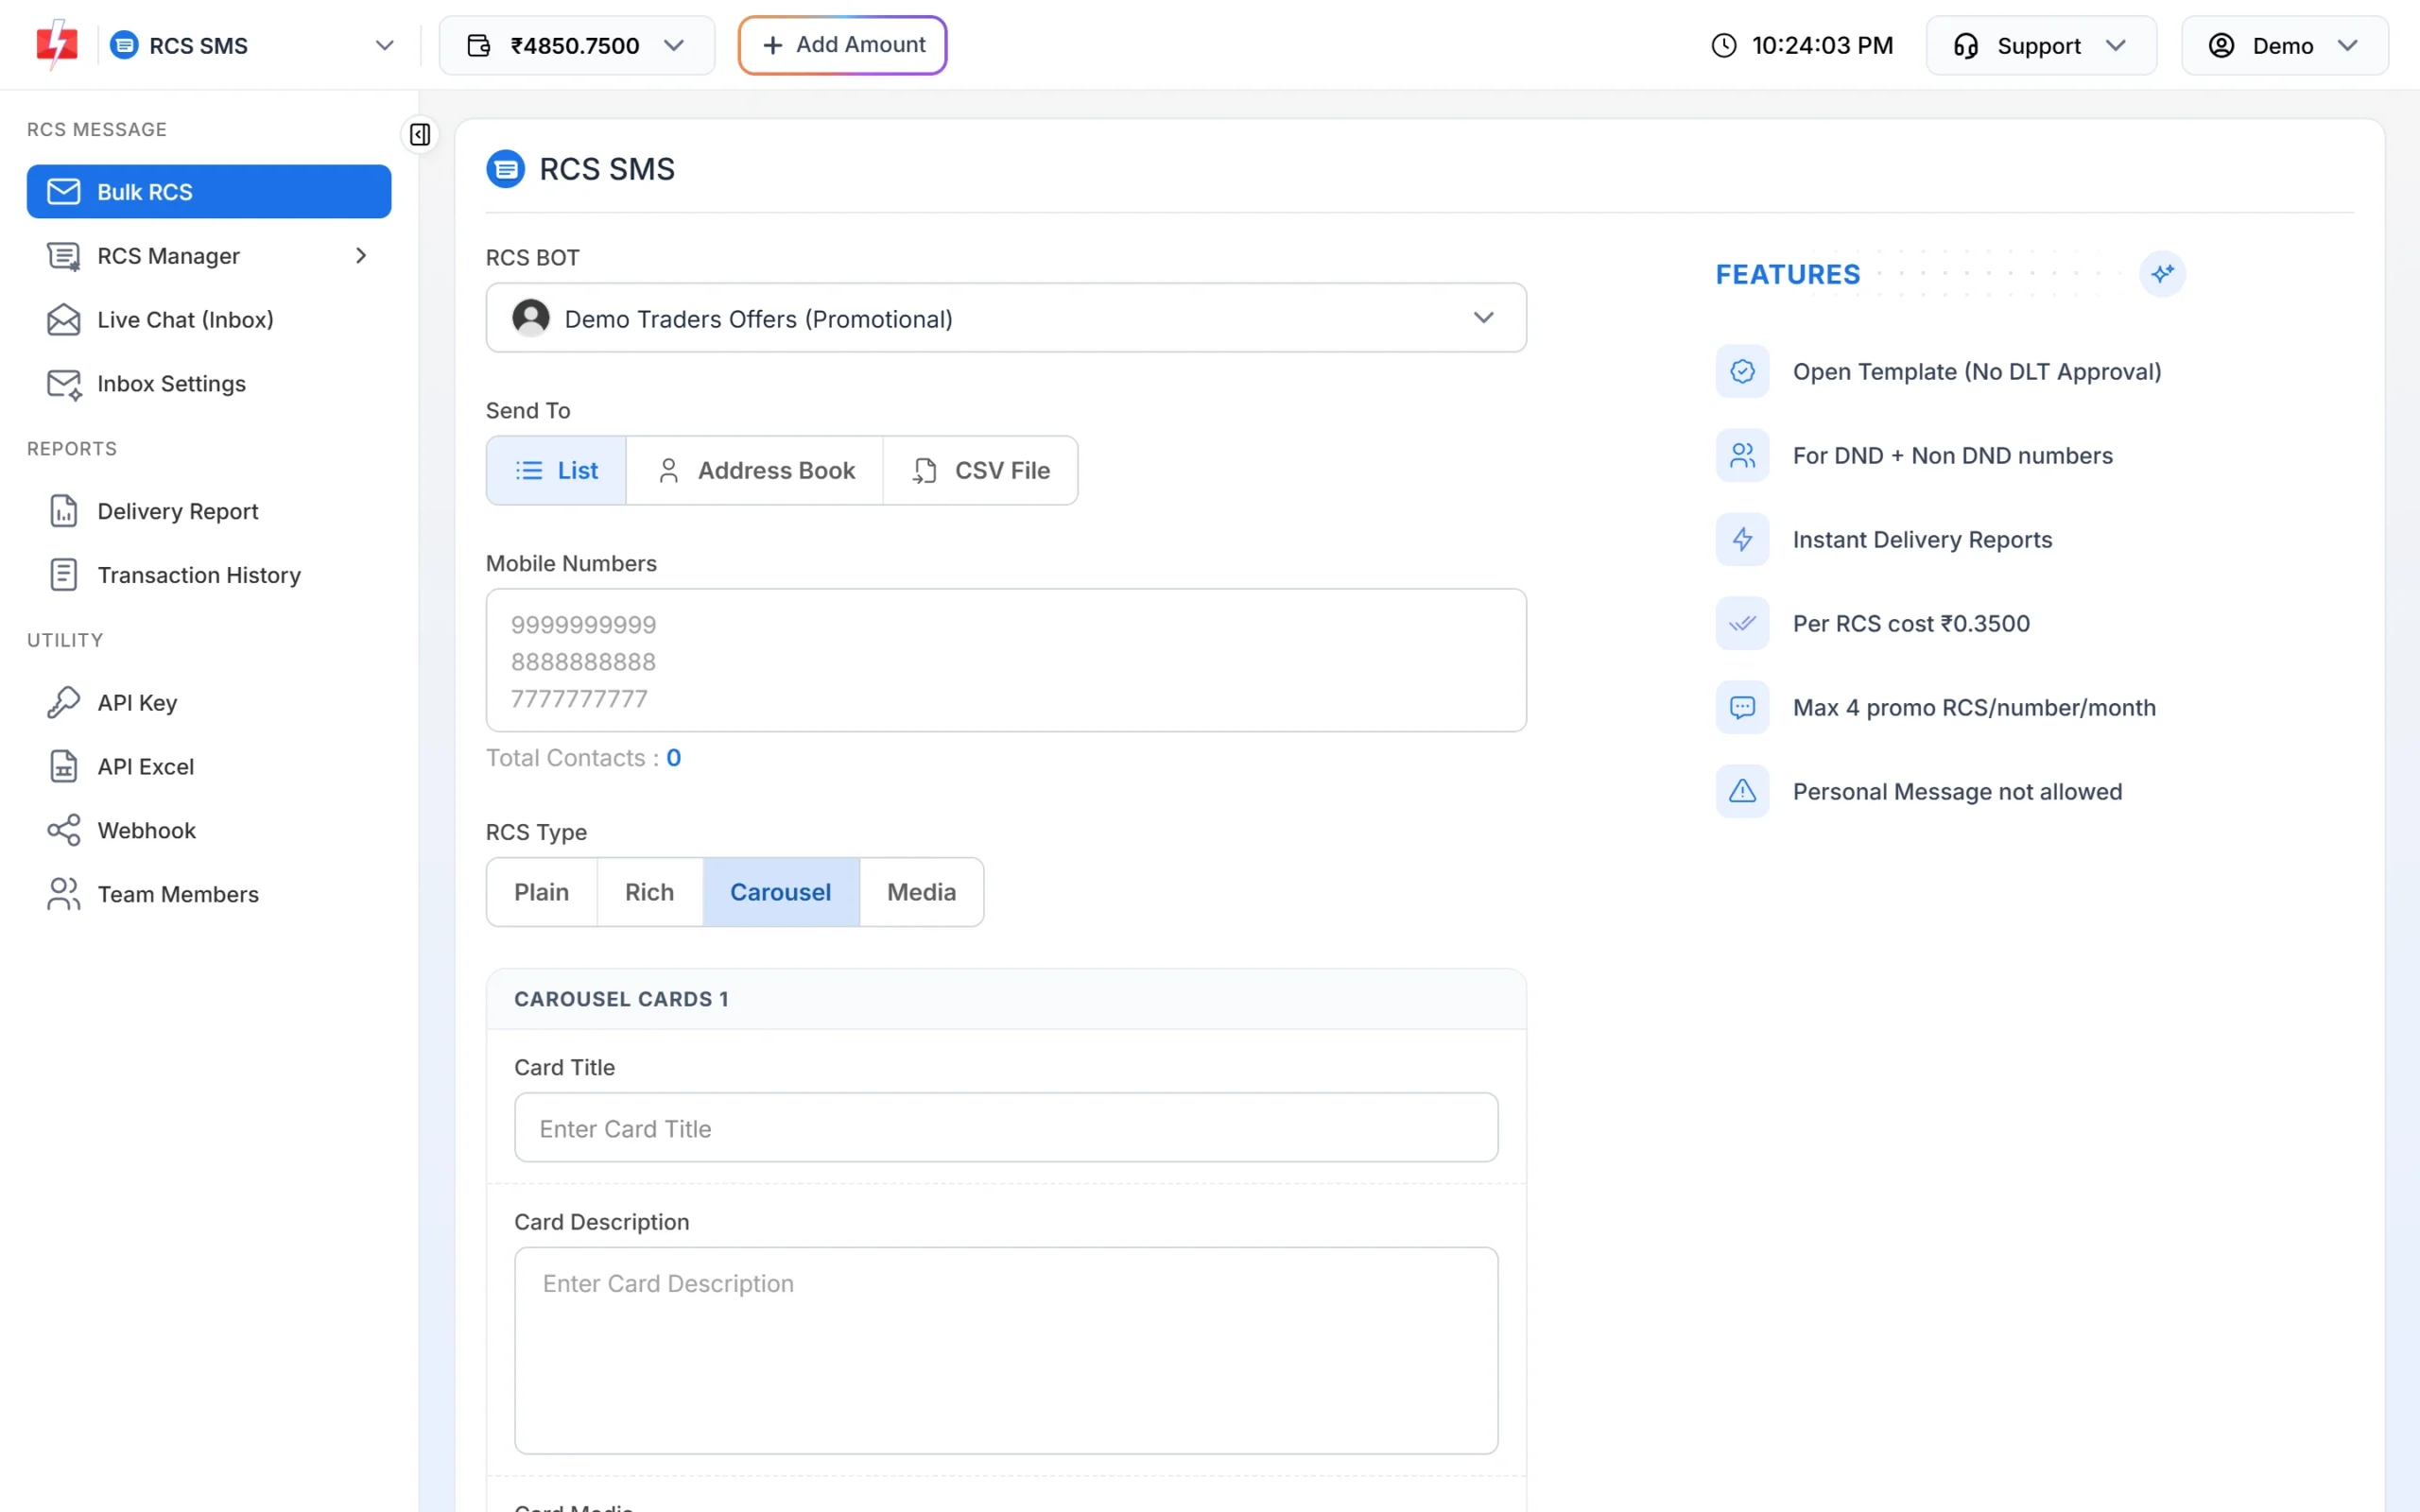
Each carousel card has its own title, text, media and buttons. -
Add buttons (Suggestions)
Click Add Suggestion and pick an Action Type: Open URL, Dial a Number or View Location. You can add up to 4 buttons per message (or per carousel card), and button text can be up to 25 characters. For Dial a Number, +91 is added for you. On a Rich message, buttons appear after you add media. Click Reset to remove them all.
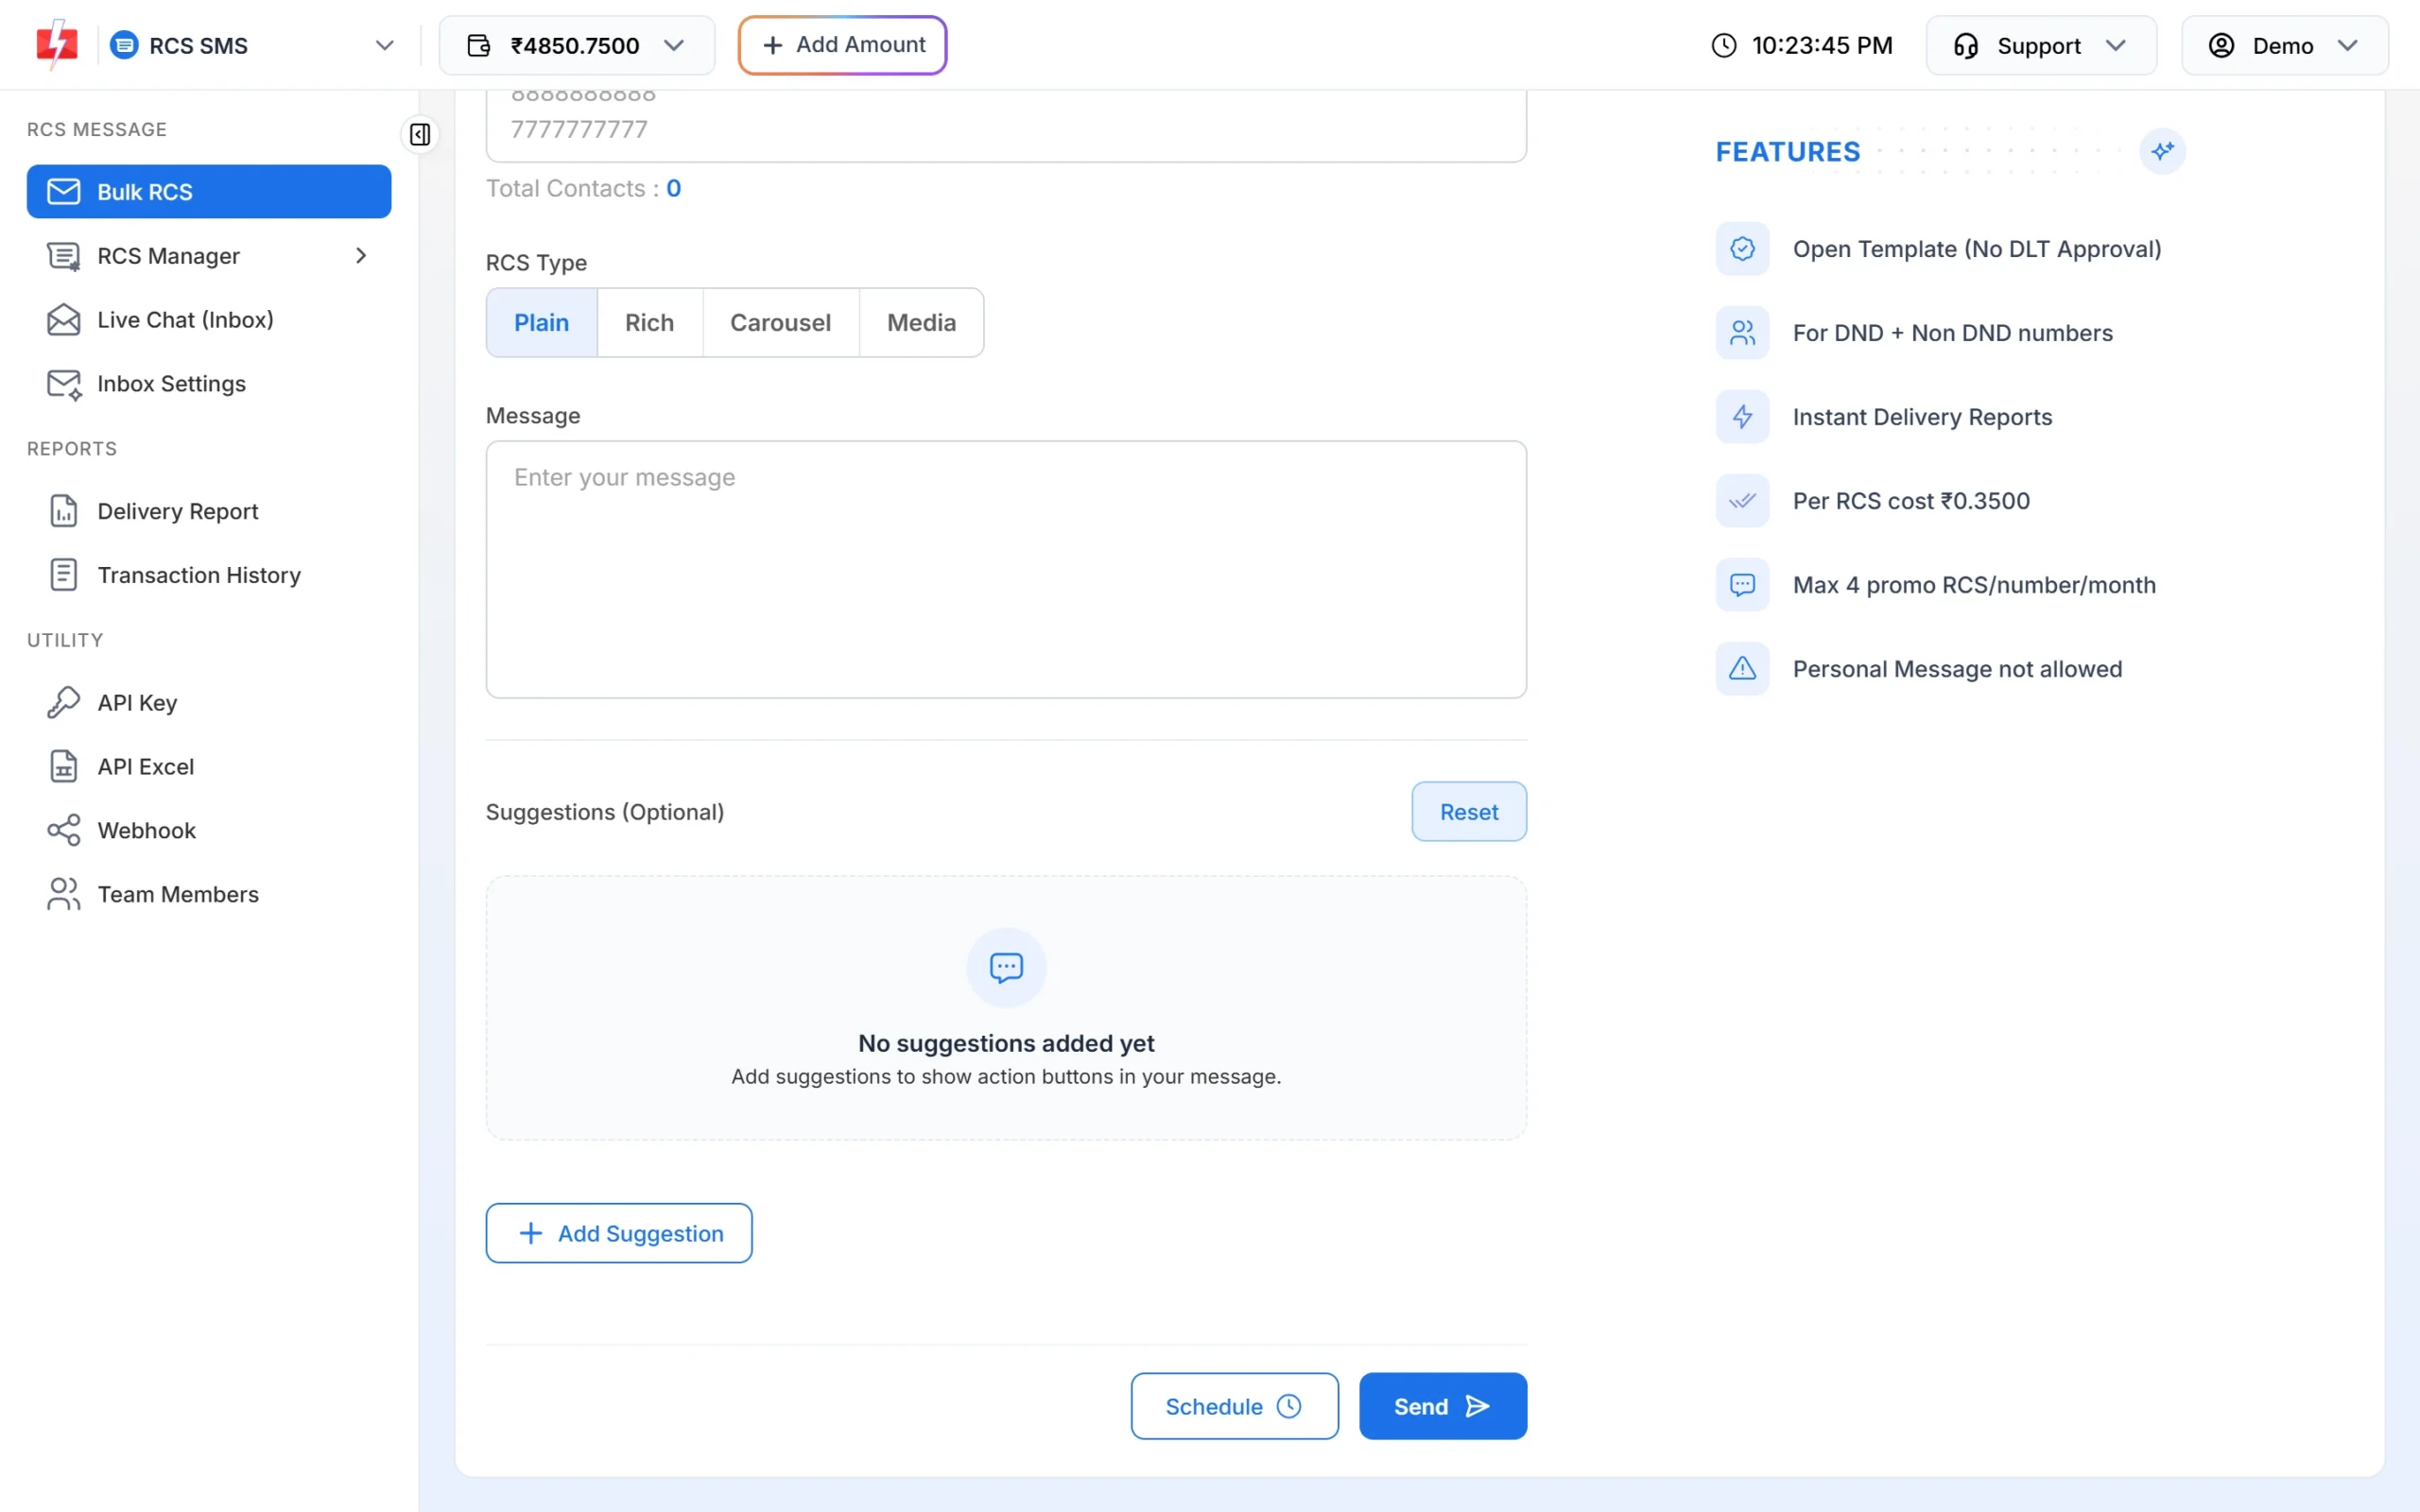
Buttons let customers open your site or call you in one tap. -
Reuse a message you sent before (optional)
Click Select Previous Template to open your last sends for a bot. Filter by All, Plain, Rich, Carousel or Media, or search by text, then pick one to fill the form. You can also go to RCS Manager > Previous Template and click Test Template on any card.
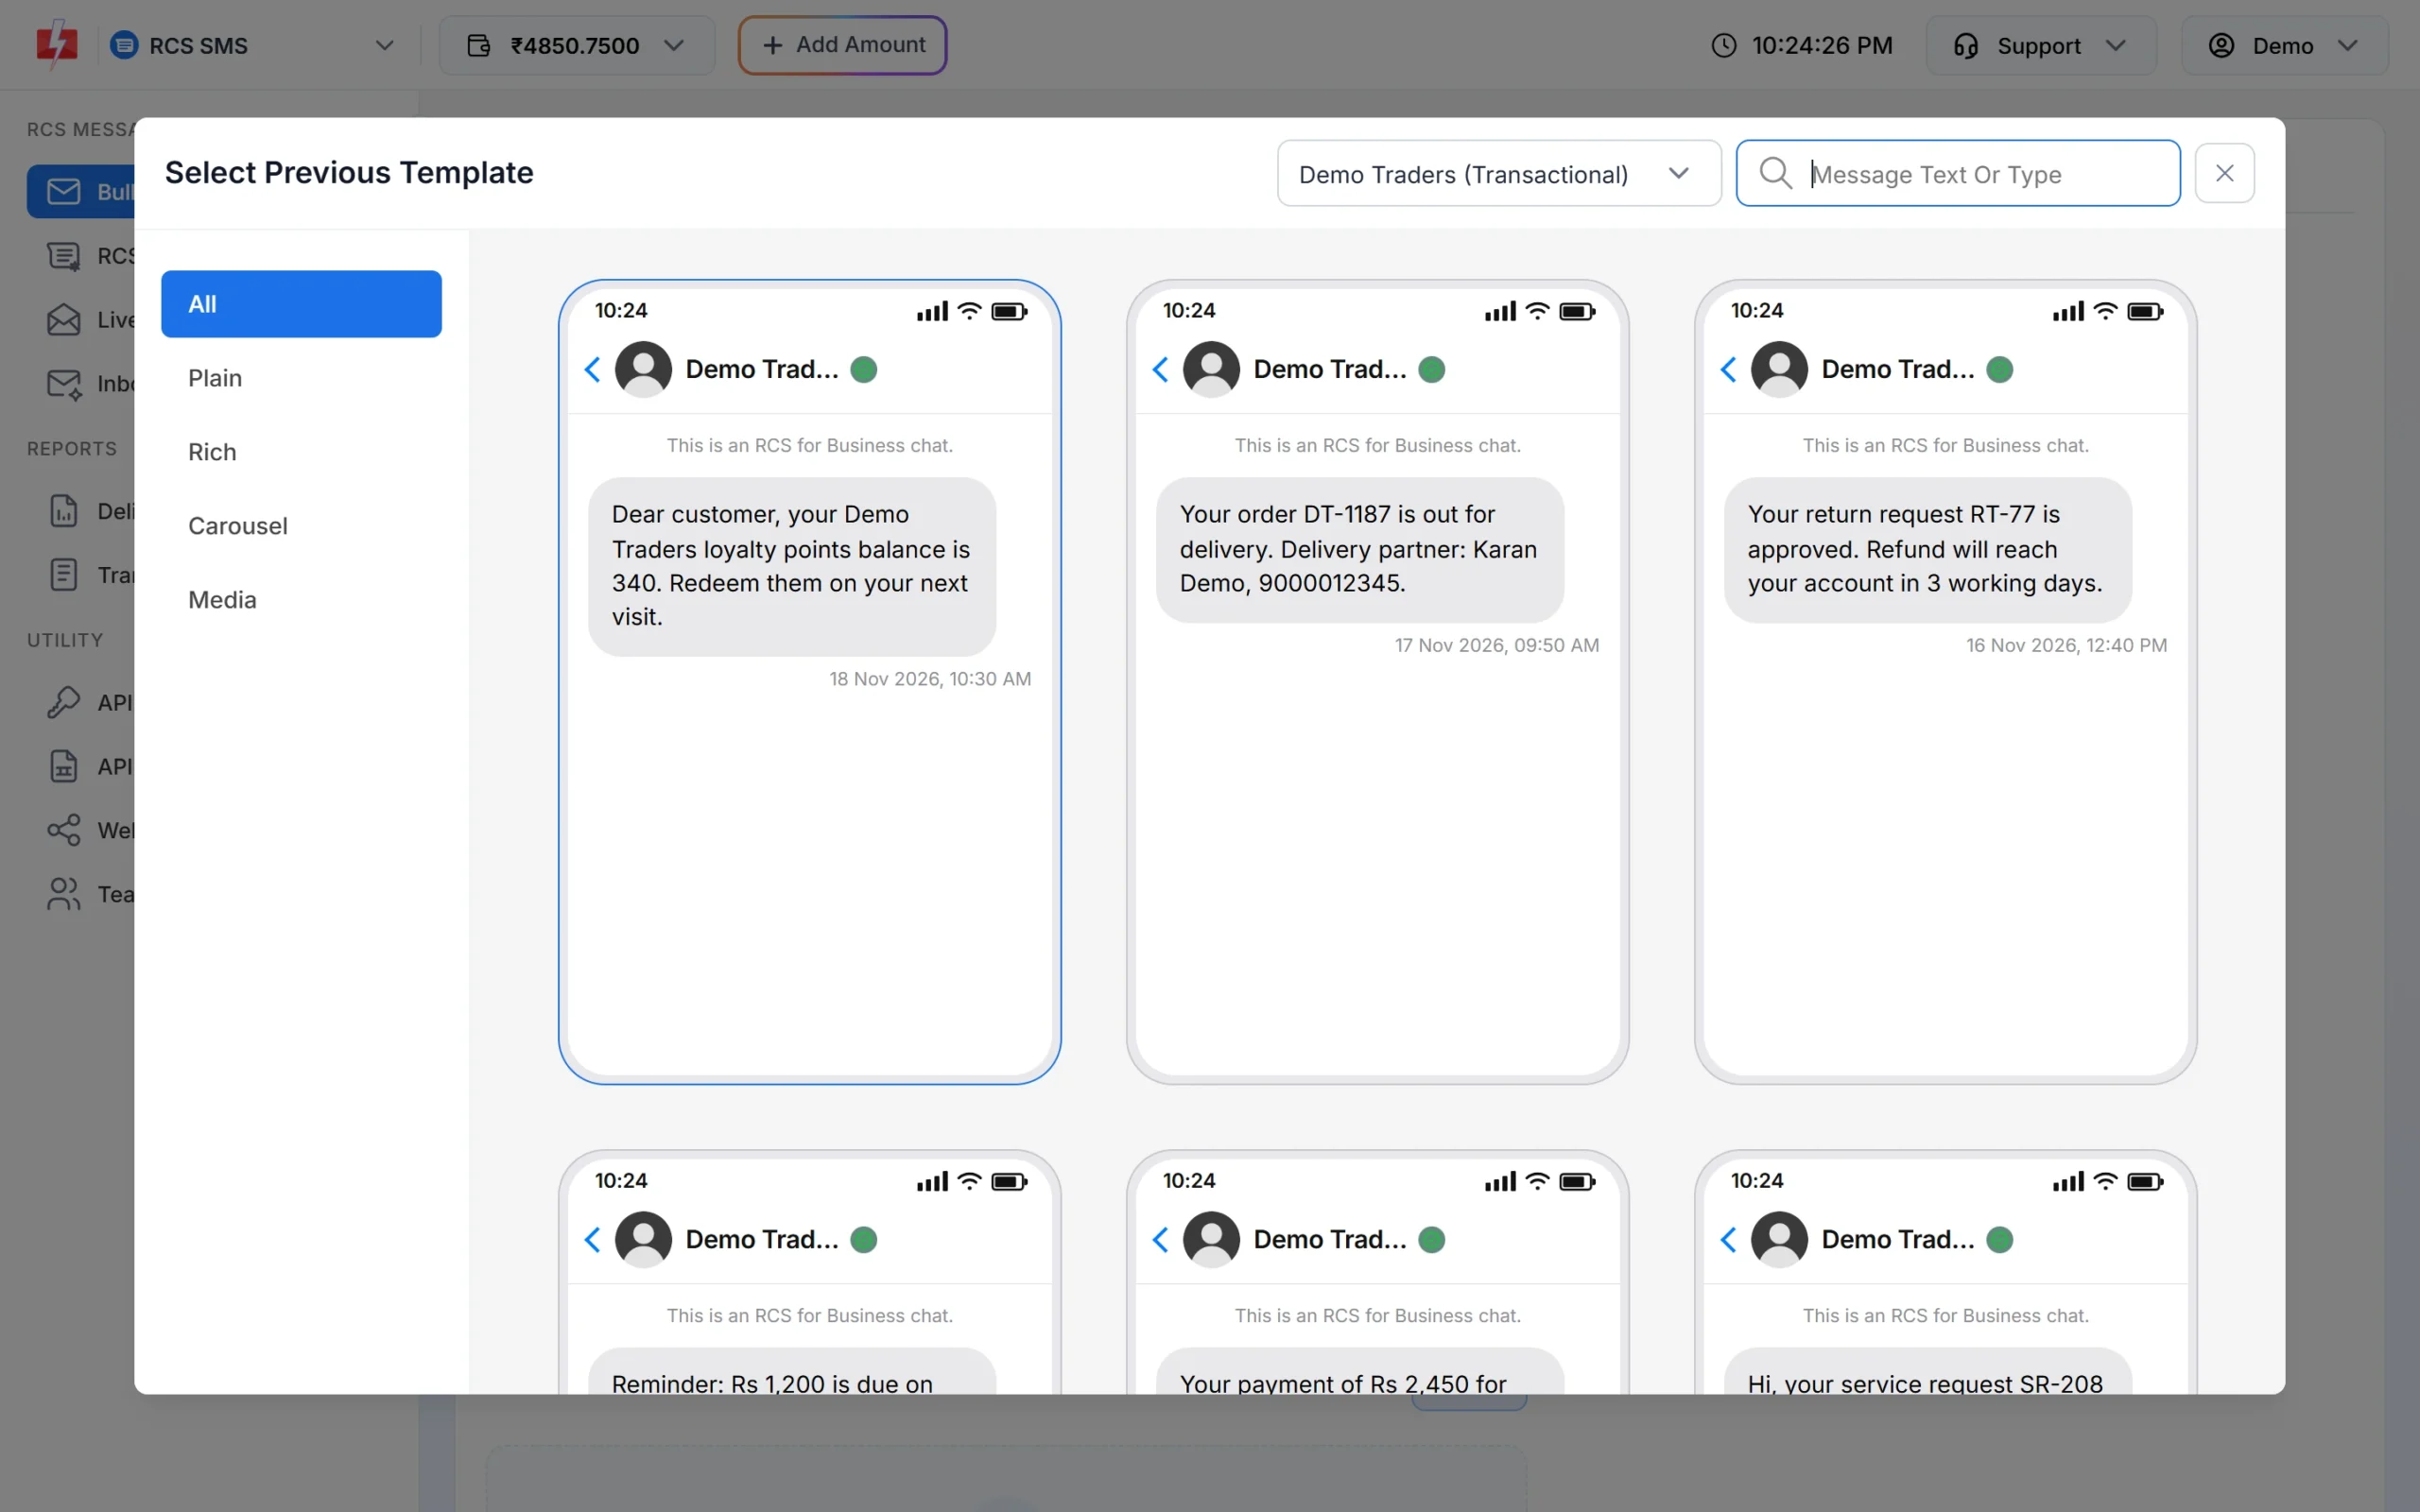
Earlier messages shown as phone previews. -
Check the cost, then send or schedule
Click Send. The Message Preview & Confirmation popup shows Cost per RCS, Total Messages, Total Numbers, Duplicate Numbers, Valid Numbers, Invalid Number and the total cost. Click Confirm & Send. To send later, click Schedule, pick a date and time at least 1 minute ahead, and confirm with Confirm & Schedule.
The amount is taken from your wallet when you send. You will see it in Transaction History as “RCS (N Message)”.
-
Track delivery
Open Delivery Report > RCS Report. Each campaign shows its status and a Download button. Click a row to see every number with Delivered, Read, Sent, Failed or Non-RCS.
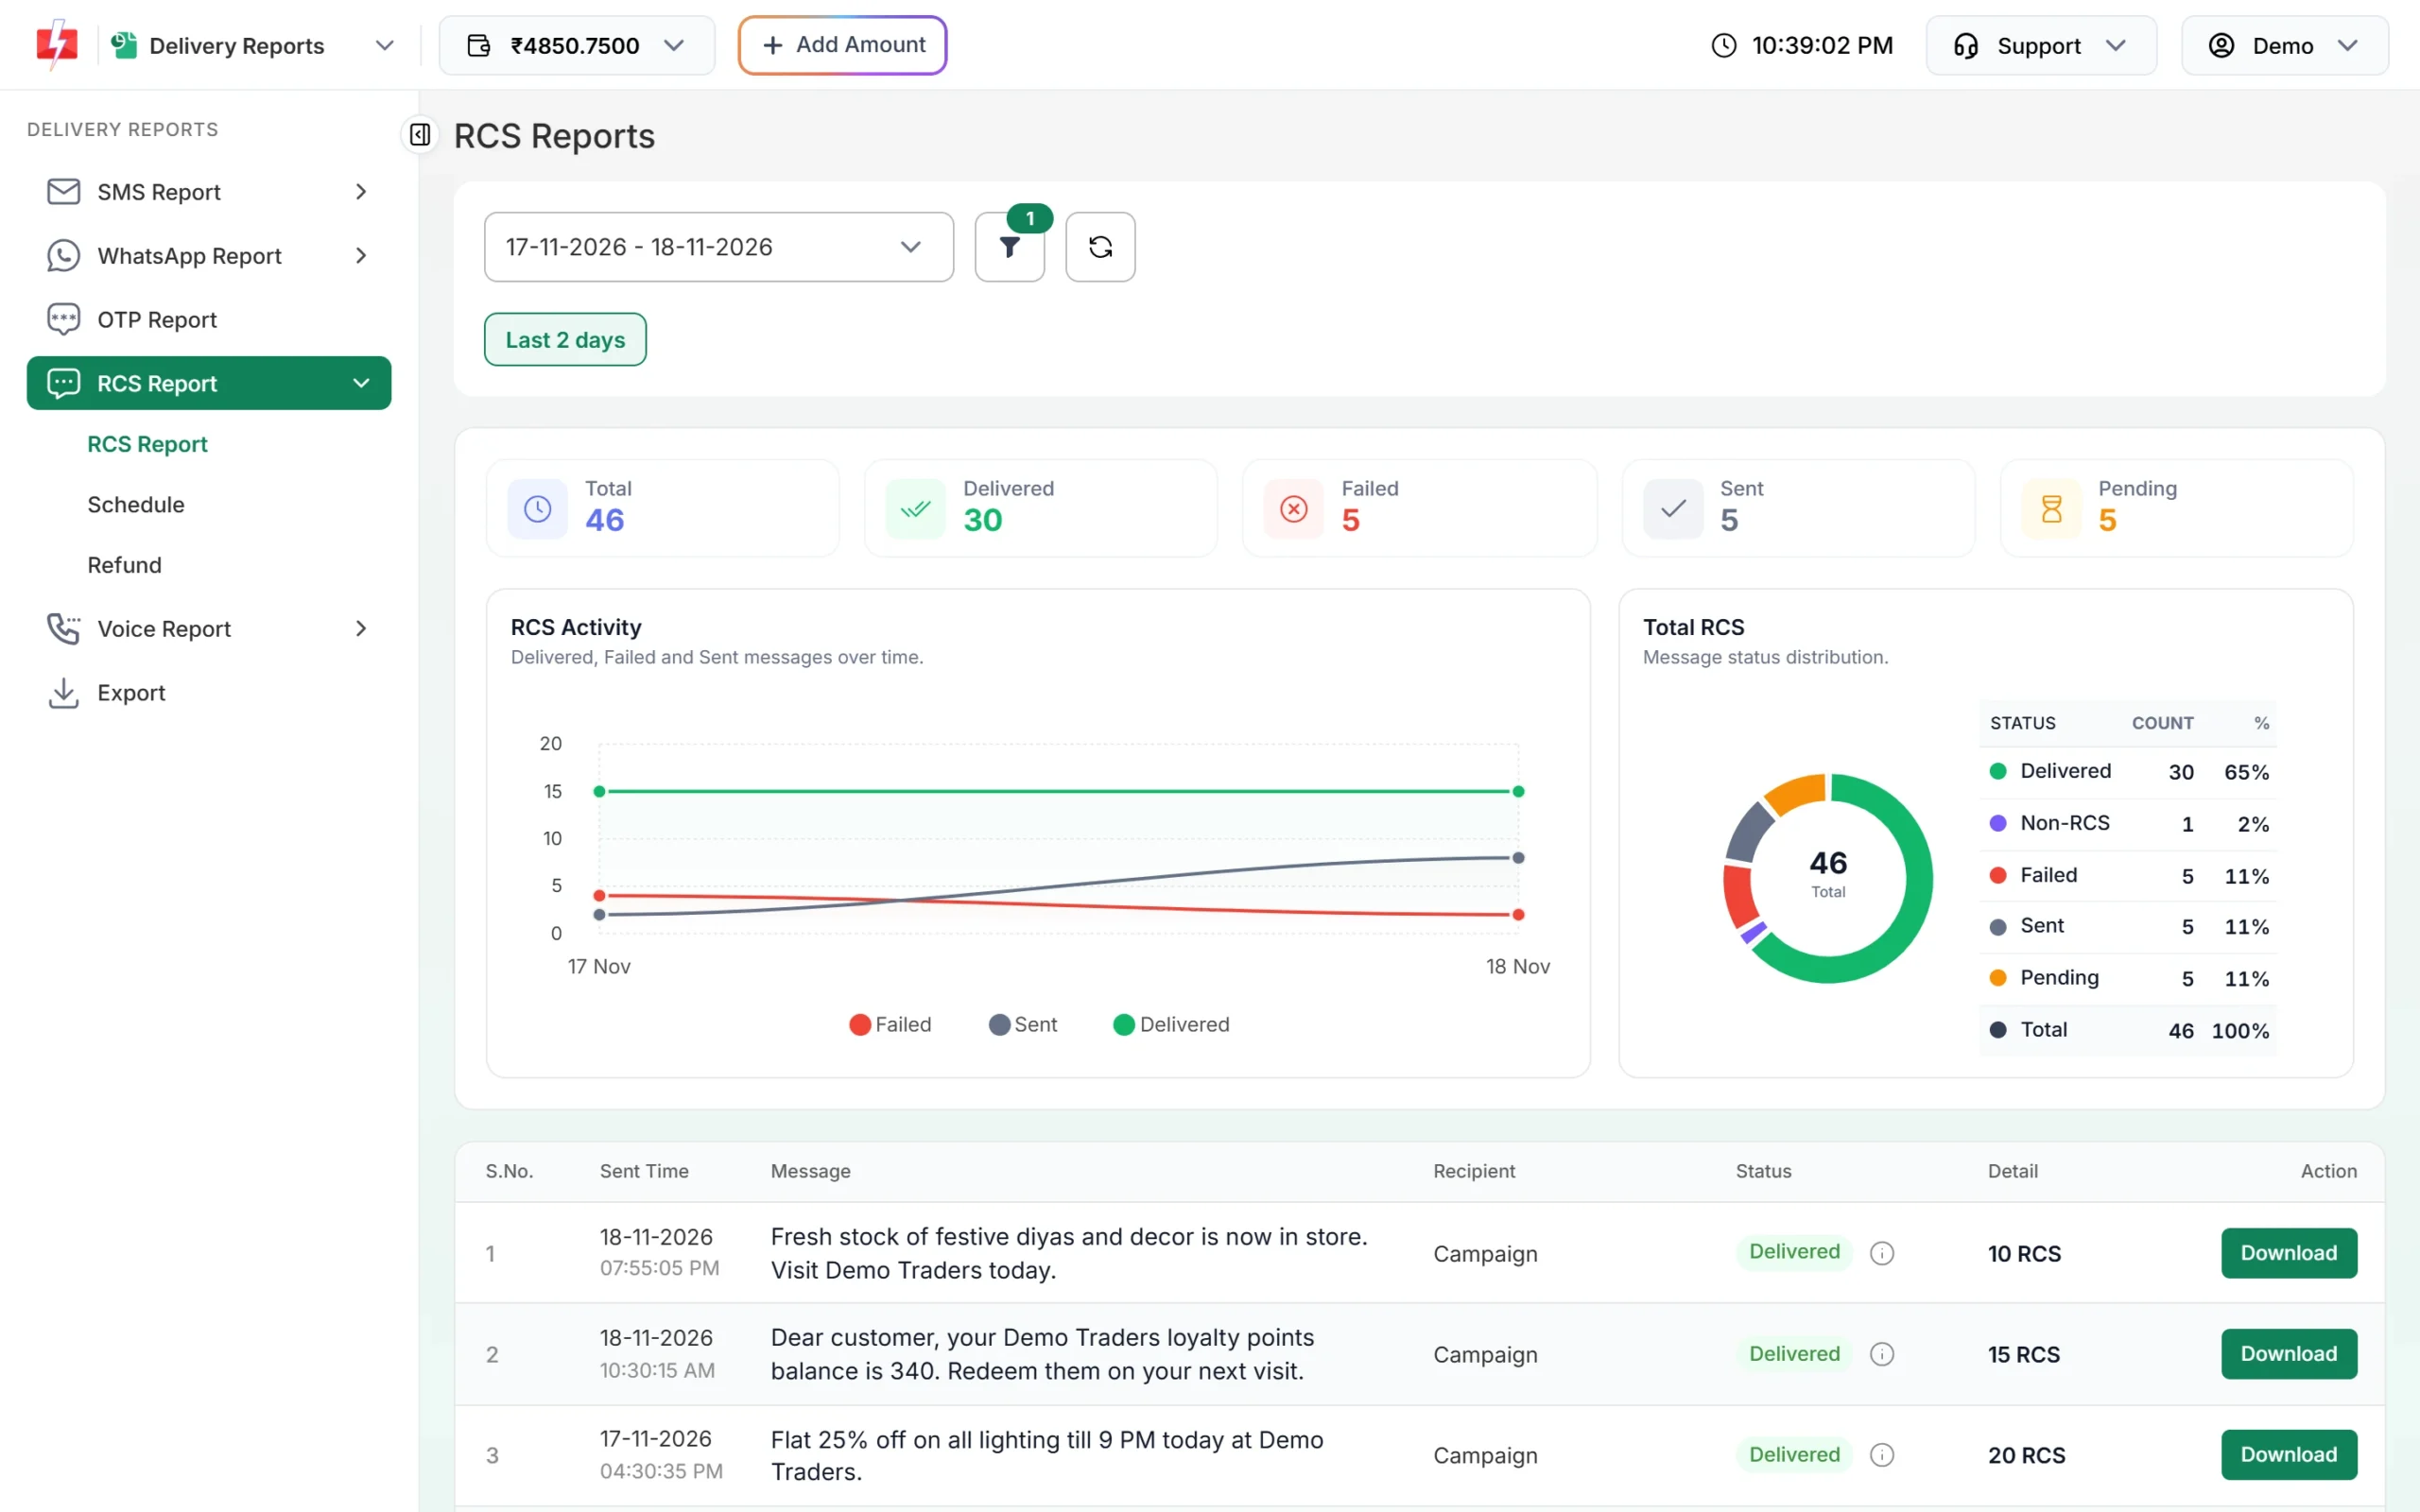
The RCS report for the last 2 days.
RCS message types and limits
| Type | What it contains | Limits |
|---|---|---|
| Plain | Text with optional buttons | Message under 3,000 characters, up to 4 buttons |
| Rich | Optional title, text, one image/video/audio/PDF, buttons | Title up to 100 characters, message under 3,000 characters, media up to 10 MB, up to 4 buttons |
| Carousel | 2 to 10 swipeable cards, each with title, description, media and buttons | Up to 4 buttons per card |
| Media | Only files (image, video, audio or PDF) | Up to 10 files, 10 MB each, no buttons |
At the time of writing, Fast2SMS charges one rate for every RCS type. See the current rate on the RCS pricing page.
Tip: Promotional bots can only send between 7:00 AM and 10:00 PM. If you schedule a promotional message for the night, it is moved to 7:01 AM. Transactional bots do not have this window.
Common problems and fixes
| Message you see | What to do |
|---|---|
| Your RCS brand is pending approval. You cannot send RCS messages until it is approved. | Wait for operator approval. The registration form says this can take 3-7 days. |
| Promotional messages are allowed from 7:00 AM to 10:00 PM | Send inside this window or schedule the campaign for the morning. |
| Minimum one contact or one group requried. | Add at least one number, contact or group under Send To. |
| Message length should be less than 3000 characters. | Shorten the text, or split it into two messages. |
| Insufficient wallet balance, you need at least ₹X to send this RCS Message campaign. | Click Add Amount, recharge and send again. |
Frequently asked questions
Do I need DLT template approval to send RCS?
No. In Fast2SMS, RCS messages are open templates, so you do not need a DLT template. Your brand must still be approved for RCS.
Can I send RCS to DND numbers?
Yes. The Bulk RCS page lists RCS as “For DND + Non DND numbers”. Promotional bots still have a limit of 4 promotional RCS per number per month.
What happens if a number does not support RCS?
It shows as Non-RCS in the report. No SMS is sent in its place, and the amount for that number is refunded to your wallet automatically within 48 hours.
Can I add a name or other personal detail for each customer?
No. The Bulk RCS form sends the same message to every number, and the panel says “Personal Message not allowed”.
How many buttons can an RCS message have?
Up to 4 per message, or 4 per card in a carousel. Each button can open a link, dial a number or show a location.
Can I cancel a scheduled RCS campaign?
Yes, before it starts. Go to Delivery Report > RCS Report > Schedule and click Cancel. The full amount goes back to your wallet.
Can I send RCS by API?
Yes. Copy the Bot ID from RCS Manager > Bots and use it with your API key. API Excel has a ready RCS file with examples for each bot.