To show an OTP popup on button click, add data-f2s-otp-popup="YOUR_WIDGET_KEY" to your own button and load the Fast2SMS widget script once on the page. When a visitor clicks the button, the free OTP widget opens in a popup, they verify their mobile number, and the popup closes. This page covers all four install modes of the hosted OTP widget: the inline widget, a popup on your own button, a Verify button next to your own mobile field, and a protected form. It ends with the JavaScript events your page can listen to.
Before you start
You need a widget first. If you have not made one, follow the free OTP widget guide: pick an approved OTP ID, list your websites and save. Every code on this page is in the widget’s Install tab, with your widget key filled in and a Copy button. The widget is free. Each OTP it sends, including tests, is charged at your Smart OTP rate.
Sending in bulk? For high OTP volumes our team offers discounted rates. Talk to our team or see OTP pricing.
The four install modes at a glance
| Install sub-tab | Attribute | The visitor sees | Your page gets |
|---|---|---|---|
| Widget | data-f2s-otp-widget on a div |
The widget inside the page | The f2s:verified event with a token |
| Popup | data-f2s-otp-popup on your button |
Your button; the widget opens in a popup | The f2s:verified event, or your “after verify” page |
| Mobile field | data-f2s-otp-attach on your mobile input |
A Verify button next to your own field | A hidden f2s_token in the form; the form waits for verification |
| Form | data-f2s-otp-protect on your form |
The widget inside your form | A hidden f2s_token in the form; the form waits for verification |
All four modes use the same script line. Add it once per page, even if you use more than one mode.
Mode 1: the inline widget
Put the div where the box should appear. This suits a page whose main job is verification, such as a login with mobile number or the first step of a sign-up.
<script src="https://www.fast2sms.com/widget/otp-js?v=1.0.5" defer></script>
<div data-f2s-otp-widget="YOUR_WIDGET_KEY"></div>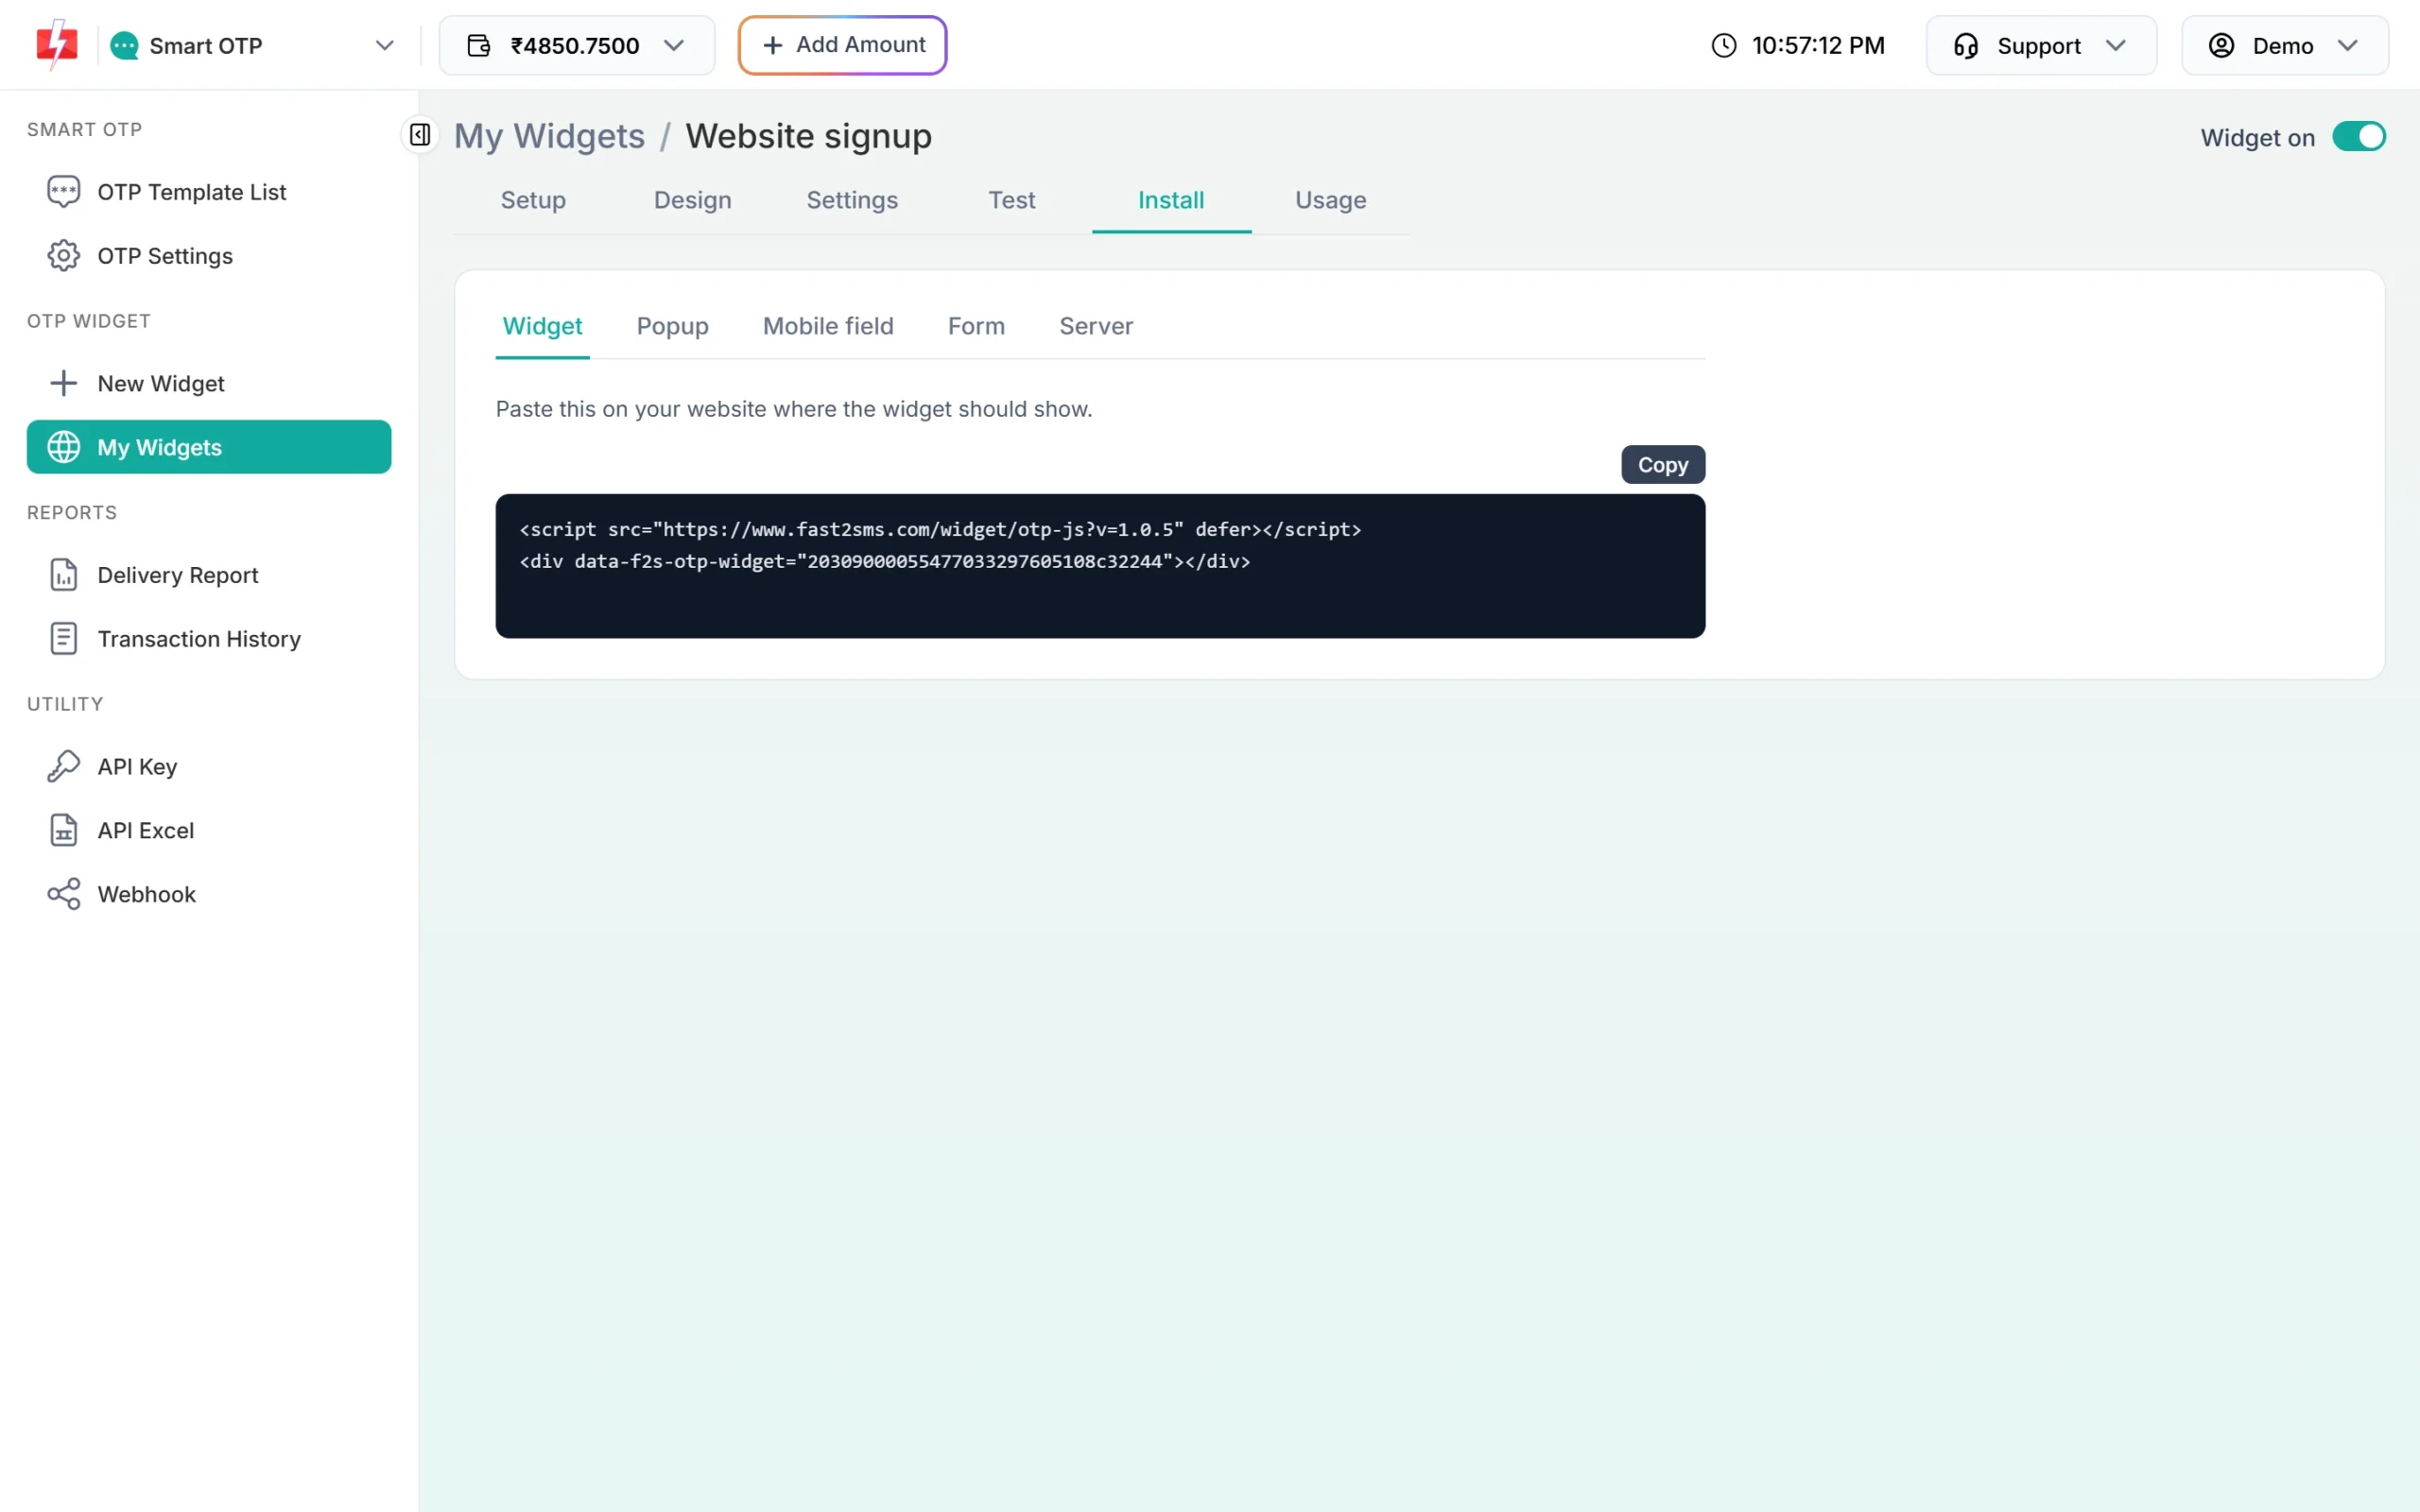
Mode 2: OTP popup on button click
Use this when you already have a button and want the check to happen only when someone clicks it, for example a cash on delivery button. Add the attribute to your button:
<script src="https://www.fast2sms.com/widget/otp-js?v=1.0.5" defer></script>
<button type="button" data-f2s-otp-popup="YOUR_WIDGET_KEY">Verify mobile</button>
The button can have any text and style. Keep type="button" so it does not submit a form by itself. A click opens the widget over a dark backdrop with a close (×) button. After the code is verified, the popup closes on its own a moment later.
-
Copy the Popup code
Open Install > Popup. Choose a Popup position (Center is the default) and click Copy.
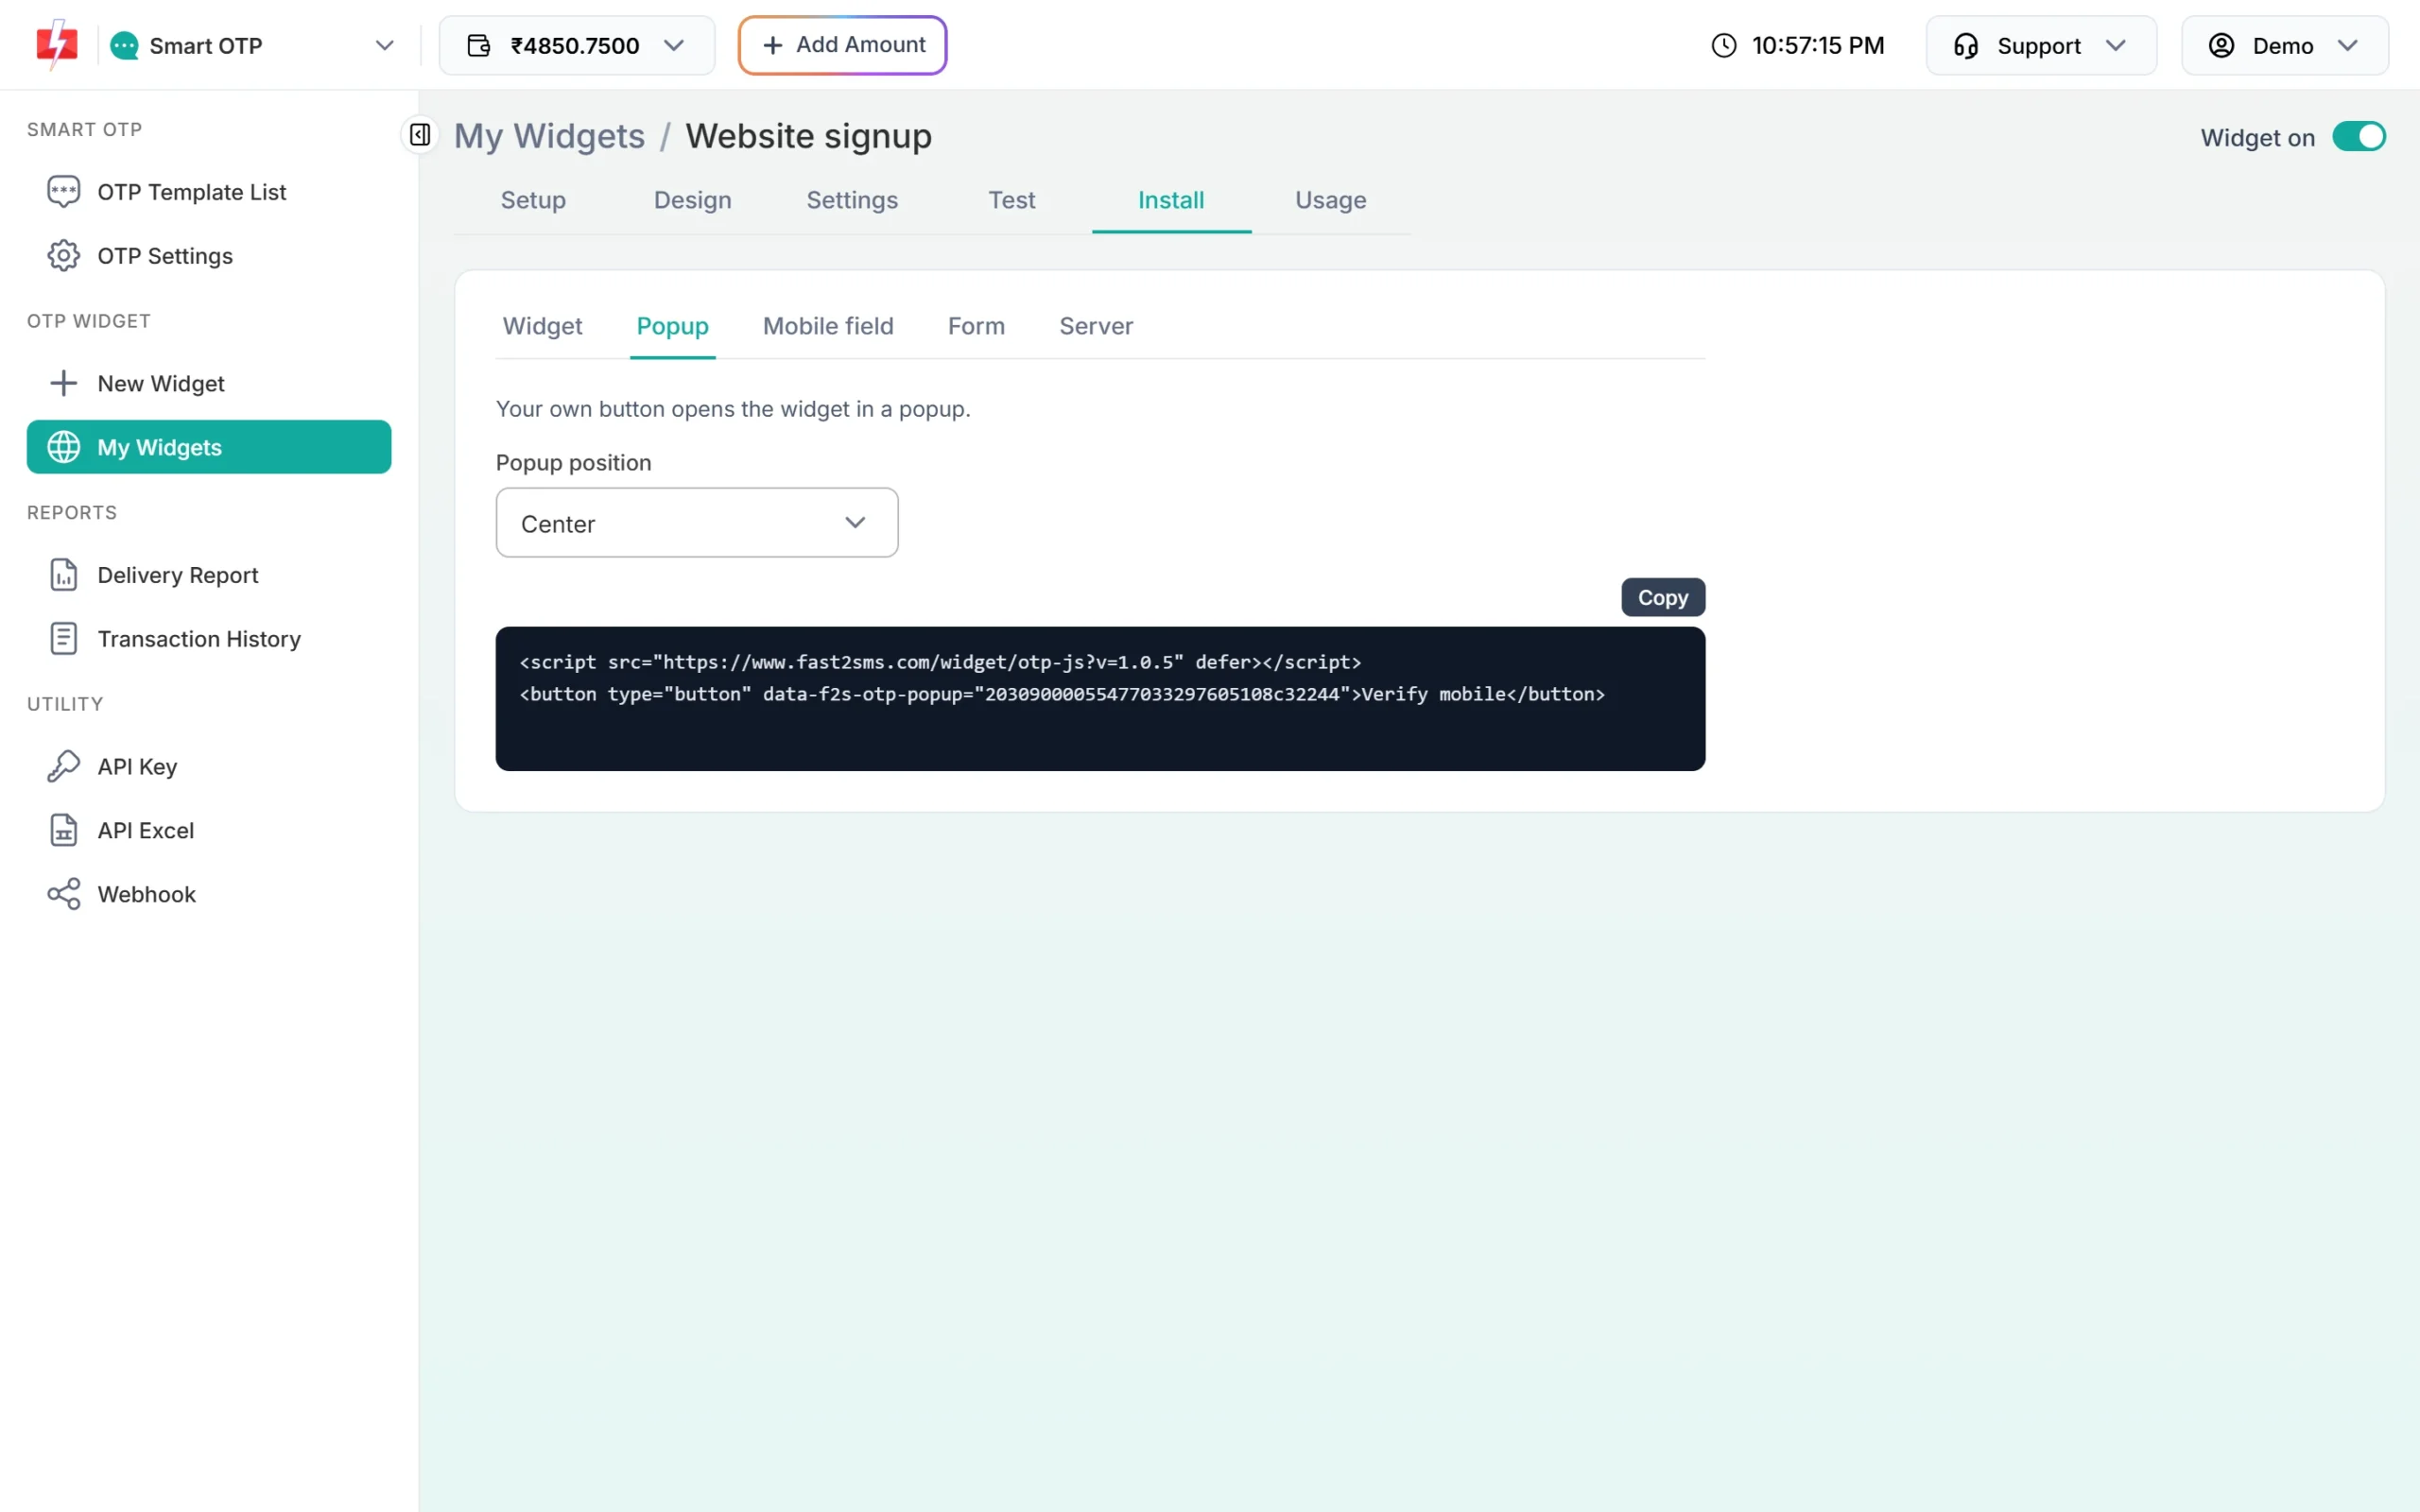
Install, Popup: pick a position, then copy. -
Your button sits on the page as usual
Nothing changes on the page until the visitor clicks. On this sample checkout, the button reads “Verify mobile and place order”.
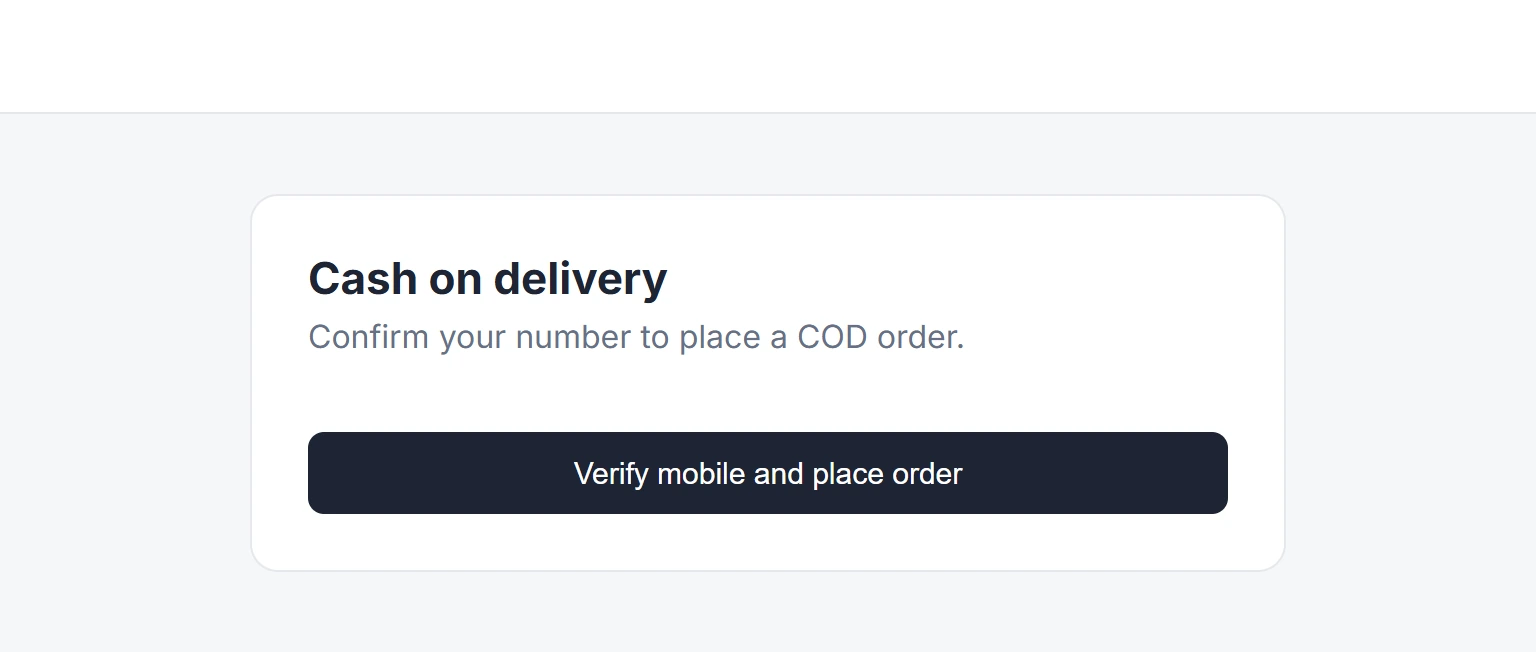
Your own button on a sample cash on delivery page. -
The widget opens in a popup
The visitor types the number, clicks Send OTP, passes the short “I am human” check and types the 6-digit code.
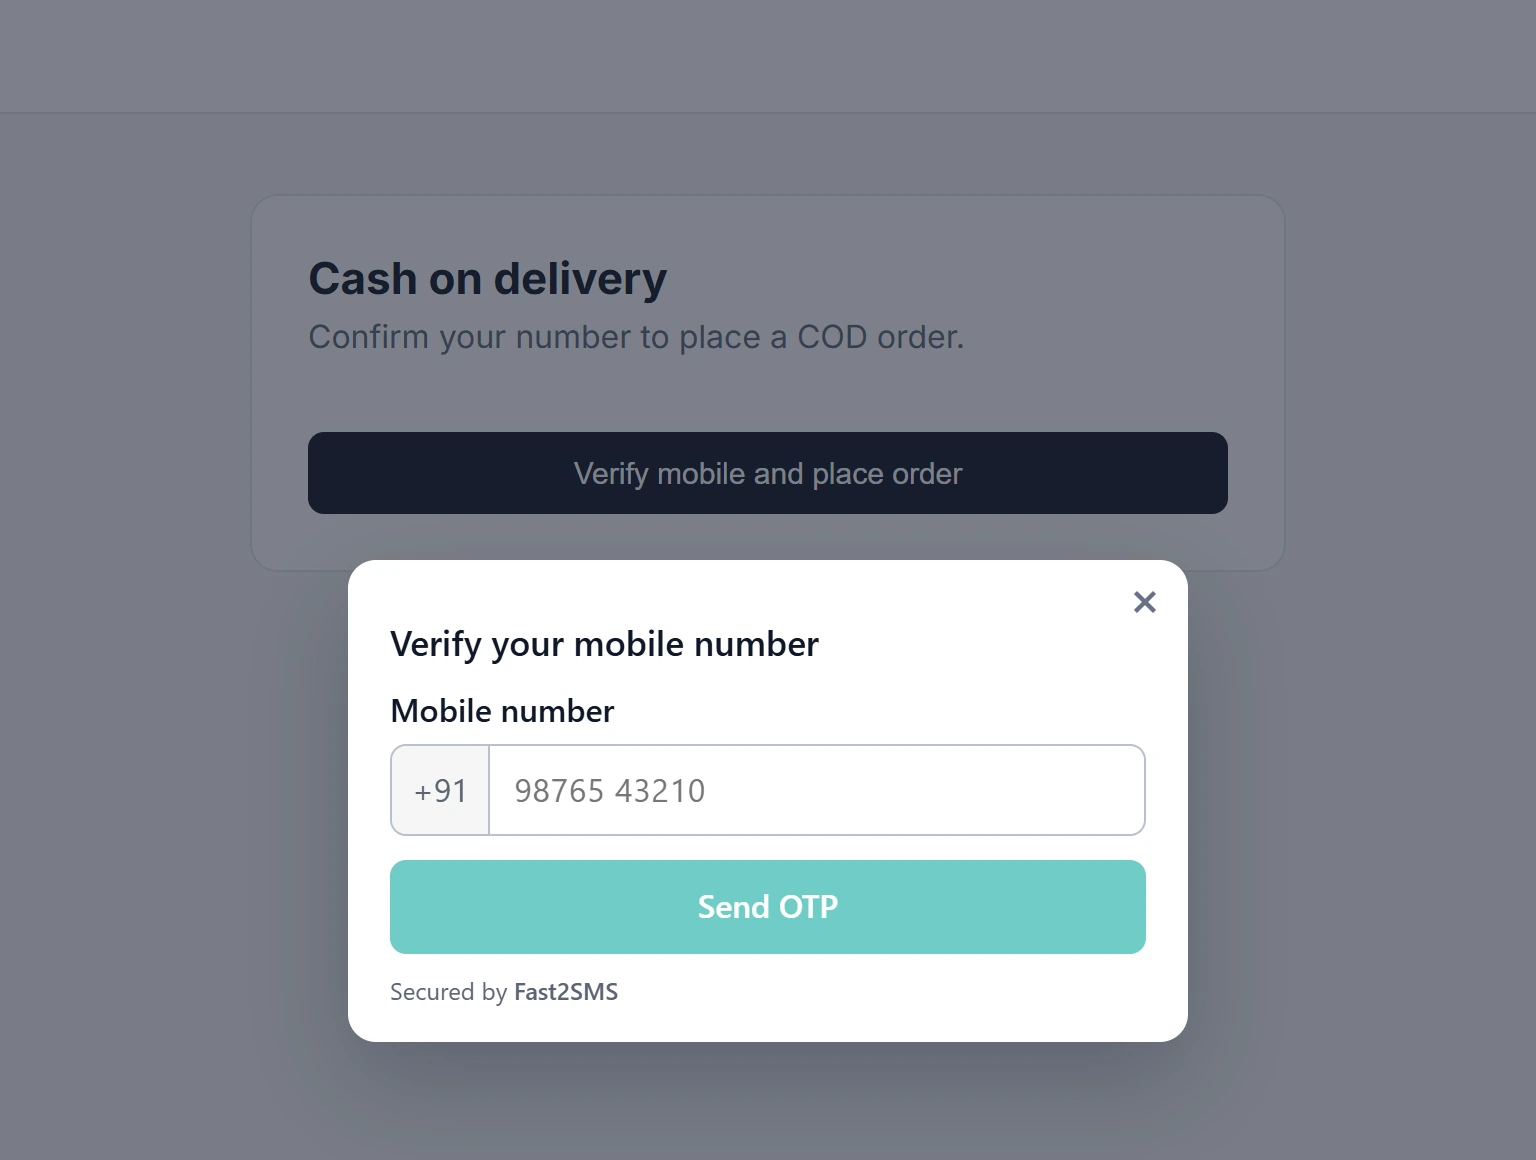
The popup over your page. -
Verified, and the popup closes
“Mobile number verified” shows for a moment, then the popup closes. Your page hears the
f2s:verifiedevent (see below), or the visitor goes to the page set in After verify, open a page.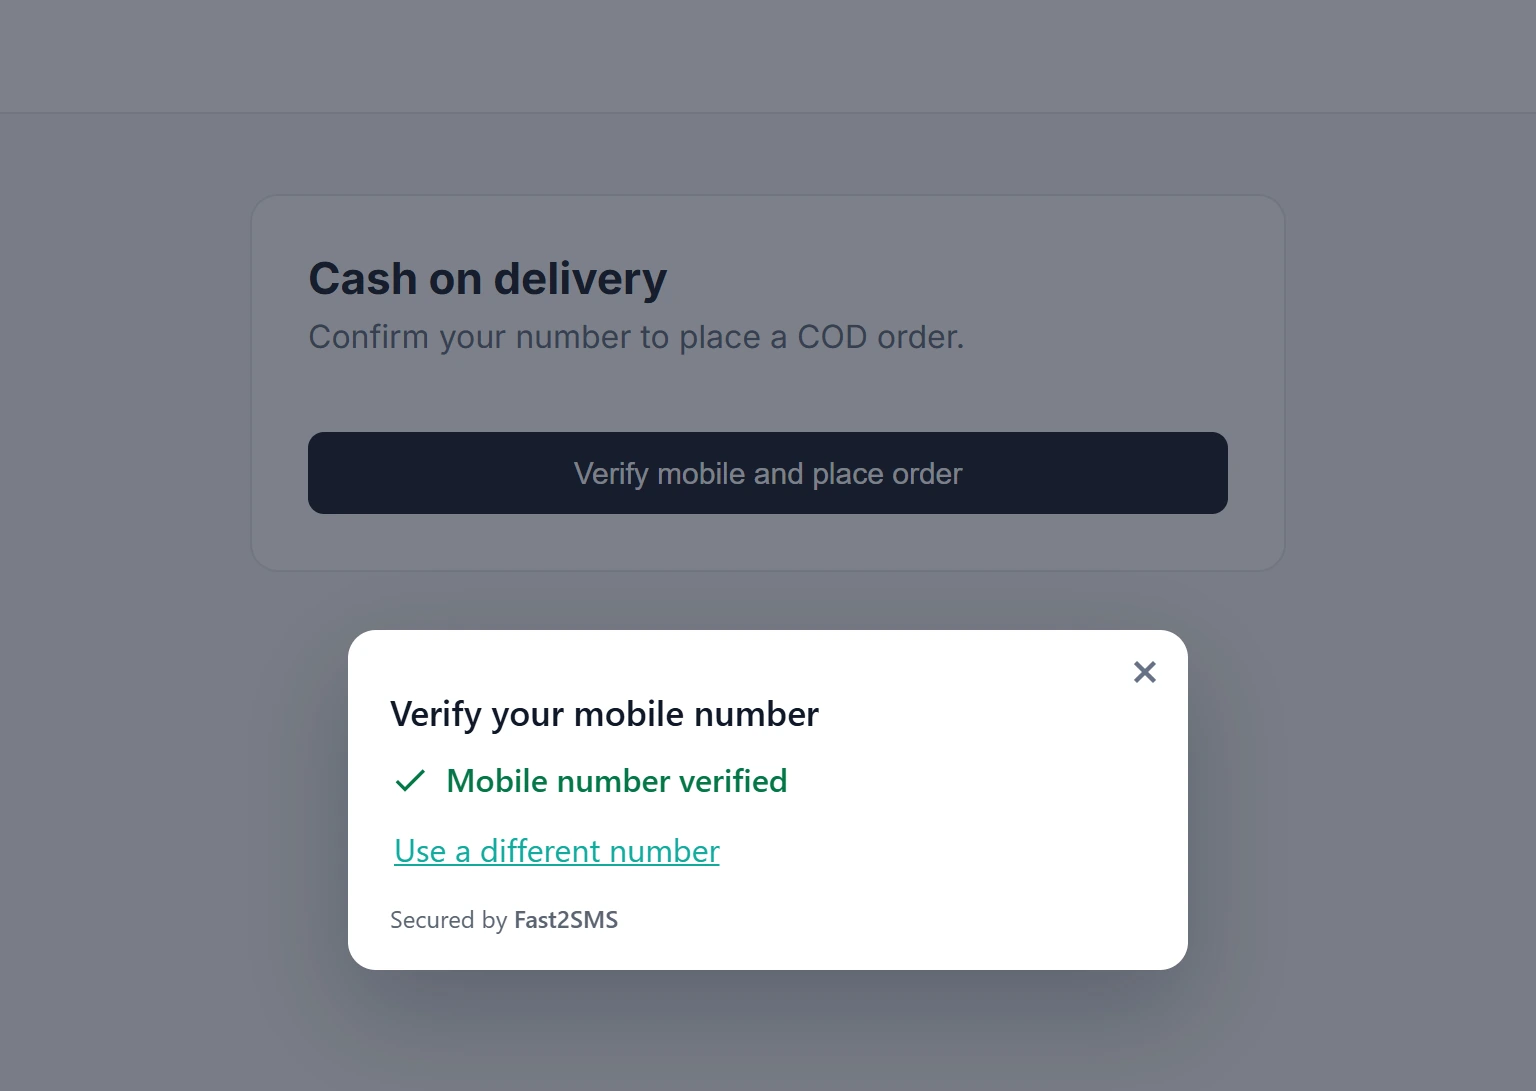
The verified state before the popup closes.
Popup positions
The popup can sit in 9 places. Pick one in Popup position before you copy, or set data-f2s-position on the button yourself:
| data-f2s-position | Where the popup shows |
|---|---|
| center (default) | Middle of the screen |
| top | Top of the screen, centred |
| bottom | Bottom of the screen, centred |
| left | Left side, middle |
| right | Right side, middle |
| top-left | Top left corner |
| top-right | Top right corner |
| bottom-left | Bottom left corner |
| bottom-right | Bottom right corner |
<button type="button" data-f2s-otp-popup="YOUR_WIDGET_KEY" data-f2s-position="bottom-right">Verify mobile</button>Mode 3: a Verify button next to your own mobile field
If your form already asks for a mobile number, keep your field. Add data-f2s-otp-attach to it, and the script puts a Verify button next to it. The form submits only after that number is verified.
<script src="https://www.fast2sms.com/widget/otp-js?v=1.0.5" defer></script>
<form action="/your-signup" method="post">
  <input name="name" placeholder="Your name">
  <input name="mobile" type="tel" data-f2s-otp-attach="YOUR_WIDGET_KEY" placeholder="Mobile number">
  <button type="submit">Sign up</button>
</form>
What happens on the page:
- A click on Verify opens the widget in a popup, with the number from your field already filled in.
- After a correct code, your field is locked, a green “Verified” tick appears and the button changes to Change.
- If the visitor edits the number, the verification is cleared and they verify again.
- If they click Sign up before verifying, the form does not submit and the popup opens.
- If they verify a different number inside the popup than the one in your field, the widget does not accept it and fires
f2s:errorwith the reasonnumber_mismatch. - When verified, the form gets a hidden
f2s_tokenfield, the same as in Form mode.
Three optional attributes change the button: data-f2s-label (button text, default “Verify”), data-f2s-color (a colour like #12aa9e) and data-f2s-position (where the popup opens, same 9 values as above).
<input name="mobile" type="tel" data-f2s-otp-attach="YOUR_WIDGET_KEY"
data-f2s-label="Verify number" data-f2s-color="#1d4ed8" data-f2s-position="top">-
Copy the Mobile field code
Open Install > Mobile field, choose a Popup position and click Copy. Move the attribute to the mobile input in your own form.
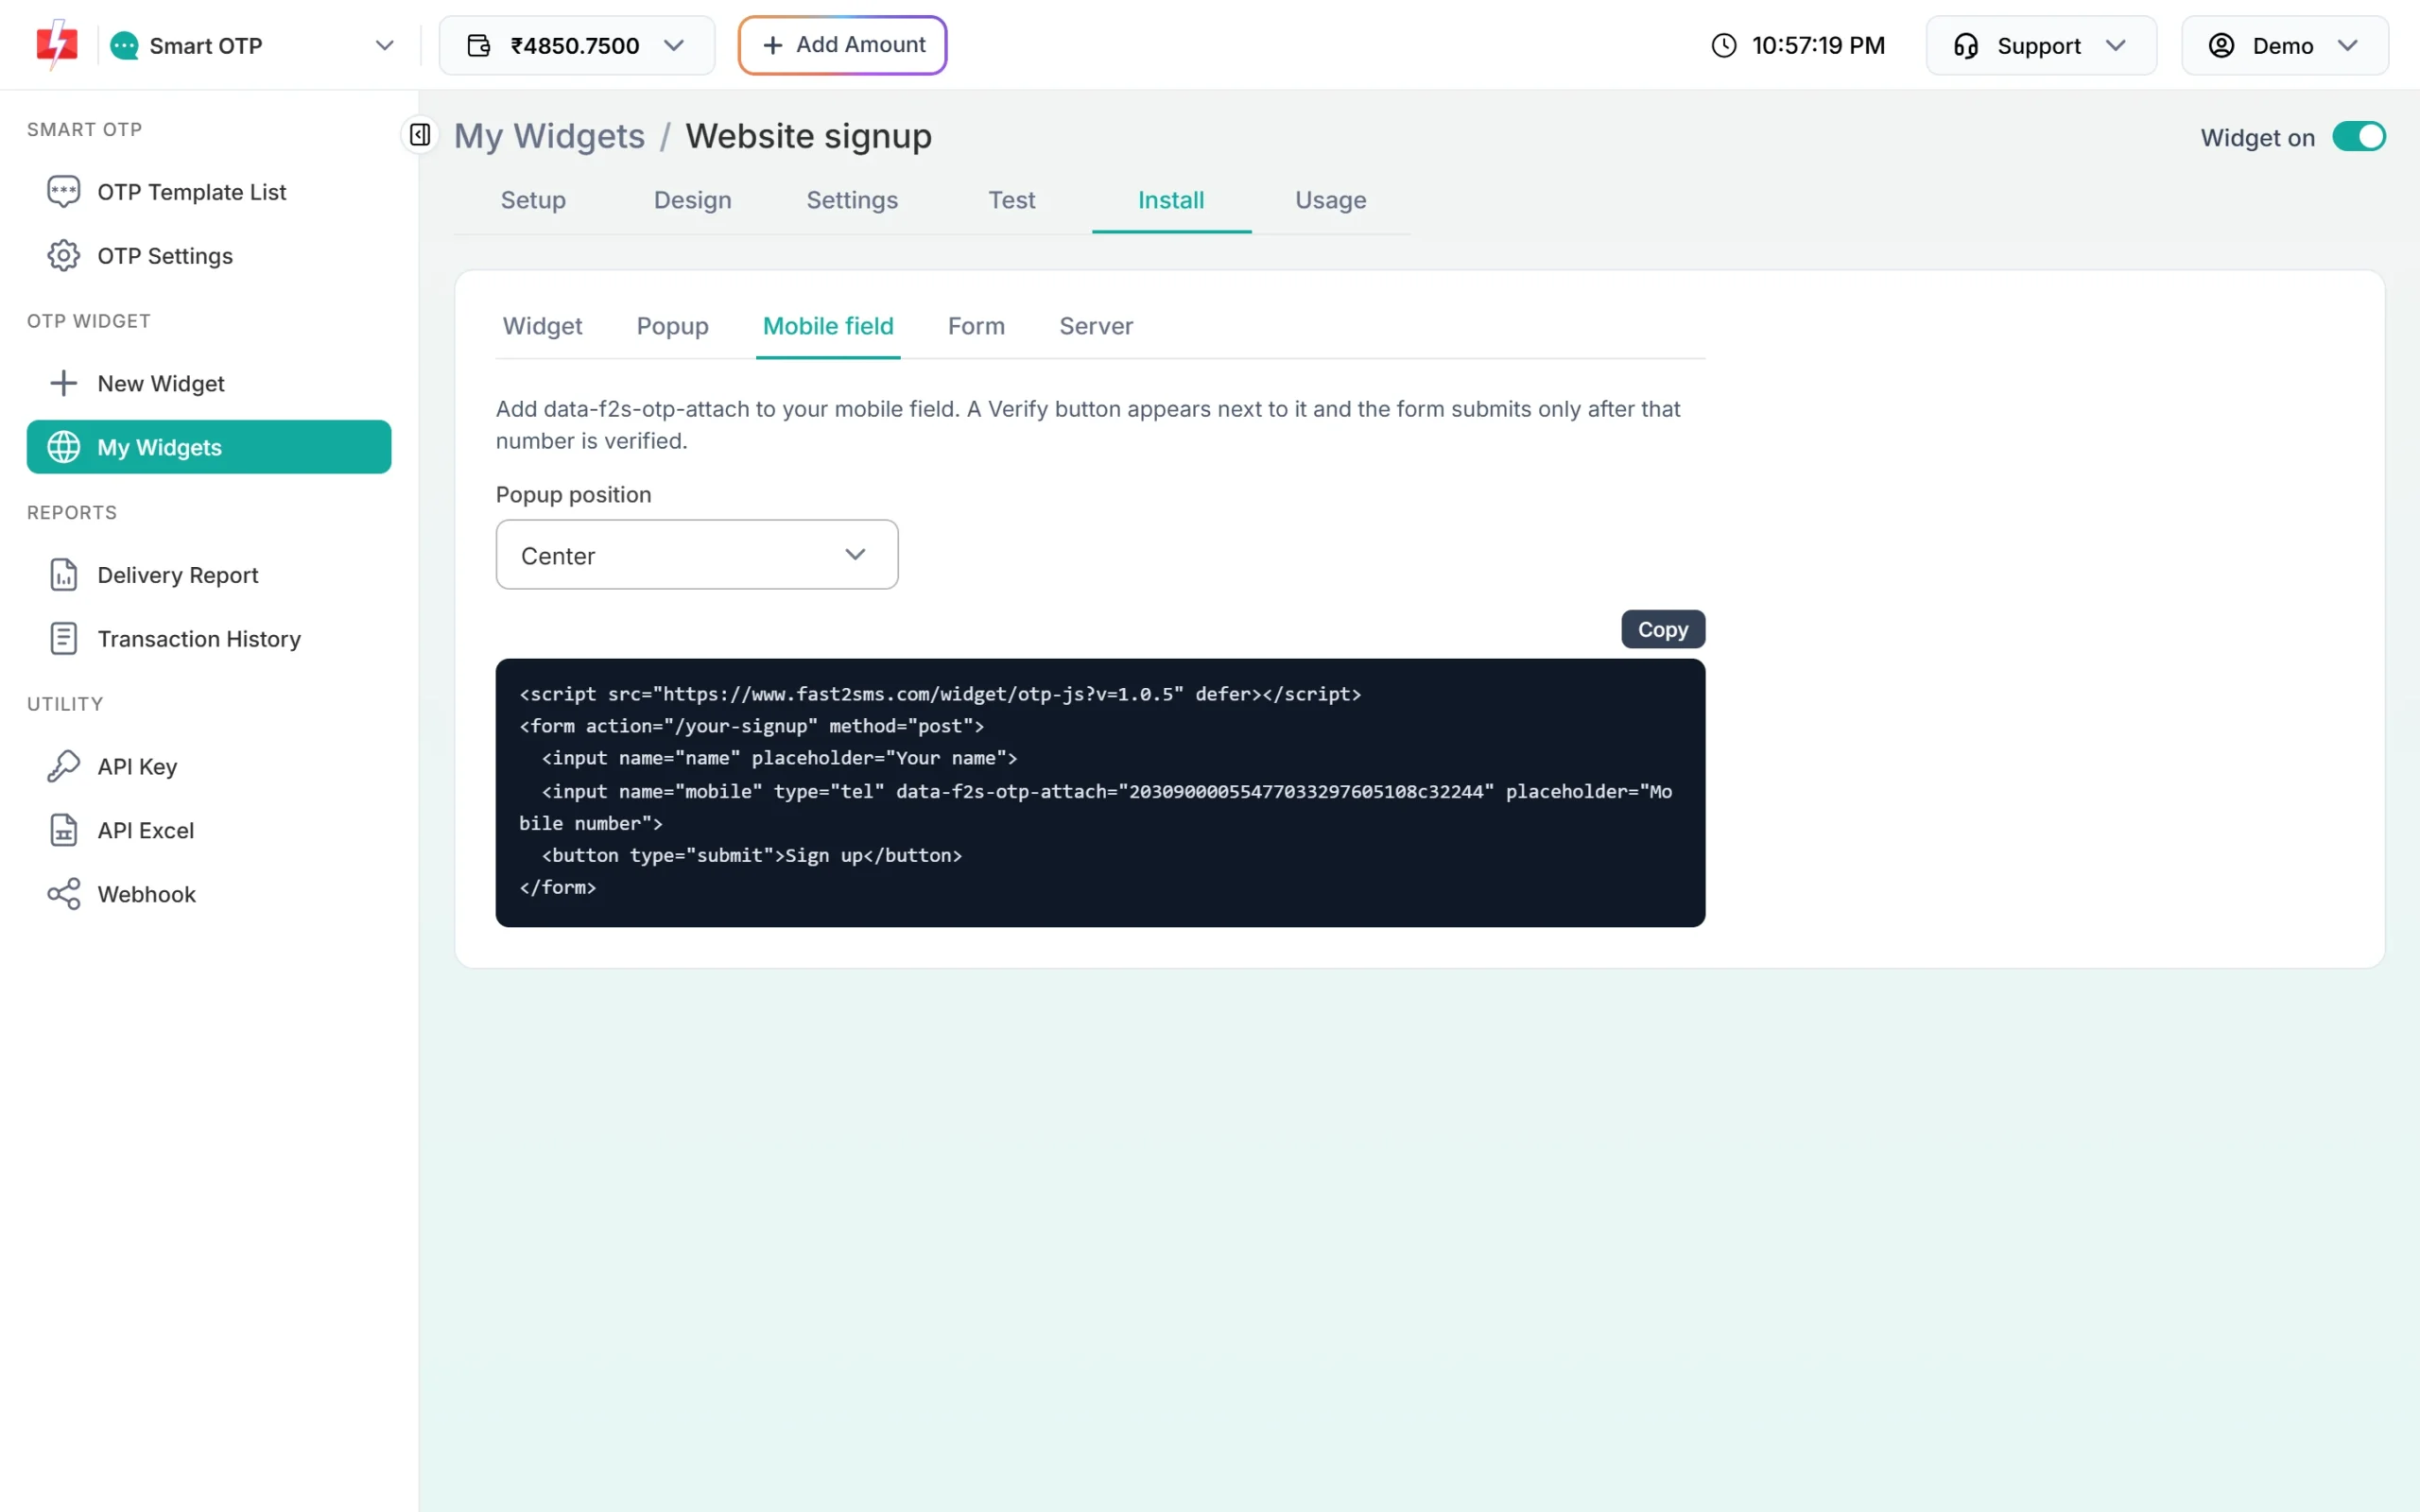
Install, Mobile field: the attribute goes on your own input. -
The Verify button appears next to your field
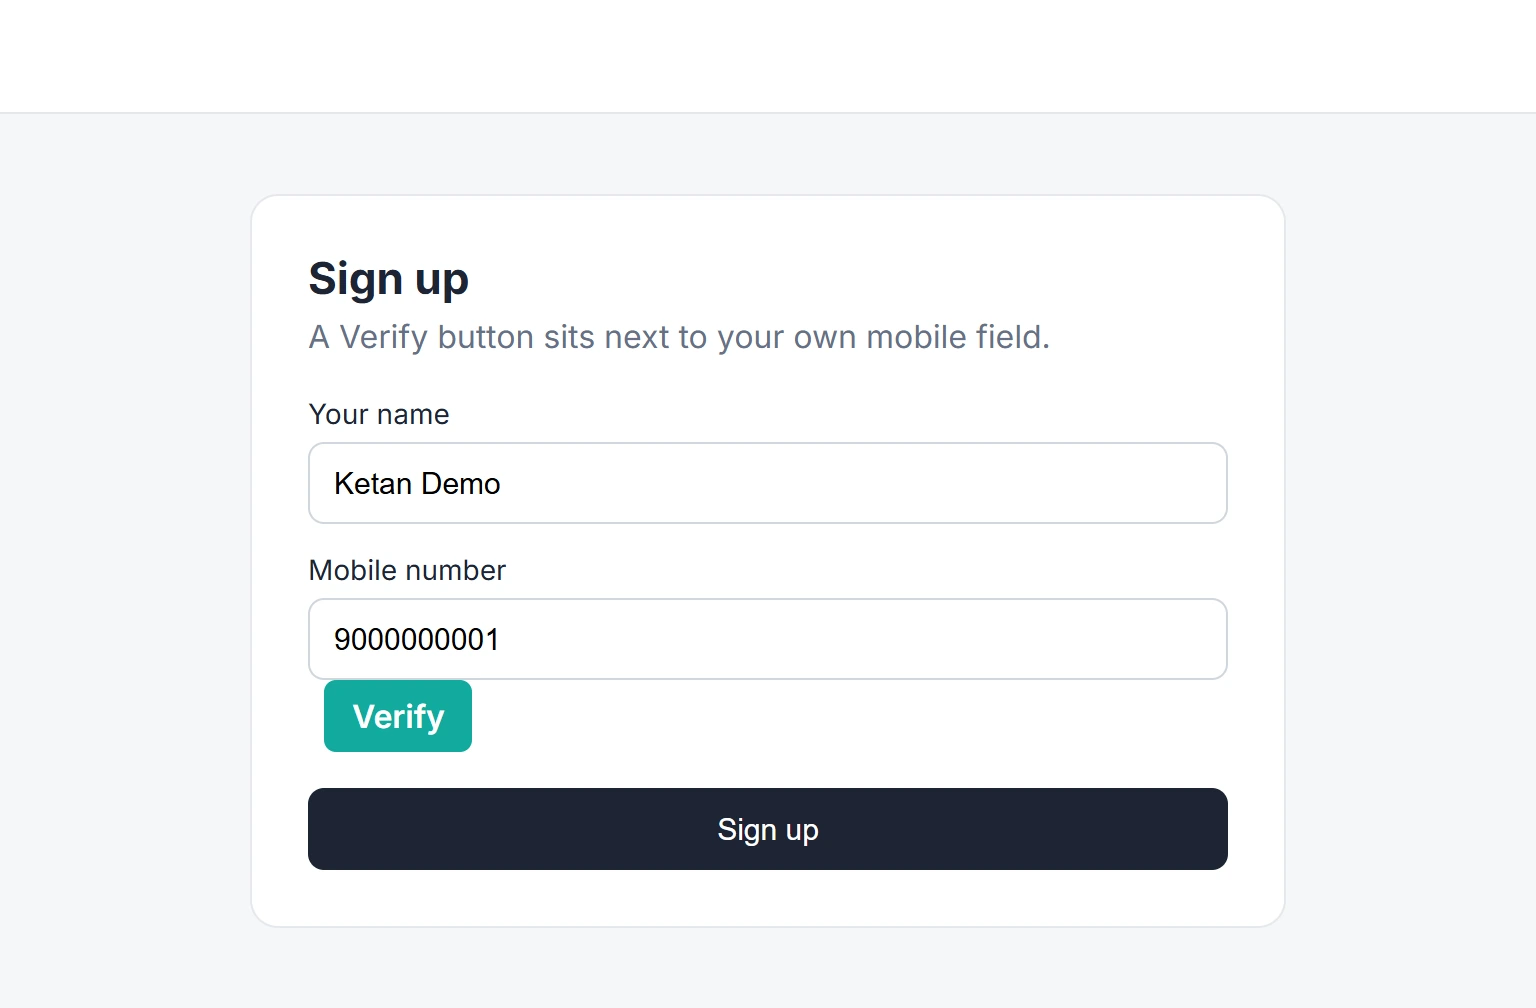
Your form with the Verify button added. -
The popup opens with the number filled in
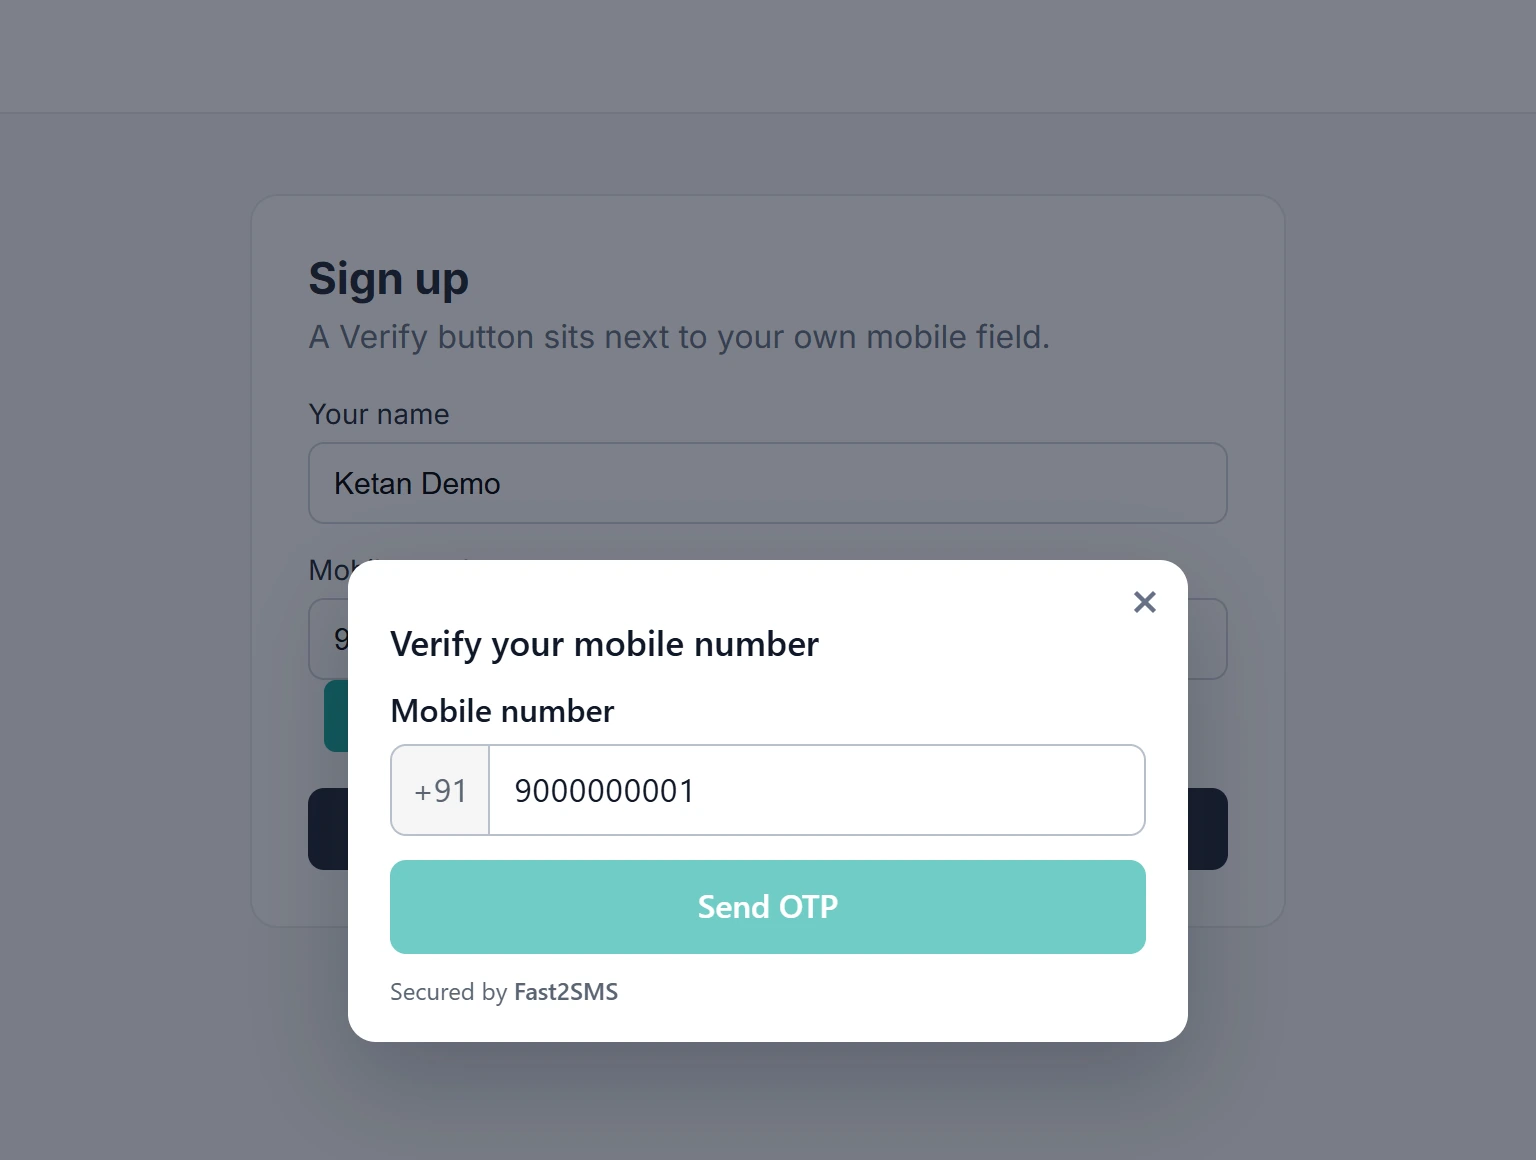
The number from your field is filled in. -
Verified, then the visitor submits your form
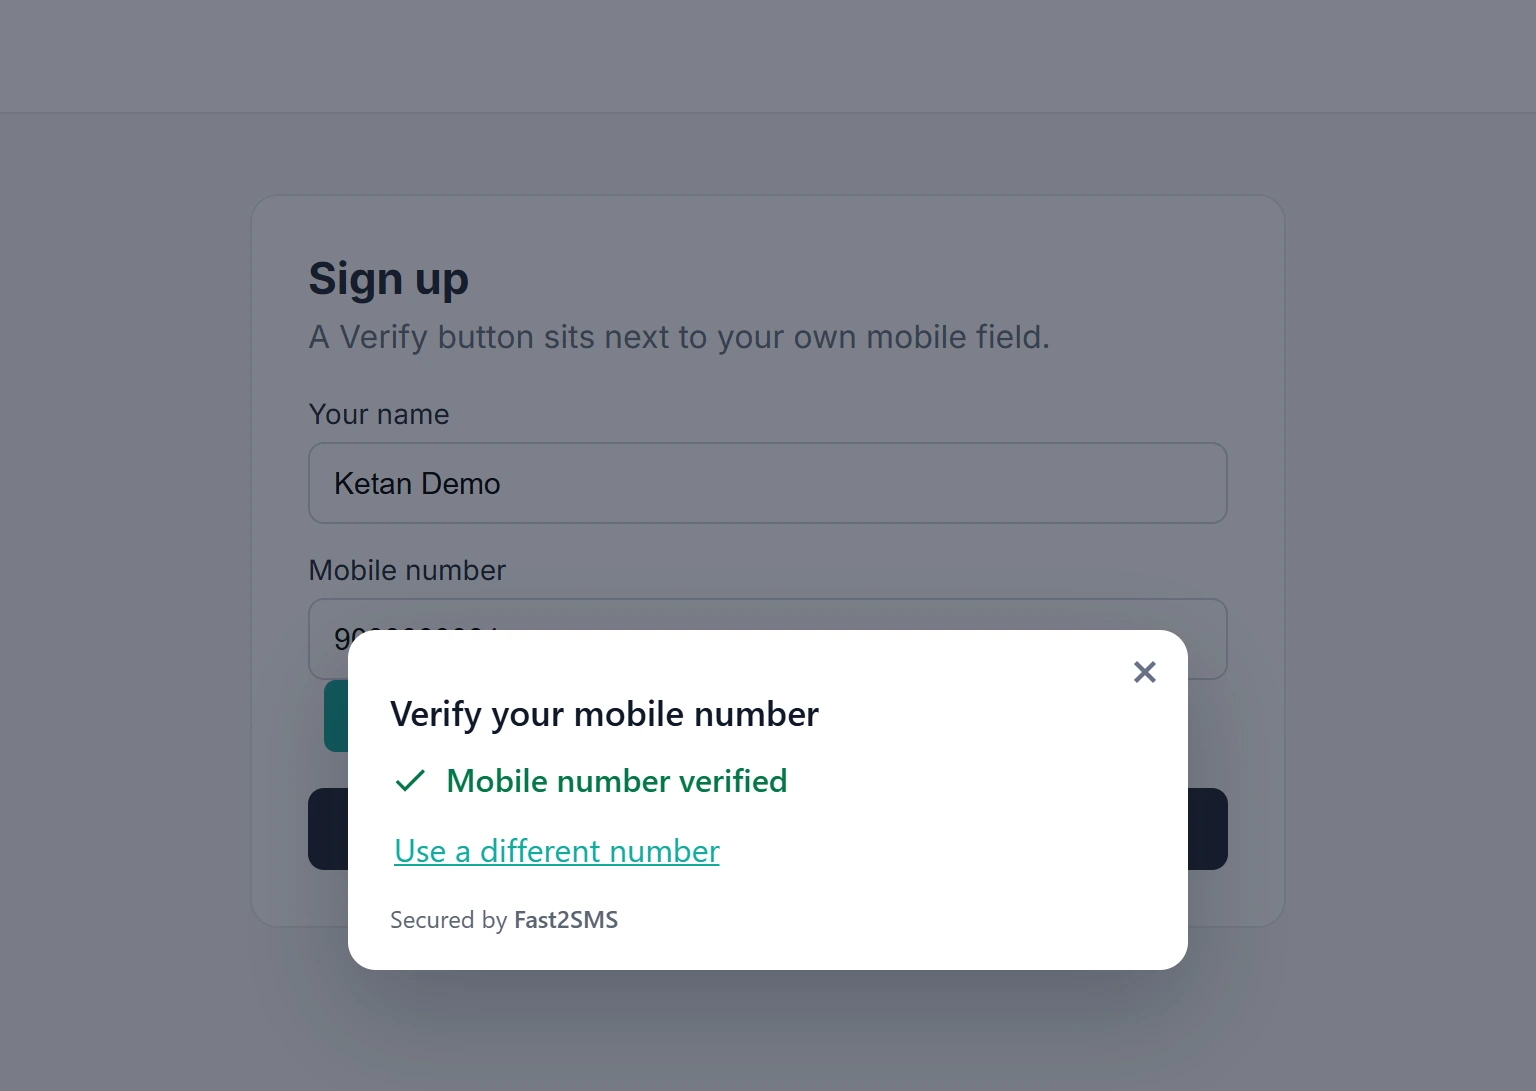
After this, your Sign up button works.
Mode 4: protect a whole form
Add data-f2s-otp-protect to your form tag. The widget appears inside the form, just above the submit button, and the form submits only after the number is verified. If the visitor clicks submit too early, the form stays put and the page scrolls to the widget.
<script src="https://www.fast2sms.com/widget/otp-js?v=1.0.5" defer></script>
<form action="/your-signup" method="post" data-f2s-otp-protect="YOUR_WIDGET_KEY">
  <input name="name" data-f2s-forward placeholder="Your name">
  <input name="email" type="email" data-f2s-forward placeholder="Email">
  <button type="submit">Sign up</button>
</form>
What your form handler receives:
- Your normal fields, plus a hidden
f2s_tokenfield that the widget adds. - Not the mobile number. The number is typed inside the widget frame, so it is not posted with your form. Get the full verified number on your server by checking
f2s_token, or from the webhook. - Fields marked
data-f2s-forwardare also sent to your webhook together with the verified number (up to 20 fields; password and file fields are never sent).
Server code for the token check and the webhook is in OTP widget webhook and f2s_token check.
-
Copy the Form code
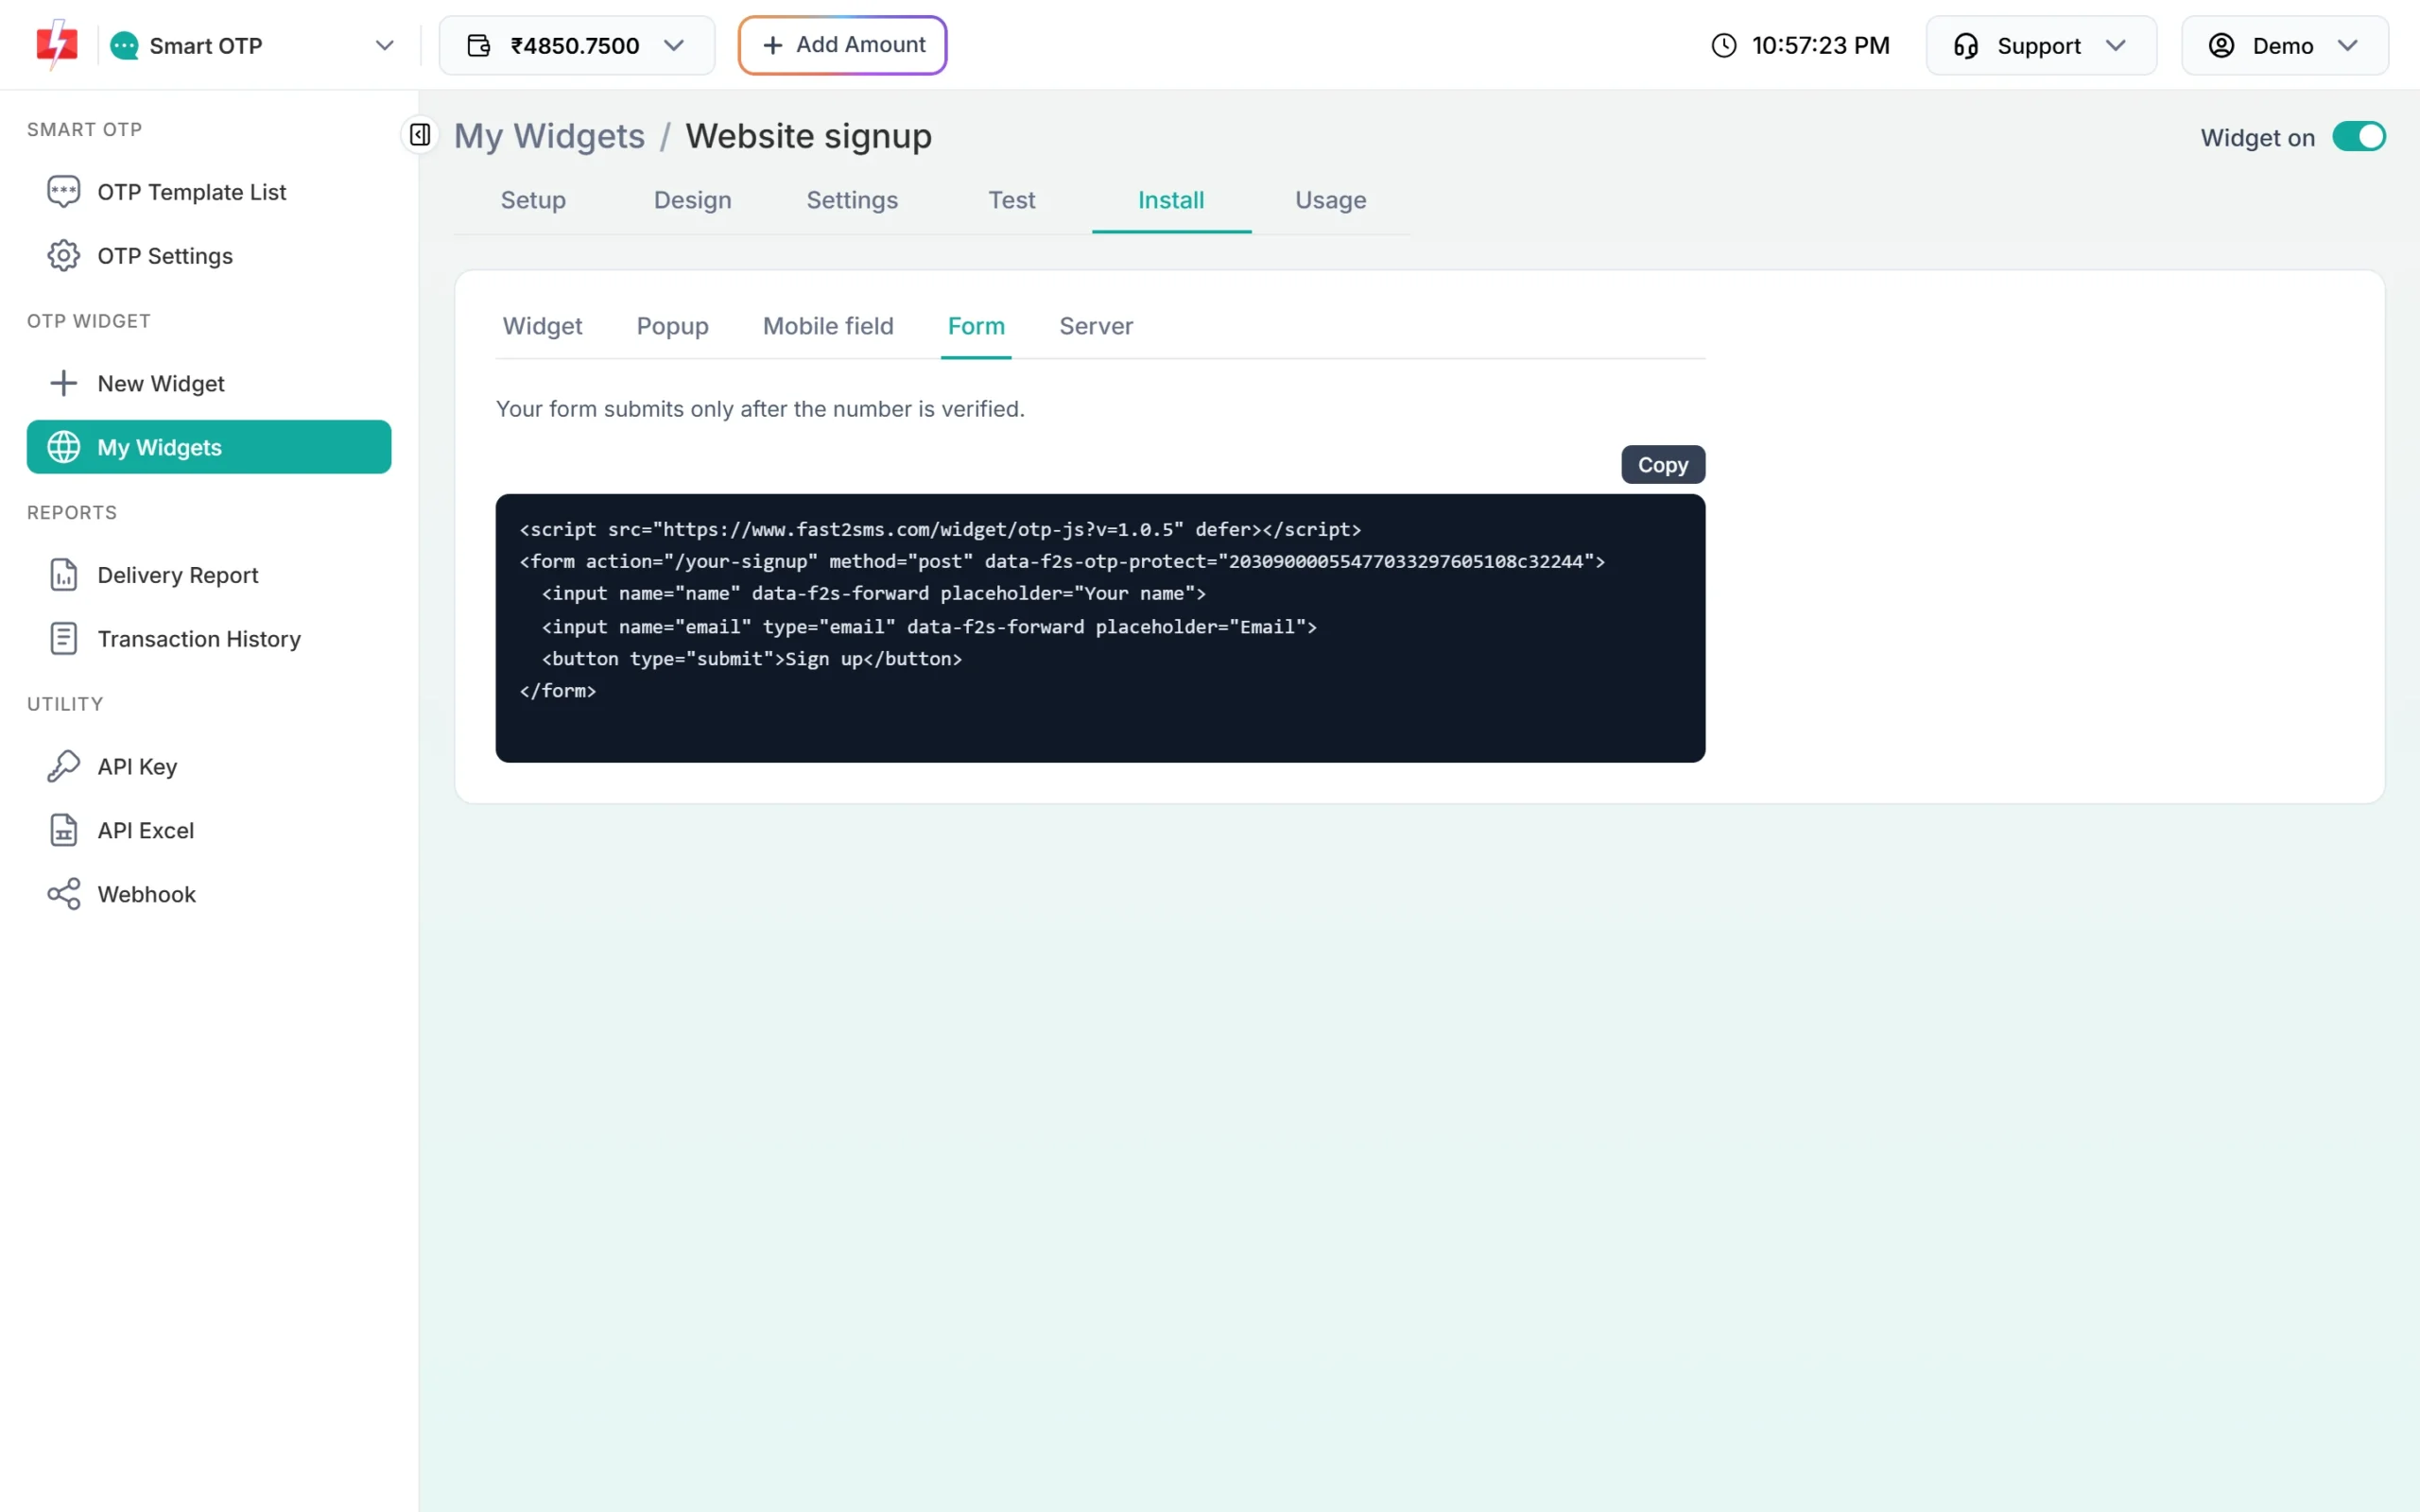
Install, Form: one attribute on the form tag. -
The widget sits inside your form
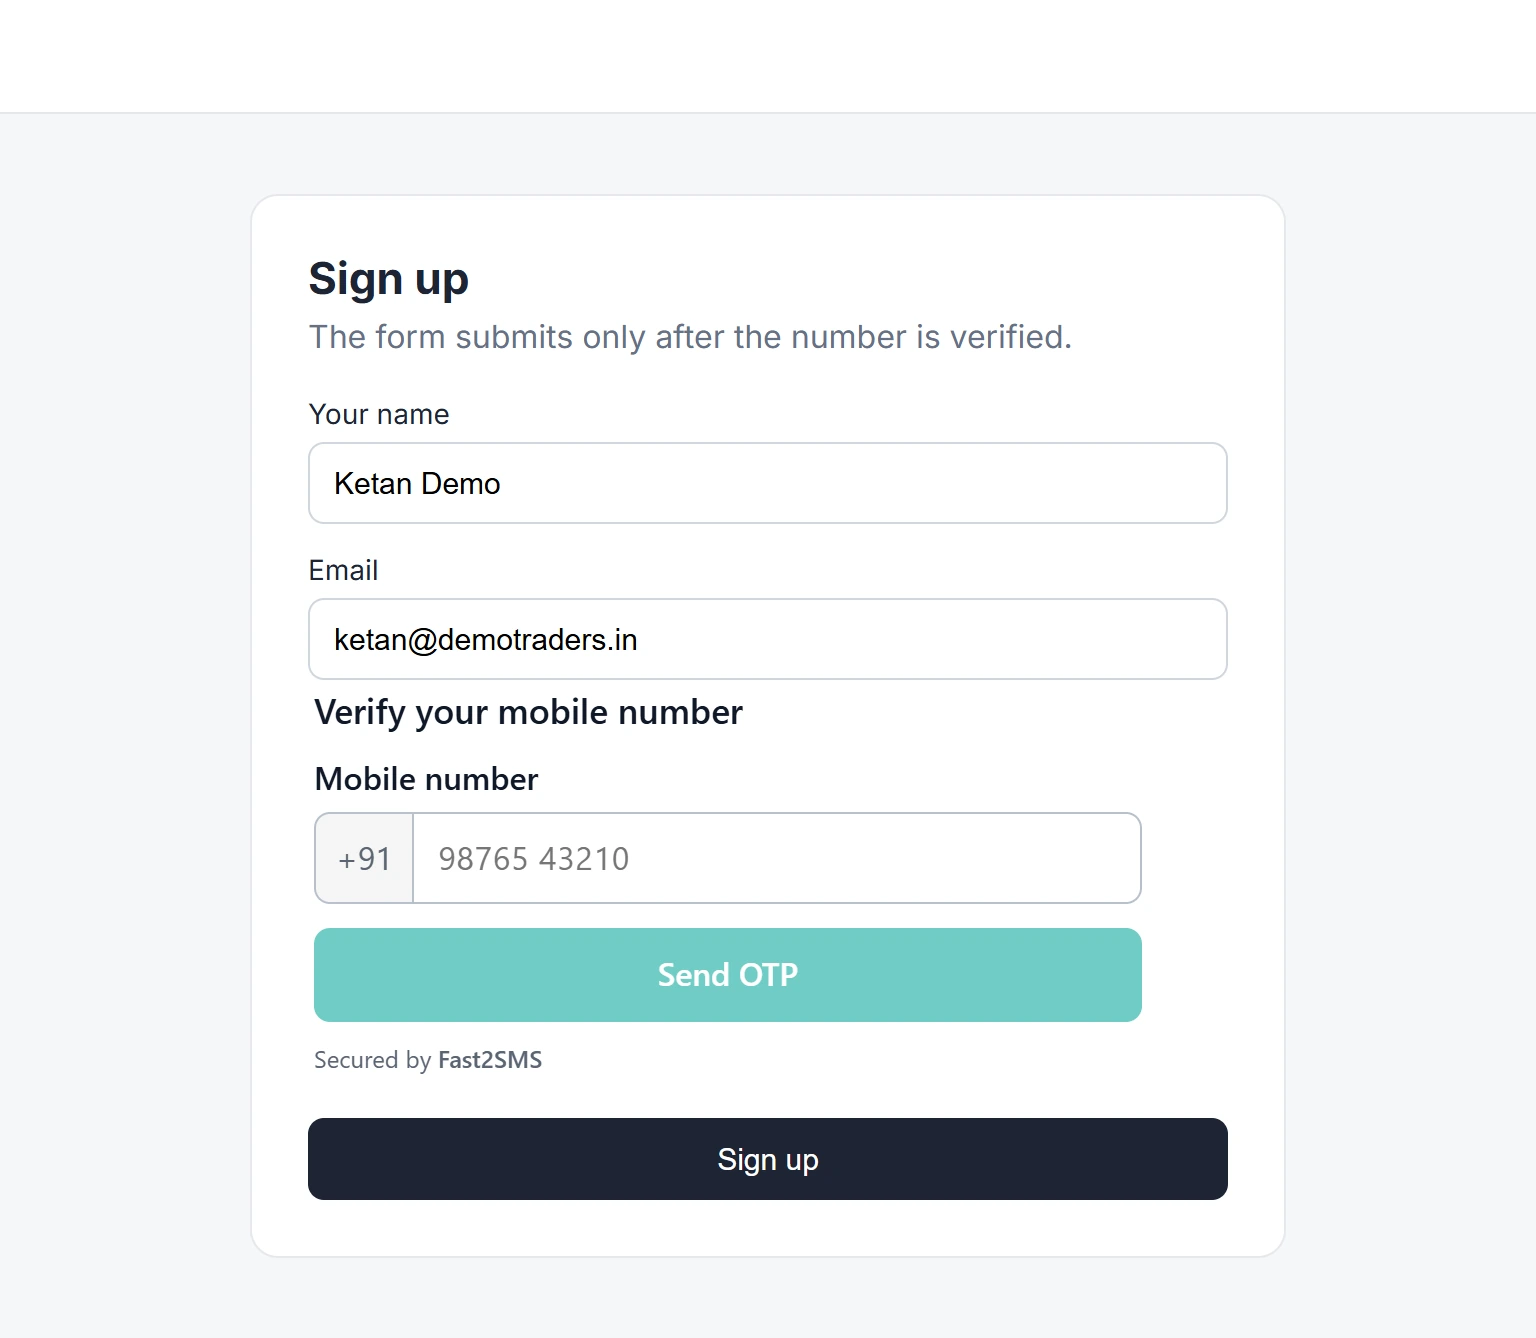
The widget appears above your submit button. -
After verification the form can be submitted
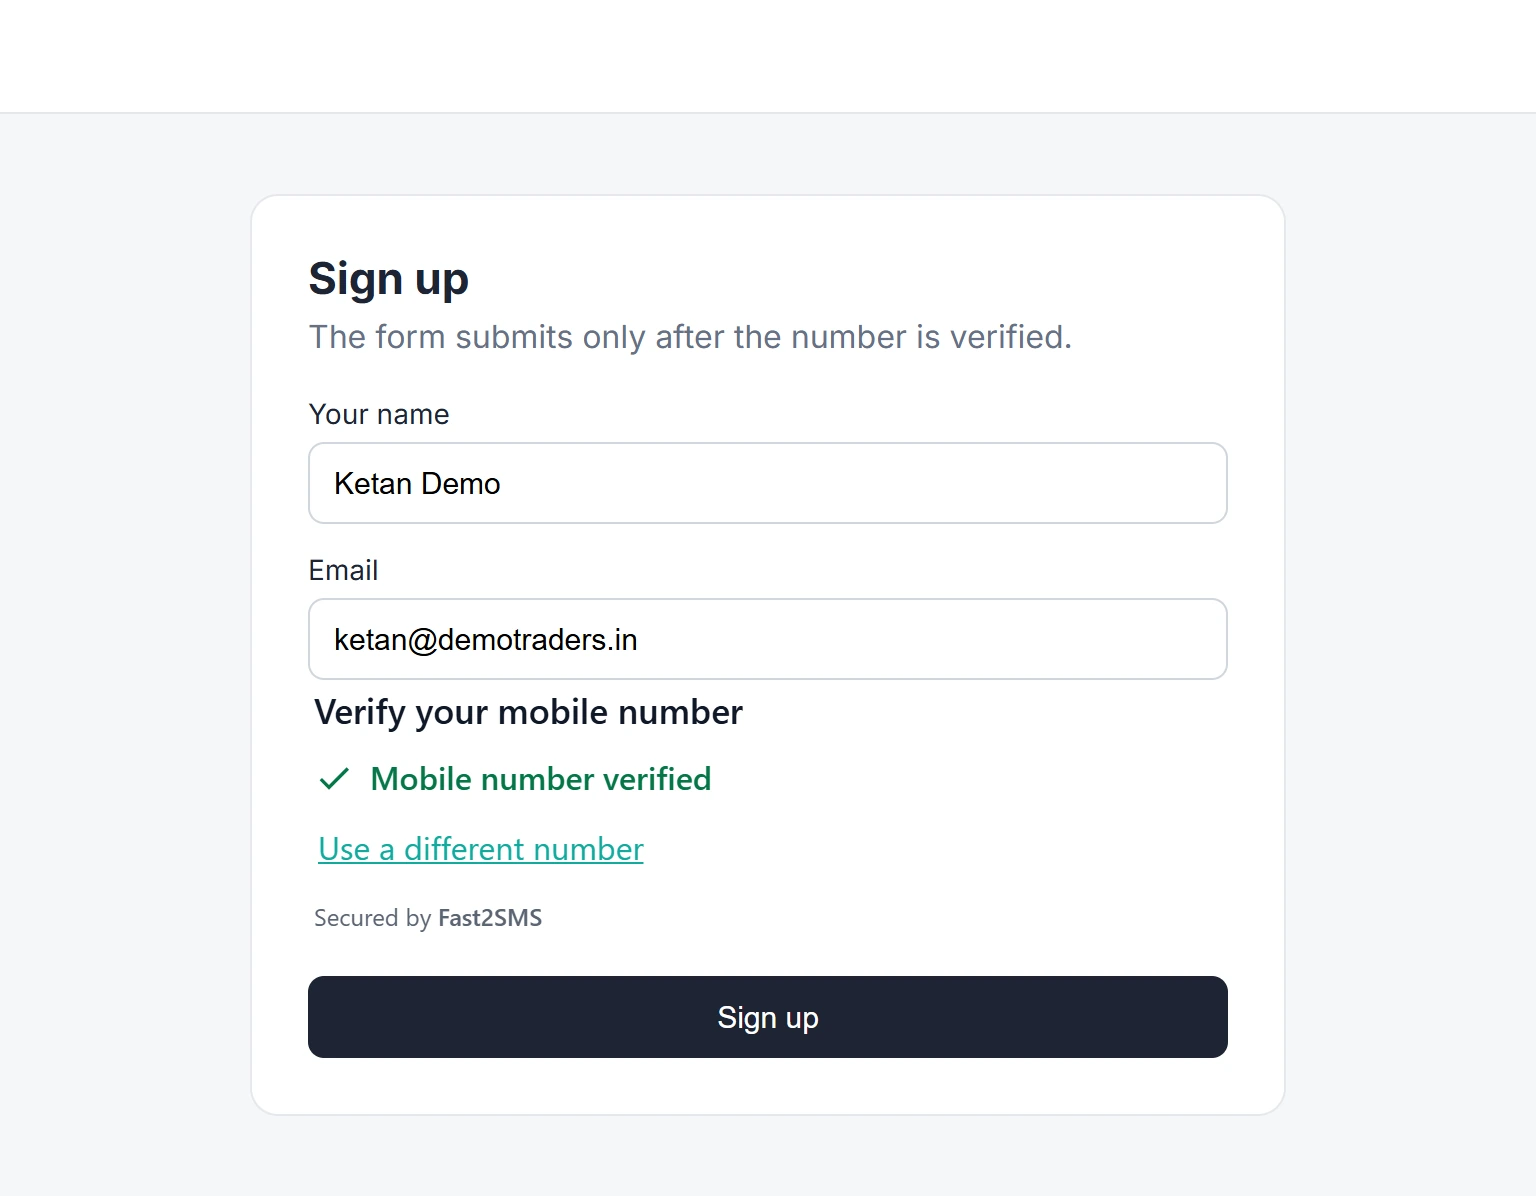
Verified: Sign up now submits with f2s_token.
JavaScript events: f2s:sent, f2s:verified, f2s:error, f2s:reset
The widget fires four events on its element. They bubble, so you can listen on document. Each one carries details in event.detail:
| Event | When | event.detail |
|---|---|---|
f2s:sent |
A code was sent or resent | masked (like 98xxxxxx10), resend (true for a resend) |
f2s:verified |
The code was correct | token, masked, expiresIn (seconds the token stays valid) |
f2s:error |
Something stopped the flow | reason, for example not_verified (submit before verifying) or number_mismatch |
f2s:reset |
The visitor changed the number, or the token ran out | wasVerified |
A small example that turns an order button on only after verification:
<script>
  // the events bubble, so one listener on document hears every widget on the page
  document.addEventListener('f2s:verified', function (e) {
    document.getElementById('place-order').disabled = false;
    document.getElementById('otp-token').value = e.detail.token; // check it on your server
  });
  document.addEventListener('f2s:reset', function () {
    document.getElementById('place-order').disabled = true;
  });
  document.addEventListener('f2s:error', function (e) {
    console.log('OTP widget:', e.detail.reason);
  });
</script>
Use events to change your page, not as proof. Anyone can fire a fake event from the browser console. Before you save an order or an account, send the token to your server and check it there.
Which mode should you use?
- Widget: a page that is only about verifying, like a mobile login. See how a login OTP flow works.
- Popup: one button, such as cash on delivery confirmation. See COD order confirmation with OTP.
- Mobile field: an existing form where you want to keep your own phone field.
- Form: a new or simple form where you are happy with the widget’s own field. See OTP verification on a sign-up form.
The script works on plain HTML and in website builders that let you add your own code. See the guides for WordPress, Shopify and Wix, Webflow and Blogger. After pasting, check the result with the Test tab and on the live page.
Common problems and fixes
| Problem | Fix |
|---|---|
| Clicking the button does nothing | The script line is missing on this page, or the widget key in the attribute is wrong. Copy both lines again from Install. |
| The popup says “Mobile verification is not available on this page right now.” | Add this website’s address to Websites in Setup and check that Widget on is on. |
| The form submits but your server has no number | That is by design. Check f2s_token on your server to get the number. |
| “Verified” disappears after editing the field | Also by design: a changed number must be verified again. |
Frequently asked questions
How do I open an OTP popup when someone clicks my button?
Load the widget script once and add data-f2s-otp-popup="YOUR_WIDGET_KEY" to your button. Copy both from Install > Popup.
Can I change where the OTP popup appears?
Yes. Set data-f2s-position to center, top, bottom, left, right, top-left, top-right, bottom-left or bottom-right.
Can I keep my own mobile number field?
Yes. Use the Mobile field mode. A Verify button appears next to your field and the number is filled into the popup.
Will my form submit if the number is not verified?
No. In Mobile field and Form mode the form waits until the number is verified, and the widget fires f2s:error with not_verified.
How do I get the verified mobile number in my form handler?
Read the hidden f2s_token field and check it with the verify-token API. The answer has the full number.
Can I use two modes on the same page?
Yes. Load the script once and add the attributes you need, for example a popup button in the header and a protected form lower down.